This past week, in Medieval Art, we explored the 3D art of gargoyles and chimeras. We learned some neat facts such as the name gargoyle means "water spitter" or "water vomiter" which is quite accurate since gargoyles have a gutter where rain is funneled through and then exits their mouths (sometimes the water exits the nose or, ahem, other places). Sculptures that do not have holes for water to travel through are actually called chimera (ki-mare-ah). Gargoyles and chimeras do not have to be scary--we saw some that looked like elephants, sea turtles and even Darth Vader! This art form is a great way for children to explore clay modeling techniques while experimenting with telling a story and expressing emotion in their work.
 |
| Love the fangs and curly tail! |
We used a technique where the children created a pinch pot with clay first and then flipped it on its side to create the mouth of their gargoyle. This created a large caricature mouth and immediately made their sculpture more expressive. The children then utilized the "scratch and attach" method of using slip (watered down clay) to attach their features to the gargoyles. Since these are made from air dry clay, I took them home to dry and my husband sprayed them with a metallic faux-stone paint to make them look as though they truly are gargoyles carved from stone.
Thus technique of using a pinch pot to make a gargoyle is different than my previous approach. I thought the pinch pot gargoyles were very expressive, and great for a younger group.
And a big "Thank you" to one of my students who brought in a few gargoyles from his personal collection for us to see firsthand. Seeing gargoyles and chimeras in 3D really helped facilitate the discussion.
Big Mouth Gargoyles
Supplies Needed:
- Air dry clay (we used Crayola), about the size of a baseball
- Newspapers and a paper plate for work surface
- Little cup (for slip)
- Plastic knife
- Crayola Marker (one of the thick ones), color not important
- Toothpick
- Paint (acrylics, or faux stone spray paint), optional
Directions:
1. Knead the dough to get it more pliable. If it is too dry, dip your fingers in a bit of water. The dough shouldn't be goopy, but it shouldn't crack when you mold it either. Divide the dough in half and put one half aside for now. The ball of dough you are working with should be about the size of a golf ball or an egg.
2. Using your thumb and pointer finger, gently squeeze the dough to create a pinch pot. The walls of the pinch pot should be thick enough to support its weight, but thin enough so that the piece dries properly (about 1/4" thick is good).
3. Place the pinch pot on its side on the paper plate. This is the mouth of your gargoyle. Feel free to gently manipulate the pinch pot so that the mouth is expressive: a smile, a grimace, a frown.
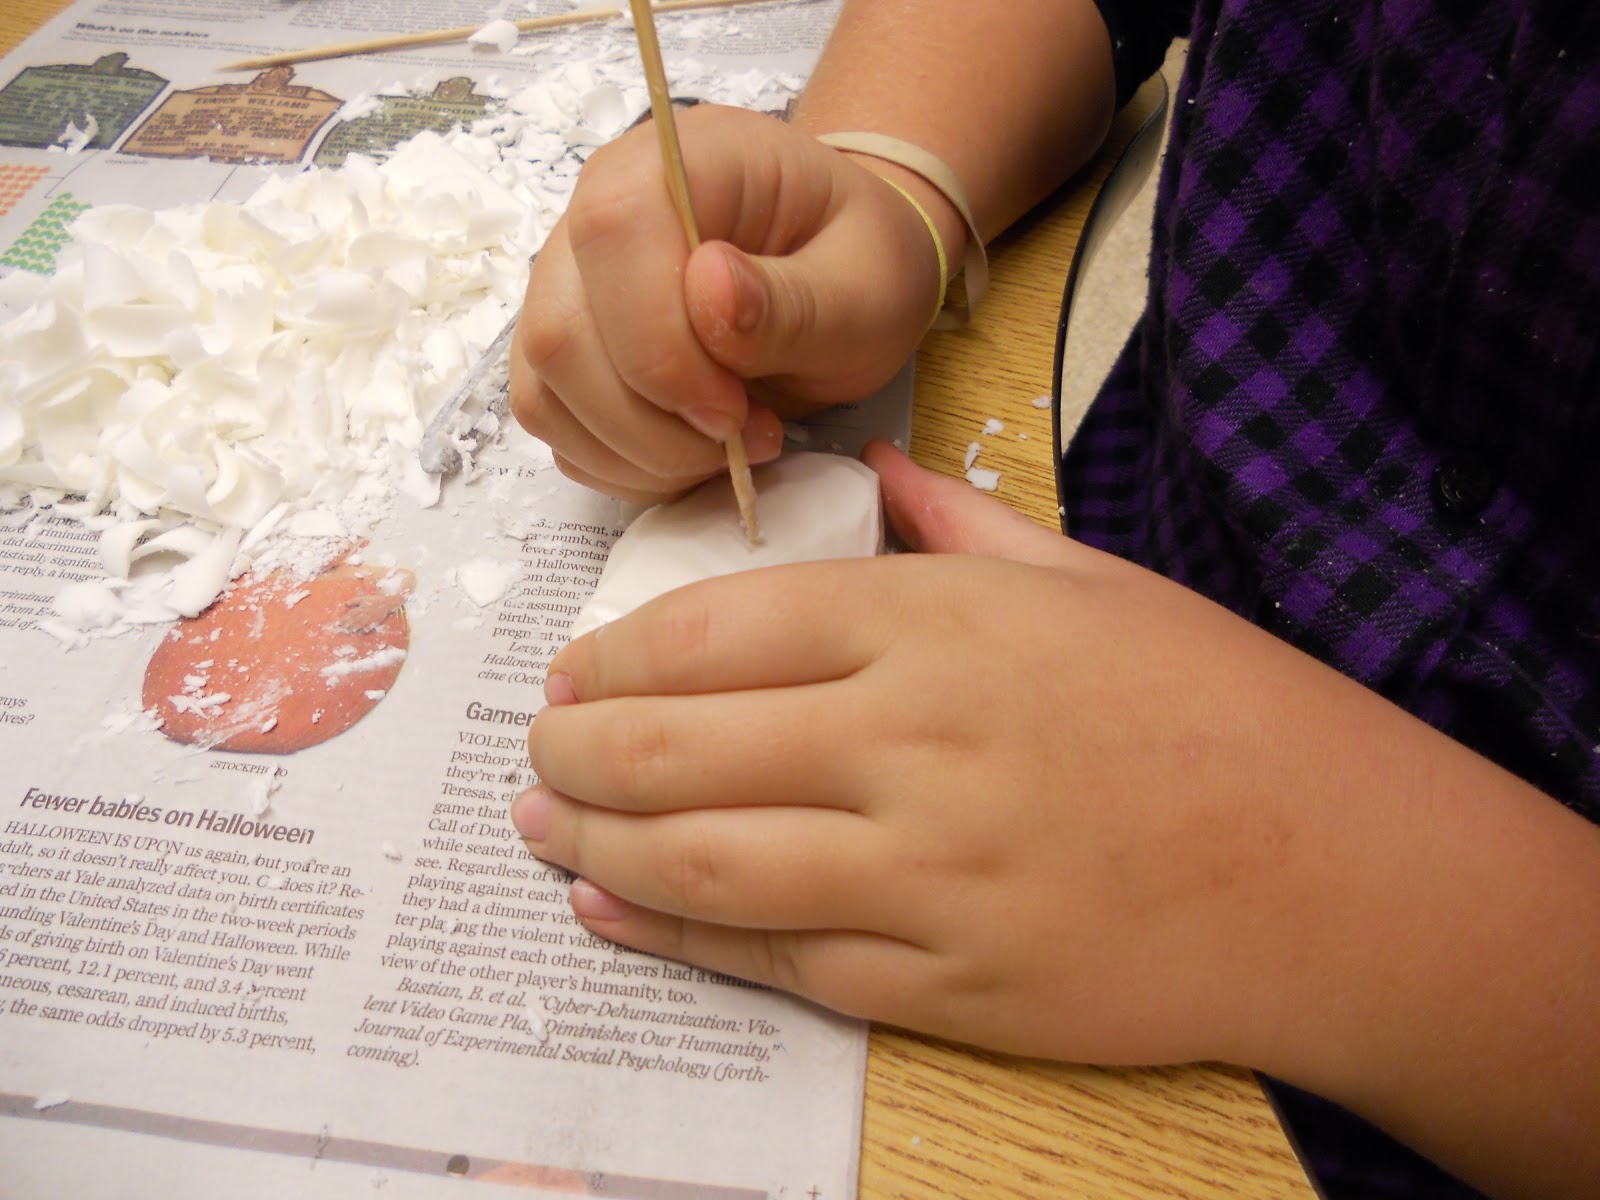
4. From your excess clay, pinch off a bit, about the size of a large blueberry. Place it in your little cup with a couple Tablespoons of water. Stir the clay around in the water until it dissolves and makes mud. This is slip and it will help the clay pieces stick together better.
5. Use the rest of your excess clay to form the features and appendages of your gargoyle. Gargoyle parts you may need are: eye(s), ears, a nose (with crazy nostrils), horns, scales down the back, arms, legs, claws, fangs, teeth, tail, and/or wings. The list is endless! Some things to keep in mind when creating your gargoyle parts:
- Don't make any piece too thin--it will crack as it dries.
- Legs, arms, wings and tails should touch the pinch pot and/or rest up against each other for support. Parts that stick off the pinch pot too much will get damaged. Have the legs and arms fold up like your gargoyle is crouching and make the tail wrap around the body. Look at pictures of real gargoyles to see how the sculptors handled this challenge.
- All "parts" need to be attached with slip. To do this, scratch the area you'd like to attach the "part" to the pinch pot, add a dab of slip, and then press the part onto the pinch pot. This will form a nice bond between the pieces of clay. I'm not sure if there is a formal name for this technique, but I use "scratch and attach."
I have my students use the tools they have to create all of the pieces for their gargoyles. The plastic knives are helpful to some students, the toothpick is great for scoring and poking little holes such as the pupils and drawing scales or adding a furry texture to the piece. The Crayola markers are good for rollers (the outside of the marker shaft) or to create circles for eyeballs (the end of the cap). I remind my students to add all of the parts they want to during this session, and when they think they are done I remind them to take a look again and make sure they've added details in the mouth (teeth & tongue), the top of the head (horns and hair) and the back (scales and texture). They can choose what they want to add/disregard, but I want to encourage them to add detail.
6. Once the piece has all of its "parts" on it, put it aside to dry for a few days.
7. You can leave the sculptures as they are, or paint them. Before painting, I do a once over and hot glue any bits that seem to be falling off. Acrylic paint works well on the dry clay and you could always use a limited palette such as grey, black and white and have the students create their own faux stone look. I had a 50% off coupon for Michael's craft store and wanted to try the faux stone spray paint, so I picked that up. My husband is the spray paint guy, so I had him spray the gargoyles for me.
Note: One can of stone spray paint covered eight sculptures. I think the color we chose (a metallic stone) looked more silver than anything else. I would have liked a more "plain stone" look. Also, this paint is expensive. $5.00 for 8 sculptures is probably a bit much if you were doing this with a large group, but worked with my smaller group.
Note: One can of stone spray paint covered eight sculptures. I think the color we chose (a metallic stone) looked more silver than anything else. I would have liked a more "plain stone" look. Also, this paint is expensive. $5.00 for 8 sculptures is probably a bit much if you were doing this with a large group, but worked with my smaller group.
 |
| Great expression--love the two teeth in front! |
 |
| Cyclops with big claws on the toes. The wings are resting against the gargoyle's haunches so they are supported. |
 |
| This student was inspired by some of the animal gargoyles we looked at. This elephant has lovely ears. It has a trunk and tusks, too (sorry the picture is kind of blurry). |