Showing posts with label math. Show all posts

Tuesday, October 28, 2014

Printmaking with Shapes: Spooky Haunted Houses

Cue the scary music! It's time to get spooky! In my after school class we talked about silhouettes and nighttime and fall. Although we don't usually walk around outside at night--we may be doing that soon if we Trick-or-Treat at Halloween. Halloween can be lots of things: scary, exciting, spooky, cold, dark, and tingly (I love that one!). I had the idea to create a spooky neighborhood and I asked the students to help me by creating their own Spooky Houses.


We had tried another way of making printmaking plates the week before, but the students were struggling a bit and I knew the final results might be "eh" instead of "WOW!" The class is made up of first- through fourth-graders and since they were all struggling with the media, I realized I chosen the wrong way to go about this project! So I rethought the project over the week and this is what I came up with...

We used sticky back foam shapes to create the "silhouette" or outline of our houses that we could then print onto different colors of paper. That's the cool thing about printmaking--you make one plate and you can re-ink it and print it multiple times! Below are the directions for the project. We did it during one after school class period, but I would do this over three regular art classes (to also include a basic writing component--more on that later). Anyway, this will get you started:

On the left: Printing plate example
Middle: The print
Right: The haunted house print embellished with details.

Spooky Printmaking Nighttime Houses

Supplies Needed For the Printing Plates:

  • Sticky-back Foam Shapes (I bought larger sheets and cut my own shapes from them--squares, triangles, long, skinny strips, rectangles, etc.). 
  • Mat board or foam core cut into rectangles for the printing plate (ours are 5 1/2" x 7" because that's what I had).
  • Scissors
  • Pencils
Directions to make the Printing Plates:
  1. Arrange the foam shapes onto the plate to create the silhouette or outside shape of a spooky house. I had the students arrange the pieces first, then when they liked what they had created, they could peel the paper off the back of their shapes and attach them to their plates.
  2. Add elements to the background: bats, ghosts, etc. Attach those to the plate as well. Younger kids may need help cutting out complex shapes such as bats.


Supplies Needed For the Prints:
  • Your completed printing plate (from above)
  • Newspaper for covering surfaces
  • Solid colored papers (We used orange, 2 shades of purple, and lime green cut to 5 1/2" x 8 1/2" rectangles)
  • Washable printmaking ink in black
  • A soft rubber roller
  • A piece of plastic-coated butcher paper (maybe 14"x 17" or so)
  • Masking tape or painter's tape
Directions to make Prints:
  1. Before you begin, set up your work area by taping the butcher paper (plastic-side up) to the work surface on all four sides with tape. This will be the area you'll use for the ink and roller. Squirt a bit of ink on this area and use the roller to spread it around and load the roller. Also, place newspapers on the rest of your work surface.
  2. Ink up the plate, and place a sheet of paper on top of it, rub and press gently & remove. Ta da! A print. Move it to a drying area (that has been covered with newspaper) and let dry.
  3. Repeat to create more prints. I had the students make three to take home and one for me.
  4. Let the prints dry before moving on to the next step.


Supplies to Embellish and Complete the Spooky Houses:
  • Glue sticks and Elmer's glue
  • Large sheets of black construction paper (12 x 18"), 1 per student
  • Scraps of yellow, orange and red paper for windows and moons
  • Scissors and pencils
  • Sharpies (thin and thick)
  • Googly eyes (optional)
  • Halloween stickers (optional)
Directions to Embellish and Complete the Spooky Houses:
  1. Have students glue three of their prints to the black construction paper sheet using a glue stick.
  2. Have students draw and cut out windows and moons, etc. from the yellow scraps of paper. They can trace their pencil lines with Sharpie, if they like. My students also used Sharpies to add cracks to their windows, spiders, and scary phrases to the doors like "Keep Out!" and such.
  3. Glue the windows, doors, and moons, to the prints using glue sticks.
  4. Add goggly eyes to any critters on their prints, if desired: ghosts, cats, bats. Use Elmer's glue for that.
  5. Embellish with stickers, if desired.
Close up of my trial print.

And now you are ready for a Spooky Fall Night! ENJOY!

Thursday, May 8, 2014

Integrated Arts: Postcard Activity

The undergrad teaching students I work with at Plymouth State University had a week-long practicum experience in elementary and middle school a few weeks ago. When they came back, their professor advised me that they'd be bursting with anecdotes and stories about their week. Their professor had a field trip with another class their first day back, so I substituted for her. Of course, because I'm an art teacher, I had to put a twist on the lesson!

When I am presenting any sort of lesson to the future K-8 teachers, I try to have them learn using a lesson they could adapt in their own classrooms later on. This is a perfect example! This lesson allowed them to share with their professor the following:
  • One success
  • One thing they learned
  • One thing they need to work on
This allowed them to analyze, summarize, and "tell" their professor about their experience. A part of this was also learning about the parts of a postcard--such as address, stamp, greeting, closing, and signature--a skill they all knew, but something that is valuable for younger students to learn. They used the free postcard generator on www.ReadWriteThink.org--a wonderful website I wanted them to be aware of.

Then, they needed to "show" their practicum experience. They could bring photos printed in color, or they could use the lab to search and print photos. I suggested the following images:
  • Photos of the school they were at (they could take the photos themselves or pull them from the school's website)
  • Photos of any projects they did
We only had a black and white printer in the lab, so I showed them how they could colorize the b&w photos using colored pencils. They needed to mount the finished front and back of their postcards onto a 9x12" piece of construction paper and then they were allowed to embellish their pieces. I had brought colored pencils, stickers, scrapbook page borders, and colored pieces of paper along with fancy-edged scissors.

The results are colorful and fun and it was nice to chat with the students about their experiences in the classrooms. Like the proud art teacher, I posted them all over the door and tiny bulletin boards I have on either side at the college.

Before we left, I had the students brainstorm ways they could use a lesson like this in their own classrooms and they had a ton of great ideas such as writing a friend about a math or science concept, writing a postcard from the point of view of a character in a book they've read, or even writing to a penpal in another class (or state or country)! Such great ideas!

So many great projects, but here are a few...ENJOY!


Wednesday, March 12, 2014

Integrating the Arts: Art, Science & The Persistence of Vision

Monday night I had the pleasure of volunteering at Amherst PTA's Math & Science Night at Wilkin's Elementary School in Amherst, NH. The Math & Science night is a free non-commercial event where families can come together and enjoy playing with math and science concepts. There were all sorts of good things there: games, voting & graphing, fishing for fractions, using microscopes, learning about sound waves and more--all in a fun & relaxed setting.


I asked if I could come and set up a table where art and science were used together. Combining science and art is probably one of the most fun things to do (I often tell my husband that if this art teacher thing doesn't work out I am becoming an earth science teacher. To which he replies with raised eyebrows!).

Anyhow, I needed to create a project that would entice children to stop at my table, stay a couple minutes, have a high success rate, and be cheap (hey, I'm paying for this and I didn't know if I was going to have 100 or 300 kids at this event!). So, I chose a basic animation "machine" called the Thaumatrope. Here's my original post here with the "how to."I used plastic drinking straws instead of skewers because they were safer.


Here are some of the examples of Thaumatropes I brought to the event.
Compare the two images to see the front and the back of each...


Here are some photos from the event...
My display explaining lenticular animation & optical illusions (top portion)
and animation and the persistence of vision (bottom portion).
The work area before the kids arrived. I had all the supplies they needed
in each tray and directions in case I wasn't able to get to the right away.
These Thaumatropes cost about 2 cents each to make (not including the colored pencils).
And just to prove I actually had children visit me, here's a photo of a few
girls working at my table. This was at the end of the night. At one point it was
standing room only at my table! Visitors ended up making 100 Thaumatropes that night!

How it went:

Great! I tried to think of some great hook to get children to stop and do my project—I was worried it would seem like too much work. So I would say—“Hey, do you want to make a magic picture?—It only takes a minute!” and then I’d show them a couple of examples. My favorite was one that I created that has an image of a top hat on one side. I showed this to the children and said “I can make a rabbit come out of this hat—want to see?” And then, when I spun it, the rabbit (image from the other side) appears. It was really fun seeing the look of awe on some of the kids’ faces when they saw the two images come together!

The Lesson:
Because I had about 30 seconds per child to explain the concept, I tried to be pretty descriptive when showing them the examples. I’d say the following:
  • See how there is one picture on this side and one on the other side?
  • When you draw your two pictures, they will come together when you spin your thaumatrope—so think about that when you draw—use pencil first so we can try it out.
  • Don’t worry if it doesn’t work at first—this is tricky! I made mistakes too (I had one of my mistakes on hand to show them)—if you make a mistake, you can erase, or make another one—I have more!
I had all sorts of creative Thaumatropes made: a cheetah leaping into a tree, a sugar glider leaping from a tree, a Star Wars light saber battle, all sorts of sports balls going into goals, hoops, nets, etc., kittens lounging in cat beds or eating food, and so much more! Students of all ages were successful with this craft—K-4th, I’d say. 

I noticed the older they were, the more complicated they tried to make their animations and therefore the more thought needed to go into them (and then they sometimes needed to make some adjustments). But I tried to work with the students so that everyone went away with a successful Thaumatrope.

Friday, March 7, 2014

Lenticular Animation Tutorial

As I've said in previous posts, I am trying to use technology in my teaching a bit more. I've been working with the Educreations App for the iPad a bit and really love it (along with Screen Chomp). Both Apps just make explaining things so easy. 
Educreations is free in the App Store
So when I decided to make two lenticular animations for a display I am doing, I thought..."wait a minute, this would be great to explain how to make these!" I've posted about Lenticular Animation before, but it was way back when I first started blogging and my project was pretty complicated. I even had a student get super-frustrated with the whole technical aspect of the project as I had designed in. It had to be easier, and I found a way!

I attended an awesome conference session at the Integrated Arts Conference in Plymouth, NH held by Timm Judas and he explained how to make a Lenticular animation and his way was just....easier.

So here's how it works: Students need to create two images that are on the same size paper but VERY different (that way the transformation is the best). Cutting and gluing needs to be pretty precise, so this is best done with students in grade 5 or above, I think (unless you are working in small groups or one-on-one).

In the video I made, I show you how to make simple Lenticular Animations at home. I'm making two pieces for a display I'll be using at the PTA Math and Science fair I'm attending on Monday night. I'm Integrating art with Science and my Lenticular animations are "One Fish, Two Fish" and "Red Fish, Blue Fish."

Lenticular animation is fun and really has a great "WOW!" factor--even grown-ups are wondering how it's done! So watch my Educreations video and try it out--and please send me an email or post below letting me know how your Lenticular design came out--I love to see what people are creating!

ENJOY!

Monday, October 15, 2012

Paper Mosaic Skull

Here's a quick little project that can be used in a variety of ways. These are 1/2" paper squares, but you could scale the pattern down to use 1/4" squares for a smaller skull. Mosaics have a definite art history link, but also tie in with math. This might be a good project to create when you have a couple of free minutes of downtime in your classroom or in your day (pack a less messy version of the project for your child to do at the doctor's office or in the car).

This skull was cut out and glued to two pieces of background paper--
a torn-edged orange and a black for a bit of contrast.
Here are the basic instructions followed by a couple of variations.

Skull Mosaic

Supplies Needed (for very basic version):
  • Graph paper
  • Pencil
  • Sharpie
  • Paper grid/pattern printed on copy paper
  • 1/2" construction paper squares in white and black
  • 1/4" strip of white construction paper
  • Glue stick
  • Scissors
  • Piece of construction paper (or patterned paper) for background (your choice of color(s))
Directions:

1. Using my example as a guide, create the skull "pattern" on graph paper. I made my squares 1/2" for my 5-year-old. Darken the grid lines with Sharpie so they will reproduce well. I used an ultra fine tip to show the division of the squares, but then a regular sharpie to bold the edges of the different sections of the design (edge of skull, eyes, nose, and mouth). Slightly shade the areas of your design that you would like to be black, so the children know to place black squares on those areas. I cut the skull pattern out and glued it to black construction paper so the children would know where the edge of the skull was and disregard the background.

The larger image in this photo is the pattern I made on graph paper,
cut out and glued on a plain black background so I could photocopy
it for the children. This keeps the background plain so they can focus on the skull.
The smaller image is a copy of my skull pattern, copied at 50% to make 1/4" squares
in the mosaic (good for bookmarks or a pin or something).
2. Photocopy the grid onto plain white copy paper.

3. Use glue stick to glue construction paper squares directly onto the photocopy paper. Light areas of the grid get white construction paper squares glued to them and shaded areas get black squares glued to them. Cover the entire skull pattern on the copy paper, but leave the negative space (background) around the skull blank.

4. When all of the squares of the skull are glued down, you can use the 1/4" strip of white paper to divide up the mouth area so that it looks like the skull has teeth. We just eyeballed this part. Attach the pieces with glue stick.

5. When all of your gluing is done, use the scissors to cut around the outside of the skull, cutting away the extra copy paper. Flip the skull over and put glue on the back. Place the finished skull on the background paper (this gives the piece a more finished look).

Other variations:

I used 1/2" squares for my 5-year-old to do this project, but you could use 1" squares and make a bigger skull (or increase the square size even LARGER and make one for the wall). Another option for older children, is to decrease the size of the squares to 1/4" to make smaller skulls to create a pin, bookmark, or to use as a decoration for a candle. 

If you want to create the mosaic to Mod Podge on a clear glass object (for a candle holder, etc.). Use your paper grid pattern as a guide, but layer some tracing paper on top of it and glue the paper pieces to the tracing paper. Then trim the excess tracing paper and Mod Podge the tracing paper (with attached paper mosaic glued to it) to the glass object you want. This is a process I've used a lot in my teaching, you can check out a similar post where we use tracing paper as a substrate for the paper mosaic pieces but we Mod Podge it to wood.

I hope you enjoy this quick little project with its many variations! If you use this project, be sure to send me your thoughts and photos so I can post them here--I'd love to see how YOU used this idea!

Wednesday, June 27, 2012

Math & Art & Giant Cake!

Before school let out I was able to squeak in projects with two of the teachers at a local elementary school. I had tons of fun doing both projects! Here's the first...

The first was with Mrs. Nagy and her fourth grade class. We made 3D food sculptures inspired by the work of Claes Oldenburg. My original project idea appears here. But with this class, I limited the children to creating a slice of cake or pie so that we could study the math concepts associated with those shapes.
Mmmm...blueberry swirl cake!

I know, I know, math and art together? SIGH....isn't that going to be a bit, ahem, boring? Not at all! Here's how it's done...

I started with MY favorite part: the ART. I gave a short presentation on the work of Oldenburg and showed some examples of his sculptures.

Then, we focused on my other favorite part of this lesson: the FOOD part. We looked at some yummy examples of Oldenburg's sculptures such as the big soft sculpture of chocolate cake. These portions of the presentation allowed me to talk about art concepts such as sculpture, soft sculpture, form, scale, surface and design. We also discussed placement of art in certain environments.

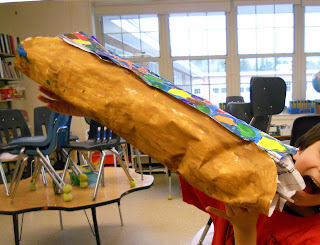
Then we got down to the MATH portion of the exercise. Don't worry, it's a "piece of cake" to create a piece of cake (come on, I HAD too!)! We created our 3D cakes from a 2D surface: a piece of paper. Our cakes are made from two equilateral triangles and have three square sides. This solid form is called a triangular prism. I brought in some other solids that the children would easily know for comarison: a pyramid, a sphere, a cone, a cube and a rectangular prism.

I had the students begin the construction of their pieces of cake by creating two identical equilateral triangles (one for the top of the cake and one for the bottom). Ours are 9" on each side. The children then figured out how big the sides of the cake needed to be. That led them to create three 9" squares (one for each side of the cake slice). This is where the discussion of height, width and depth can come in.

The children then attached the pieces together using staplers to make "seams" and stuffed their sculptures with crumpled newspaper before sealing the solids up (more info about this can be found in my earlier, related post).

WHEW! Cake slice made! Then, the children happily "decorated" their cakes using tempera paints. It was lovely to see al of the awesome cakes they made: chocolate tortes, red velvet, chocolate cake with vanilla frosting--YUM!

If your group is very comfortable with these math concepts (as was this group), you can try your hand at making a slice of pie. Make the top and bottom equilateral triangles (two 9" equilateral triangles were used by these students), but reduce the height of the sides of the sculptures (ours were 4.5" x 9") because pie is generally not as tall as cake. Proceed as above to create the solid and stuff the sculpture and decorate it accordingly. These students created chocolate cream pie, key lime pie and cherry pie.

This is a wonderful exercise illustrating all sorts of math concepts in an easy-to-understand and enjoyable way. It really does combine art and math perfectly and it's FUN! I hope you are able to try it with your kiddos!
Cherry and blueberry pie--great lattice tops!
(Sorry the photo is blurry, but you get the idea!)

Chocolate torte and black forest pie!

Key lime pie with whipped cream on top! YUM!

Tuesday, April 3, 2012

Claes Oldenburg Giant Food Sculptures

I just started my latest after school art class and the theme is Modern Art! I'm so excited! I love Modern Art and children usually do too. For our first class, I wanted to do something that was fun and allowed for a good amount of creativity, so I chose to have the children create giant food sculptures similar to those by Claes Oldenburg. I had a HUGE roll of medium weight paper that was given to me from a printing company and it was easy to work with and didn't get flimsy when painted with tempera paint. 
Ummmm...I think I'm gonna need a bigger plate!

I began by showing the children some examples of Oldenburg's famous sculptures such as the huge soft sculpture chocolate cake he created. I had also created my own version of it (chocolate cake with white frosting, sprinkles and a giant birthday candle on top) that was about 3 feet tall so they could really see what I was saying about LARGE food. I brought the templates in for them to create a slice of cake (like Oldenburg's) or a slice of pizza (very simple to do), but the children had ideas of their own so I decided to go with it and let them create whatever food they wanted to. We had quite a selection: popsicles, chocolate bars, a cheese wheel, cupcakes and more!

I think next time, if I do this with a larger group, I would stick to the same food--have them ALL do a slice of cake or a slice of pizza, but it worked out and I think the children learned so much about constructing 3D forms. I could see this project also being linked cross-curriculum to math and have the children create a slice of cake and then figure out, mathmatically, what size paper they need to go around the sides of the cake slice. I'll need to explore this more....

Claes Oldenburg-Inspired Giant Pizza Slice

Supplies Needed:

  • Medium weight paper (large sheets or a roll of paper)
  • Scissors
  • Ruler
  • Newspaper or paper scraps to stuff the form
  • Stapler with staples
  • Tempera paint, assorted colors
  • Paint brushes
  • Water bucket, paper towels
  • Paper scraps, optional, for pizza toppings, etc.
  • Glue sticks and Elmer's glue, optional
Directions:

1. Cut two triangles from paper for the top and the bottom of the pizza slice. They should be the same size. Our triangles measured 24" x 24" x 18" but that is approximate.

2. Layer the two triangles on top of one another and staple along the two 24" edges, through both layers. Leave the 18" edge open, creating a pocket.

3. Crumple up newspaper, lightly, and stuff the pizza slightly, to give the pizza slice some dimension. Leave about 4" unstuffed at the end (you'll be making the pizza crust with it).

4. Roll the 18" edge of the pizza slice inward a couple inches to create the pizza crust and secure with a couple of staples. You now have a giant slice of pizza!

5. Use tempera paints to paint the crust, sauce and cheese on your slice of pizza. While it dries, you can use paper scraps to create toppings.

6. When the paint is dry, attach the toppings to your pizza slice with glue OR just paint toppings on with additional paint.

YUM! Let's eat!

Giant Wheel of Cheese

Super-Giant Chocolate Bar

Yummy Cupcake
(This size looks like a regular serving for me!)

Giant Taco! Olé!

Saturday, February 25, 2012

Mosaic Snowglobe Project Results

This past week I had the pleasure of visiting Mrs. Bevilacqua's second grade class at Wilkin's Elementary School in Amherst, NH. Mrs. Bevilacqua usually does a themed unit that involves snow globes and I thought the children would also enjoy doing the snow globe mosaics from my blog.

All 17 snow globes! Beautiful!
The second graders were very enthusiastic and creative! I started with a revised worksheet and had the students use a limited color palette (10 crayons) so that they could easily match up the paper squares with the colors they chose for their pieces. It was a two-session project, but it went quickly and the children were very happy with the results (me too!).

The revised worksheet has different labels than before.
 It is a bit easier for the children to understand: S = Sky, R = Roof, G = Ground, etc.
They use this worksheet to plan before moving onto the actual gluing.
See the original post for "how-to" info.
A detailed look at one of the mosaic pieces.
This project was a great way for the children to explore math concepts relating to a grid (each child had 100 squares on his/her piece!) as well as exploring color choices and value (in order for the sections of the picture to be easily read, the student needs to vary his/her value and color choices), learn the art of mosaics and, even within the set parameters, there was a chance for choice and creative expression.

What a fun way to spend the afternoon! Thank you, again, to Mrs. Bevilacqua and her students for all of their hard work and energy!

NOTE: I used 5" x 7" canvas boards from www.dickblick.com to mount the finished pieces on (24 for $7 or so). I then added a border above and below the mosaics with navy grosgrain ribbon glued on with hot glue. When done, I attached a paper label with the child's name. I justified the expense because these are "keepsakes." 

If you had less time and a limited budget, you could enlarge the project to 10" square (each square of the grid is 1") and have students do this project on thin white paper paper using 1" construction paper squares and glue sticks. Skip the Mod Podge and mount the finished mosaic onto a piece of construction paper. Very inexpensive, but still great!


Related Posts Plugin for WordPress, Blogger...