Showing posts with label paint. Show all posts

Friday, April 22, 2016

First Grade Projects From My Long-Term Sub Gig

 Here are some of the projects from my long-term sub gig that appear in the collage here so that you had a bit more info on them...ENJOY!! For the background about where I've been/what I've been doing lately, scroll to the end of the post...
Here's lookin' at YOU! Check out the projects below for some
first grade ARTSY inspiration!
Grade 1 Art Projects From Fairgrounds Elementary School:

Week 1: Winter Windows (1 day)
A getting-to-know-you project.
We looked at the book, “Snowflake Bentley” by Jacqueline Briggs Martin. Students folded their paper to make four “window panes” and used crayons to draw four six-sided snowflakes (just like real snowflakes). They then added watercolor to their work (watercolor resist) to add a colorful sky (sunset, nighttime, etc.) and enhance the snowflake designs. The wet work was sprinkled with salt to add texture and interest to the work.

A close-up of one of the "Winter Windows"--
this light yellow crayon was easier to see than a white crayon on white paper.

Week 2: Aboriginal Bark Paintings (1 day)
A continuation of a project started prior to my arrival
Students used crayons to create mini circles within a photocopied Aboriginal design. They then added a black tempera paint wash to their work (watercolor resist) to enhance the designs. Finished pieces were mounted onto construction paper backgrounds.

No image of these--sorry!

Week 3, 4 and 5: Feathers For Lunch Collage (2-3 day) From Fine Lines
Inspired by the work of Mrs. Pettus--that's ME! (I've been doing collage work lately) and the collage artist Lois Elhert and her book, “Feathers For Lunch”
Students looked at the book, “Feathers For Lunch” by Lois Elhert and used different shapes and papers to create a collage composition of a cat and a bird. Details could be added using crayon and a real feather was attached to represent the one that got away—just like in the book!

Our inspiration!!
We talked about using shapes to make our cats and birds.
We used real feathers and oil pastels for fun details.

If a student wasn't in class the first week, they could make just the bird on week two.
This student was fascinated by the hole punches he found on the supply cart.

I love this cat's expression!


The finished display I copied from Fine Lines Blog--
it was perfect, so I just had to do it!

Here's the write-up that I displayed near the bulletin board-
it really helps everyone to see all of the details of this project
(as well as the National Common Core Standards in Art)

Week 6: Line Study With Pastels (1 day)
The attributes of line were discussed (length and direction) and then students took turns drawing different types of lines. Students then cut out a shape of their choice (emphasis on something that moves such as an animal or vehicle, etc.) and attached it to a piece of white paper. They used Sharpies to drew eight different types of lines coming from their shape and going off the edge(s) of their paper. Lastly, they used chalk pastels to trace their lines and smudged them to add the illusion of movement to their work.

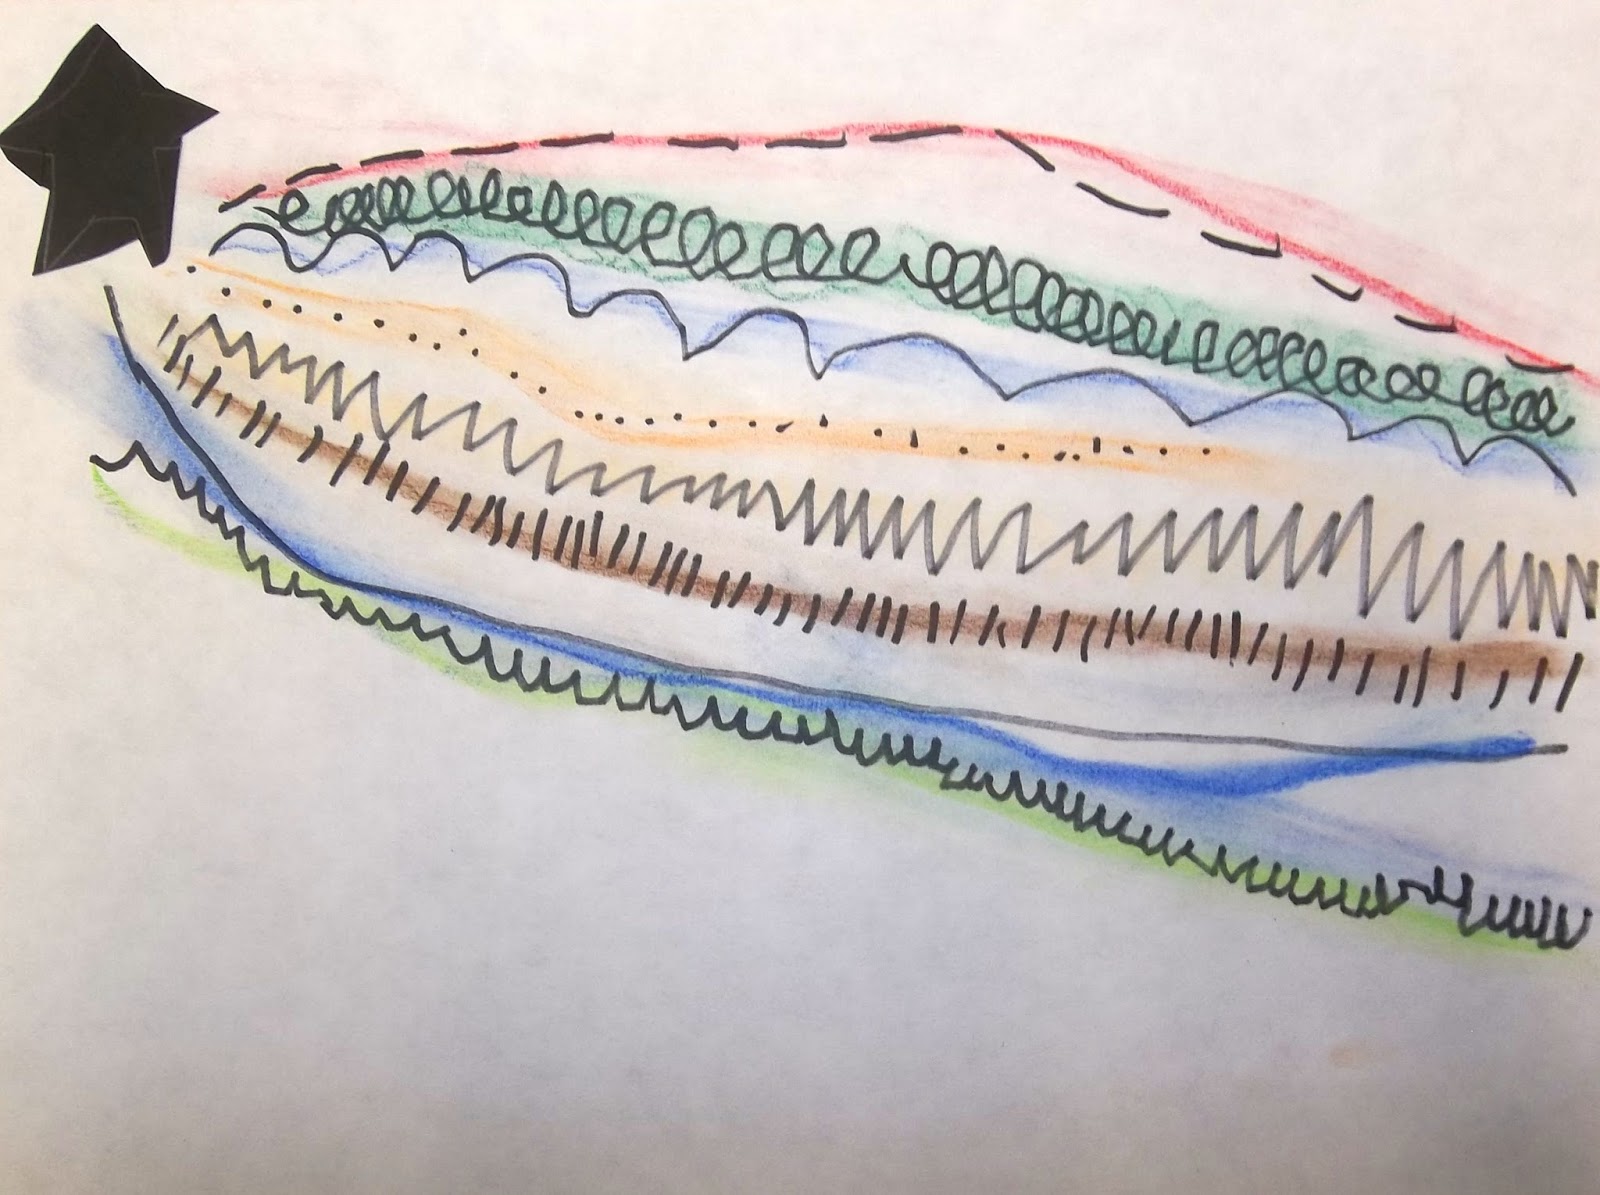
Beautiful shooting star!

Some students chose to have a limited color palette, but they still turned out beautifully.

A flying airplane.


And this is a football flying back and forth between players--LOVE it!
We also had flying pigs, a giraffe or two, cars, superheros, a UFO, a couple of rockets,
LOTS of footballs, a unicorn, some cats and much more!
Week 7: Kandinsky group mural See post here
Inspired by Kandinsky’s color studies

Students used paint to create a composition of concentric rings based on the color studies by Kandinsky. Individual student work was displayed with other grade levels to create a multi-age group mural for the hallway.

A close-up of the individual 6" squares all glued together
onto the larger roll of paper using Elmer's glue (a dot in each corner).

The finished mural. Beautiful!!

----------------
Backstory for this post:

So, it's been a busy Spring for me since I finished student teacherin' in December--I subbed a bit in preschool, kindergarten, elementary and high school and then landed a wonderful 6 1/2 weeks long-term sub gig at an elementary school nearby teaching art to grades K-5. What a blast I had--the students and staff at Fairgrounds rock and I was sad to go (it's hard to stop doing something you love when your next big thing isn't settled upon yet). Since then, I haven't blogged much because I've been daily subbing and working on my dang art teacher portfolio (more on that in a future post or ten). Check the sidebar (over on the right side of the blog) for other posts in this series (k-5 at Fairgrounds Elementary School). ENJOY!!

Wednesday, April 6, 2016

Multi-Grade 1-Day Goodbye Project

I just finished 6 1/2 weeks as a long-term substitute art teacher at Fairgrounds Elementary School in Nashua, NH. I had a blast sharing my own art with the children (printmaking, collage, and graphic design and illustration) and creating some winter/spring- and artist-inpired projects that related to the type of art I create. It was a whirlwind, but hopefully I will be able to post more about all of those fun projects soon!

I wanted to share this wonderful goodbye project I did with my kiddos on the last day. I had multiple classes who were done their work and had one class left with me. This project was a nice one since it allowed me to prep once for 5 classes or so and all the students from Kindergarten through grade 5 were able to contribute to it. For the youngins, I read the book "The Dot" by Peter Reynolds afterwards and told them that today (and for the last 6 weeks) they've made their mark all over Fairgrounds (I'm big into collaborative art which is evident in the bulletin board displays I left up all over the school) and in my life as an art teacher.

This project idea came from Jennifer Boral over at The Art of Education (check it out over at https://www.youtube.com/watch?v=FXkqpmGZe88). Loved it and knew I had to try it. While I would have LOVED to do this project with all 500+ students, it just wasn't going to happen due to time constraints, etc. The finished piece is quirky and colorful and adds a bright pop of color as students go to music class and outside to recess.

ENJOY!


Monday, March 7, 2016

Picasso's Hands With Bouquet With KINDERS


 I've been having a blast with the elementary students at the school I am working at temporarily. I've been having the Kinders explore art materials a bit and this week I thought they'd enjoy doing a project I originally posted back in 2013 as we continued our discussion about line and shape. This is not my idea, as you can read in the original post, but it's a great one that I'm sure I'll be doing again and again in the coming years!


The only thing I changed this time was to have the students draw all of their flowers first, then add the stems, and when they were done they could line up and they could make their hand print at the back of the room at a table by the sink (and near the drying rack). Other times I'd have them print their hand first and then add the flowers.

Again, it helps if you have a bucket or two of water ready for them to rinse their hands in and paper towels ready to go right near the sink (already ripped to single-serve sizes). This was a wonderful project that helped them explore some of the elements of art (shape, line, color) and explore a new material and technique or two. They have some really good observations and insight about Pablo Picasso's work and, it's a FUN project--I mean, who doesn't love to have their hand painted by the art teacher!!??

VOCAB: Pablo Picasso, bouquet, shape (circle, oval), line, color, drawing

CROSS-CURRICULAR CONNECTION: Science (flowers (petals, stems), spring), kindness/giving

MATERIALS: 12" x 18" white paper, oil pastels, black tempera paint, paint brush

Our inspiration!

ENJOY!


Friday, January 29, 2016

Happy Birthday, Paul Cezanne! (On January 19th)

In honor of Cezanne's birthday, I thought I would REPOST a popular lesson from 2013 that is fun and easy and is appropriate for a wide range of students. The painting below is my youngest son's and was featured in the book "500 Kids Art Ideas" by Gavin Andrews published by Quarry Books. While this is a nice fall-inspired still life, you could change it to pears or lemons/limes for a more winter or spring theme. Either way, the results are fabulous and the lesson is chock-full of active learning.

-------------------------------

We are all into fall over here and I thought this week would be a nice time to do a still life with apples with my after school art class. This is the first time we've met this school year, and the group has 1st-4th graders in it. I had an idea of what I wanted to do, it's actually a combination of two lessons I saw out there:
My 1st grader's example with Cezanne's reproduction.
I can't show you the still life--he ate it!
(UPDATE: He's now in 3rd grade, but still eats still eats everything in sight!)

"Still Life With Oil Pastels and Baby Oil" (2 posts) from Fine Lines
http://kids-finelines.blogspot.com/2012/04/still-life-with-oil-pastels-and-baby.html
http://kids-finelines.blogspot.com/2012/04/oil-pastels-and-baby-oil-part-2.html

That was pretty much the lesson I used, but I modified my talk in the beginning to be about Paul Cezanne's work showing them "Still Life With Apples."

I then used the talk I found on That Artist Women: "Open vs. Closed Composition"
http://www.thatartistwoman.org/2011/09/open-vs-closed-composition.html

I really like how she shows real art examples in her post. I showed those to my kiddos as well.

Then I gave them time to experiment with arranging the apples (and one girl's donated pear) into closed and open compositions. There were three students to a table and the table needed to agree on a composition they liked best.

And then we were off! I walked them through drawing, demoed how to use the oil pastels and baby oil, and gave a quick watercolor demo.

These are their creations! Beautiful! They are so proud (me too!).

Enjoy!


Modern Art Class Roll-a-Miros

A little while back I posted about a neat project I saw on Pinterest (but couldn't find the source). The idea was to use a die and a chart to help students create Miro-inspired creatures. I did this project with my Modern Art homeschool artists and they loved it! Some of them said it was the best project so far this year! 

Here is the original post and the how-to for the Roll-a-Miro on my blog.

And here are some of the finished pieces from the home school group:


Friday, January 8, 2016

Still Life Self Portraits With 7th Grade

Self portraits can be daunting, but students can express themselves without painting a traditional portrait. This project is based on one that the art teacher at Amherst Middle School, Rachel Rouillard, does with her 7th grade students. Students learn about self-portraits (traditional and non-traditional) and then bring in three objects from home to arrange into a composition and paint. Rachel has the students use acrylic and paint a mini composition (I think 4" square on canvas board, if I remember correctly). With the group of 7th graders I had at the time, I thought I'd try having them use ink, watercolor and colored pencil--I think that combination offers students more control and they can still explore value and color-mixing using paint.


These photos don't seem to do justice to these pieces.
They are really beautiful in person!

We spent a good amount of time sketching and working on composition for these pieces so that they were dynamic. I did not specify the size for the final pieces and there was a nice variety of little compositions and larger ones. The only trouble I ran into with this project was having the students bring in items from home--that just didn't work well for some. I'm not sure how I would work that in the future (perhaps give them the chance to bring objects in, but if they don't they use objects from the classroom?).

Anyway, I was SUPER-impressed by the work the students did. I think some of them were too! Once these were on display, they generated lots of discussion and comments from the middle school students and teachers in the hallway outside of class. ENJOY!

I like the inclusion of body spray in this one. ;-)

Some students preferred to focus on one object at a time.
I like how this student worked the background as well
adding color around each object and a shadow below.

This student also wanted to have the objects separate because he felt they were easier
to read with some space between them. He did a nice job with the details
and these objects have a great deal of personal significance to him.
And here are more of the students' work from the display...

And even more! Finished pieces were mounted onto mat board.
I feel this elevates the work from ho-hum to a finished piece worthy of display
(and preparing work for presentation is one of the National Core Art Standards).


Monday, August 24, 2015

Not-So-Scary Self Portrait Project

Many of my students dread the self portrait. I find that the older they get the more fear and loathing I see when I mention "self portrait." Not to fear! I was finishing up with last semester's 6th grade students and tried this neat twist on the self portrait from Dali's Moustache that uses clear acetate sheets (overhead projector film)--we had a surplus of them in the classroom, but I've also used sheet protectors (but those are more costly).


The students were pretty happy with the results, although some of them took a couple tries to get the hang of the drawing/tracing technique. We used watercolor paper and watercolors for our backgrounds.

I also saw this other version that uses collage for the background and I'm going to try that next time. Thanks, Janet Taylor for the awesome idea--I love collage!

ENJOY!!


And the bulletin board display of some of the completed self-portraits.

Related Posts Plugin for WordPress, Blogger...