Here are some of the projects from my long-term sub gig that appear in the collage here so that you had a bit more info on them...ENJOY!! For the background about where I've been/what I've been doing lately, scroll to the end of the post...
Second Grade Projects From My Long-Term Sub Gig:
 |
| OK, I just think this is the cleverest solution to the "Beautiful OOPS" project described below--this tiger is just TOO cute!! Check out the post below to see how it was made... |
Week 1: Winter Landscapes
(1 day) Original Post here.
A getting-to-know-you
project.
Students used crayons to draw a winter landscape focusing on
foreground, background and atmospheric perspective. They then added watercolor
to their work (watercolor resist) to add a colorful sky (sunset, nighttime,
etc.).

Week 2: van Gogh
Vases (1 day)
This one was from my mentor teacher, Meagan Read, at Riddle Brook Elementary School, but she may have found it here.
This one was from my mentor teacher, Meagan Read, at Riddle Brook Elementary School, but she may have found it here.
Inspired by Vincent
van Gogh’s Sunflowers
Students used Sharpies to create radial designed
“sunflowers” and used oil pastels to add color to their work. Students then cut
out their flowers and individual student work was mounted together to create a
whole-class composition displayed in the hallway.
 |
| Oops, a little glare on the reproduction in the middle... This display used two bulletin boards. This is display #1. |
 |
| Display #2. Each second grade class had a vase of flowers. My mentor teacher did this project with grade 1, this was done with grade 2, but I think it could be done with a variety of grade levels. |
 |
| A close up of one of the compositions. The "table" is dollar store contact paper--easy!! |

Week 3 and 4:
Beautiful Oops! (2 day)
Inspired by the book,
“Beautiful Oops!” by Barney Saltzberg
Students looked at the book, “Beautiful Oops!” by Barney
Saltzberg and then moved through a series of stations where they made six
“Oops!” on their papers.
The next week, we looked at the book again and discussed how we could turn mistakes into masterpieces. Students then used markers and crayons (and imagination and innovation) to transform their mistakes into wonderful art.
- Table 1: tear or cut a scrap of warm colored paper and glue to your background paper (up to 2 times).
- Table 2: tear or cut a scrap of newspaper and glue to your background paper (up to 2 times).
- Table 3: tear or cut a scrap of cool colored paper and glue to your background paper (up to 2 times).
- Table 4: Dip the side of a cardboard scrap into paint and stamp onto paper to make a line (up to 6 times)
- Table 5: Dip a mug into paint and stamp onto paper to make a ring (up to 3 times)
- Table 6: Write your name on your background paper and then trace a circle tracer onto your background paper and cut it out (make a hole in your paper--1 time).
The next week, we looked at the book again and discussed how we could turn mistakes into masterpieces. Students then used markers and crayons (and imagination and innovation) to transform their mistakes into wonderful art.

 |
| The write-up that was part of the display. |
 |
| A cute little guy! |
 |
| "The Big Monster:" This is me, the big monster. I like to roar--it's fun. I am roaring now. |
 |
| "The Rainforest:" The rain is in the trees and (dropping?) from the tree. |
 |
| "The Snowman Winter Clean-up" |
 |
| The finished display got a TON of attention by staff and students alike. It was colorful and creative and I often saw people stopping and reading the captions written by the students about their work. Note: If you are looking for cookie-cutter, pretty projects, this many not be the project for you--but it is fun and creative! |
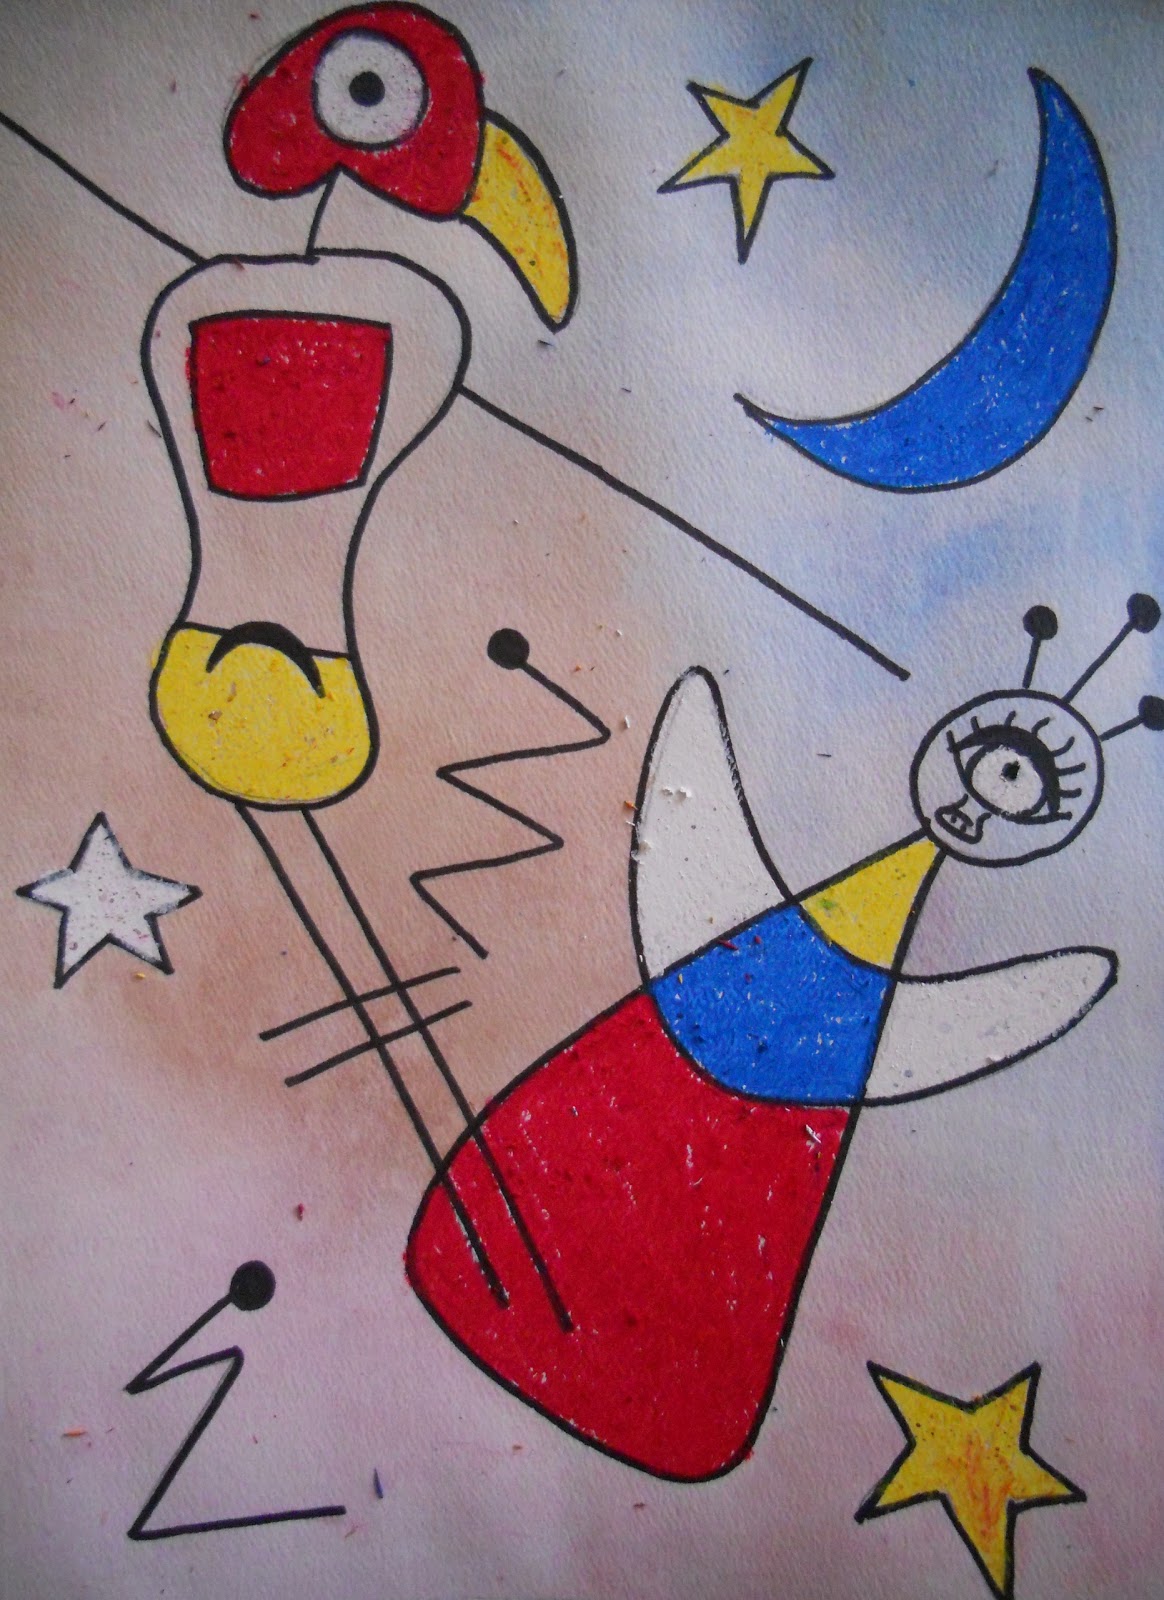
Inspired by the work
of Juan Miro that Mrs. Pettus saw on her trip to Chicago
Students looked at the work of Juan Miro and noticed the
shapes and lines he used to create his images. Students then used dice to randomly
select pieces and parts for their own creatures and fantasy compositions. Once
the creatures, shapes and lines were drawn with oil pastel, students added a
wash of watercolor (water resist) to the background to add mood. This was a
wonderful project to follow the Beautiful Oops since students needed to adapt
and use their imagination.

Week 7: Week 7: Kandinsky group mural Check out the original post here.
Inspired by Kandinsky’s color studies
Students used paint to create a composition of concentric rings based on the color studies by Kandinsky. Individual student work was displayed with other grade levels to create a multi-age group mural for the hallway.
 |
| A close-up of the individual 6" squares all glued together onto the larger roll of paper using Elmer's glue (a dot in each corner). |
 |
| The finished mural. Beautiful!! |
----------------
Backstory for this post:
So, it's been a busy Spring for me since I finished student teacherin' in December--I subbed a bit in preschool, kindergarten, elementary and high school and then landed a wonderful 6 1/2 weeks long-term sub gig at an elementary school nearby teaching art to grades K-5. What a blast I had--the students and staff at Fairgrounds rock and I was sad to go (it's hard to stop doing something you love when your next big thing isn't settled upon yet). Since then, I haven't blogged much because I've been daily subbing and working on my dang art teacher portfolio (more on that in a future post or ten). Check the sidebar (over on the right side of the blog) for other posts in this series (k-5 at Fairgrounds Elementary School). ENJOY!!