Showing posts with label mother's day. Show all posts

Tuesday, June 24, 2014

A Project That Really ROCKS!

I'm a little behind with my postings, but I wanted to share this great project I did with my after school "Spring Into Art" class for Mother's Day. Not only is this a great project to show mom you care, it's great for pretty much anytime! I mean, who doesn't like painted rocks, wire sculpture and poetry?!? ;-)


This piece was made for me by my 4th grade son.
He enjoyed this project and liked writing the poem about me
(to read it, scroll down).

I linked this project to nature, of course, and Alexander Calder, since the wire portion reminded me of his stabiles and standing mobiles. Check out this one at his website, www.calder.org:


This project can take off in a variety of directions: you could skip the poem and focus on creating a mobile-like structure where students explore balance, or you could use wood or foam core for the base, or mount the poem or a famous quote to the base…it is really up to you! Although the poetry piece makes a great integrated arts project.

Here are the directions for the version we did…Enjoy!

Rockin' Stabiles

Supplies Needed:

  • A rock the size of a softball, or so…
  • Acrylic paints
  • Paint brushes, water buckets, paper plate palettes, newspaper
  • Medium gauge copper wire (I think ours was 24 gauge, but check to see what works for you)
  • Wire cutters
  • Poem/Thank You Note Worksheets
  • Pencils
  • Plain white index cards (we used 4"x 6" ones)
  • Fine point Sharpies
  • Pretty colored paper or card stock (optional)
  • Glue Sticks
  • Scissors
  • Craft foam scraps
  • Hole punch
Directions:

1. Select a nice rock for your base, brush it off and paint it with the acrylics. Let dry.

2. Choose a poem/thank you note worksheet to work with. I downloaded the Diamante template from www.ReadWriteThink.org for the students to use. I encouraged the older students (4th grade) to use those. For the younger students and ones who struggle with writing, I let them write a thank you note to their mom. I provided a template for the thank you note as well, to prompt them a bit. As a mom, either writing is appreciated! 

My son wrote this about me:
Brandie
Beautiful, Awesome
Cleaning, Cooking, Vacuuming
You are very awesome.
Resting, Eating, Playing
Cool, Calm
Mom

3. Once the students were done their writing, I proofread them (although I let some of the creative spelling go sometimes because it was just so darn cute!). Transfer the writing to the index cards using Sharpies to make a nice-looking final copy.

4. Glue the index cards with the final writing onto a pretty piece of paper to create a nice border around the poem.

5. Cut a piece of wire to about 36" long. Wrap the wire around the rock a couple of times and twist the ends. One end can be a spiral to hold the poem you've written, the other end can curl out and around like the arm on Calder's work. You can cut smaller pieces of wire to make a mobile-type structure at this time, but I had students cut a shape from craft foam, punch a hole in it, and hang the shape from the arm.

6. Place the poem/thank you note in the spiral portion of the stabile (you may need to secure the note on the back with a bit of tape).

Enjoy!

My other son, who is in first grade, was finding it hard to write that day,
so he painted the rock and created the wire heart sculpture instead.

Thursday, May 9, 2013

Mother's Day Flowerpot Ideas

I was asked to create a painted flowerpot idea or two for our PTA to use as a fundraising kid activity at last weekend's 1st Annual PTA World's Fair. The idea for this event was to have a fun-filled day where families could come and browse different vendors, taste foods from around the world, play carnival games, do crafts, jump in a bounce house, etc.


Ladybugs were VERY popular...

I was set up in the Japanese garden area of the gym. One vendor had let the PTA borrow all sorts of trees and flowers and they were arranged all around my work area-beautiful! In keeping with the Japanese theme, I brought some sheets of origami paper and the instructions to fold a few simple pieces such as a helmet, a dog, a butterfly, etc. Since I was busy overseeing the flowerpot painting, the origami  didn't attract as much interest as I had hoped. I have some ideas about that for next year, though...

On to the flowerpots...these ideas aren't mine, they are ideas I've seen here and there multiple times or are things I've received as a mom myself. But they fit the bill for the craft request: something for mom, a painted flowerpot, easy for whatever age group showed up (this was the first year of the event and we had no idea who was going to show), and cheap (the children "paid" four tickets, roughly $2.00 to do the craft and it is supposed to be a fundraiser for the PTA). Each pot included an herb or flower plant that was donated by a local organic farm.

The supplies needed are:

  • 4" flower pots with your choice of herb or flower
  • Acrylic craft paints (we used red, orange, yellow, green, white and brown)
  • Foam brushes if the children wanted to paint the rim of the pots
  • Sharpies for details, optional
  • Fingers for fingerprints! That's what makes them so easy--no brushes to clean up!

So, here are the (poorly taken) photos of my examples, complete with my cheapo fake plant from IKEA sticking out of it. SIGH. But you get the idea...


This example is great for little ones since they are the only ones
who could fit their handprints on the little pots! I had a couple people do this version...
When the children were done, they could choose one of these
poems on a skewer to stick in their finished pot.
These bring tears to my eyes--so sweet!

The children ran with these ideas and we ended up selling about 30 of them. There are going to be many happy mothers in southern NH this Mother's Day!


Wednesday, April 10, 2013

Kinder Picasso "Hand With Bouquet"

I've been visiting the Kinders at a local school (Clark Elementary in Amherst, NH) once a month doing an art enrichment program. I usually tie in a book or music or fine art (and sometimes all three) to make the experience a rich and multi-layered one. I have absolutely LOVED working with the children--Kinders are so cool. They are up for anything and so smart!


We've done some fall- and winter-themed art, but Spring is here! So I thought we'd create a piece that celebrates warm weather, flowers and color! I'm not a huge Picasso fan, but when I saw the piece "Hand With Bouquet" I immediately thought the children would love it. I experimented a bit with using cut paper and paper muffin liners to make a daffodil bouquet (which came out fine), but then I saw this version on the blog "Splish, Splash, Splatter." Rebecca uses the child's hand print as the hand holding the bouquet--WOW! Now, I'm a mom and anything that has a handprint in it instantly gets a place in my heart (and on the wall). It was a no-brainer--this was gonna happen!

But, I have to say, I was a bit worried about handprints and Kinders and only having a half hour per session...but it went great! We have a small sink in the art room, so I brought in two plastic bins, filled them with water, and had the children wash their hands in those. This allowed all 18 kids (or so) to wash their hands in about 5-7 minutes. I had a grown-up helper at the bins keeping an eye on things-I'm sure that helped!

I am so thrilled with the results and so were the kiddos! This lesson was fun and inexpensive and has a great "WOW" factor. It would be lovely for Mother's Day, too. I particularly enjoyed painting my own hand and then giving each student a high five before they printed their hand on the paper (that allowed me to check that they had covered their entire hand in paint and make sure they placed their hand properly on the page). I think the children thought I was silly-but it was so fun!

Here's how we did these colorful pieces:

Kinder Picasso "Hand With Bouquet"

Supplies Needed:

  • One 12" x 18" piece of white construction paper
  • Paintbrush
  • Paper plate for palette
  • Black tempera
  • Oil pastels/cray pas (assorted colors, but you'll definitely need green)
Directions:

1. Paint your palm, thumb and fingers with the paintbrush and black tempera paint. Make sure you get a nice coat on your hand and go all the way to the tips of your fingers. Press your hand onto the white paper, leaving a handprint. The handprint should be perpendicular to the page. Now you can wash your hand.

2. Look at the picture of Picasso's "Hand With Bouquet." How does he make the flowers? What shapes does he use? Turn your paper so the thumb is up. Check out the examples to see what I mean. This gives a more realistic idea of the hand "holding" the flowers.
Our inspiration:
"Hand With Bouquet" by Pablo Picasso
I instructed the children to use the craypas to draw a large circle for the center of their flower and then color it in. Then add petals going around the center. Use whatever colors you want, but make 4-5 flowers on the area of the paper above the hand.

3. Then add the stems. They should go from each flower, to the hand, and out the other side. Add a couple of leaves to make your bouquet look realistic.

4. Don't forget to sign your work like Picasso, using a craypas.

Welcome spring!


Friday, March 15, 2013

Easy Art Activities For A Snow Day Or Any Day (Part 2)

OK, so now you have an Art Center full of inspiring art supplies and you are raring to go! But what are you going to do with all of that stuff? Some children don't need any encouragement--they see the art supplies and they know exactly what they are going to do with them. That's great! 

Free play and exploration of supplies is so important to a child's creative, cognitive, and motor development...BUT, I have to advise you...you are going to have to be flexible. Many children go through a phase where, to a grown-up, it looks as though they are "wasting" supplies. If you haven't experienced it--just wait! I'm talking about puddles of goopy glue, sticking every sticker they can find on their paper, whole rolls of tape shmooshed into a sticky, tangled ball, cutting and cutting until there is confetti everywhere! It's the way it goes--not all artsy activity is going to produce a masterpiece.

My youngest is just getting into the
"cutting and cutting until nothing is left" phase...

Here are my tips for allowing your child to explore the Art Center during this stage of development:

1. Relax. You've set yourself up for success by actually having art materials and tools available to your child, now you have to let them go (a bit). I'm not advocating letting them be truly wasteful on purpose, but they are going to want to "draw" with the Elmer's glue and then float scrap paper bits in it. They just are. Think about how you react to your child exploring, taking creative risks and creating. Is getting stressed and yelling really going to create good feelings about art?

2. Don't buy expensive stuff. If your child is in the "experimenting" phase, this is not the time for artist-quality supplies. Buy washable, inexpensive products when they are on sale (ie. back-to-school time) and keep the "extras" away. Buy a cheap ream of copy paper, an inexpensive sketch book, reuse scrap paper, keep those bits of construction paper and reuse them, buy some things at the dollar store...you get the idea. You won't stress out so much of your child goes through a entire roll of dollar store tape or breaks a box of inexpensive crayons into bits--again--if you are buying kid-friendly products. There will be time for special, fancy art supplies and those fancy supplies will be even more special when your child receives them when s/he is ready.

3. Monitor what you put out. If the scissors are not being used properly (cutting the air, cutting someone's hair, running with scissors, etc.), then they go away. Crayons being broken (or eaten) even though you've explained it is against the rules? They go away too. If too much is being removed, you may need to rethink the free-spirited art center at this time. Perhaps you set aside time to sit with your child to show him/her the proper way to use the supplies. Danger = Not Good, Not Respecting Supplies = Not Good. You will have to determine what your child can understand with regards to rules and expectations for "proper use" of supplies.

4. Meter what you put out. You don't keep all four bottles of Elmer's in the Art Center when your child is going through the "painting with glue" phase. But, you can keep a 1/2 full bottle in there. I can wipe up a half bottle of glue, if necessary. Same with construction paper. If your child is going through the "cut with scissors until there is nothing left" phase, keep just a couple pieces of construction paper in the Center or teach him/her to choose the recycled paper to shred.

5. Have an open mind. What we think of as "art" is not what a 3-year-old thinks of when creating. Sure, you can do projects together, but be flexible. I have seen parents so focused on the finished product that they take over the project while their child looks on. I've also seen people literally hold a child's hand and guide them to place the elements of a project. This is not assembly-line work. This is fun, this is exploring, this is creativity.

6. Think of this as a "teachable moment." Be involved. Saying things like, "This is how we use scissors safely," "Oh, see how goopy this gets when there is so much glue?" and, "How about we use the scrap paper if you are going to cut, cut, cut it up?" It's a process, but children eventually learn how to use art and craft supplies safely and properly.

7. Be OK with throwing it away. If your child is attached to an "experimental" piece and proud of it, hang it on the wall and have him or her show it to visitors. But some of these pieces in this experimental phase get forgotten the minute your child is done with them. You'll be hanging some strange stuff on the wall during this phase, but if your child is loving the work than you should too.

None of this is rocket science, but how your respond to your child in these beginning phases of art-making and exploration is really important. Exploration of tools and media in a healthy, encouraging way creates confidence, increases fine motor control and problem-solving skills and this time will be remembered fondly by you and your child for years to come!

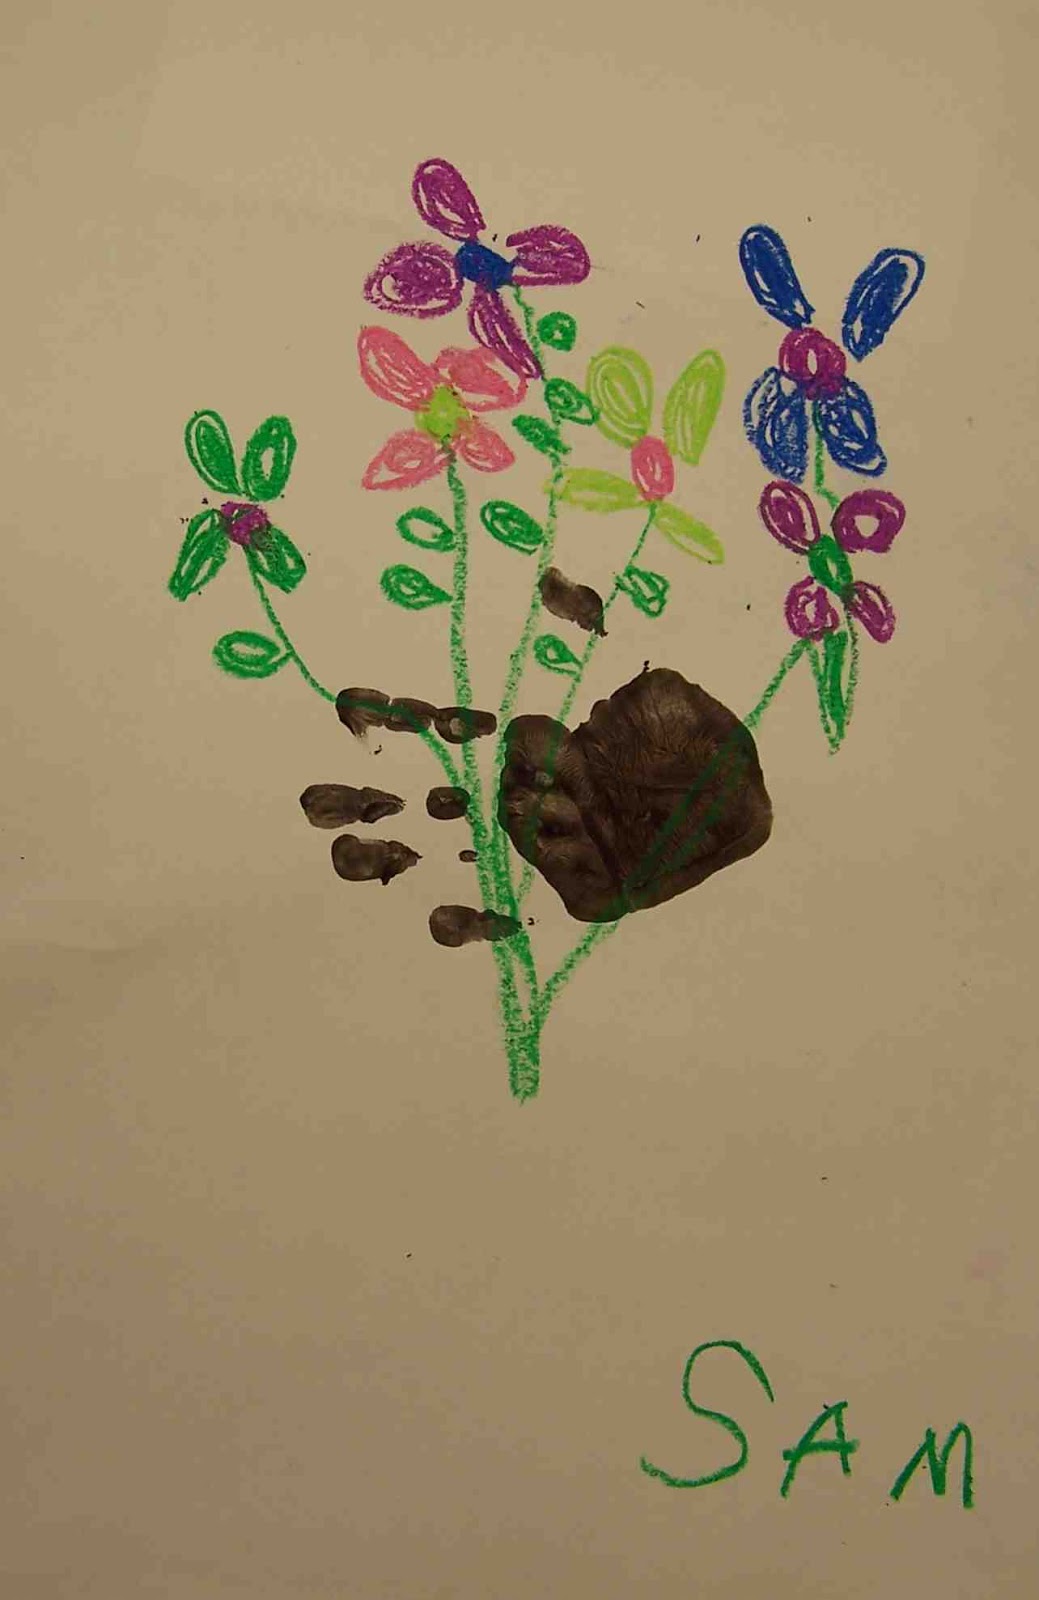
Here's an easy project to do with your child that will remind you to relax during this phase of your child's development. Print this little poem on card stock, add some little handprints, a photo and hang this in the Art Center to help when you are picking up paper confetti and goopy glue. The kit for this piece was given to me when I was pregnant with my first child, so I'm not able to track down the original source.

 Enjoy!
Sorry I couldn't show you the entire piece--it has my kids' names on it.
This is a lovely Mother's Day or any day project!

When I'm big you won't remember
the mud I tracked on the stairs.
Instead I hope you'll hear
my laugh that eased your cares.
The smudges that I leave on walls
will someday fade away.
But the memories of my first steps
will be cherished every day.
As for these two handprints,
Someday you'll be glad
We took the time to make a mess
That didn't make you mad.

Saturday, December 31, 2011

Easy Silhouettes

I love the look of silhouettes! They can go with just about any decor: traditional, modern, eclectic--you name it! They are a great way of preserving your child's image at a certain point in time, and they are also a great example of positive and negative space. 


A silhouette of my oldest guy--so handsome!


Positive space is the space an object occupies (in this case, the head of the person whose silhouette is being done). Negative space is the area around the object. I chose white paper to highlight the negative space around my silhouettes. Although this craft is simple, it may be best for older children or a grownup to do the actual cutting of the silhouette so that facial features stay intact. This is an inexpensive craft that would be perfect for a gift (think grandparents).

Supplies Needed:

  • Camera
  • Ultra fine point marker
  • Small, sharp scissors (I used embroidery scissors)
  • Black acrylic paint (I used flat paint in "lamp black")
  • Paint brush
  • 3 1/2" x 5" rectangle white paper (I used scrap booking card stock)
  • 5" x 7" rectangle colored paper, your choice of color (I used scrap booking card stock)
  • Black 5" x 7" frame (I bought mine at the dollar store)
  • Glue stick

Directions:

1. Take a profile picture of the person whose silhouette you will be creating. Make sure they are looking straight ahead and that their hair is neat (girls with long hair can pull it to the side or have it fall down their backs).

2. Print out the picture onto plain white paper. Use the fine point marker to outline the features of the subject. Add a gradually sloping neckline. You may need to draw in the bottom edge of their hair if it went beyond the picture. I try to keep the bottom edge of the silhouette simple and neat, but I do have a little fun when I'm drawing in the ends of the hair. Just don't go too crazy--remember, you'll have to cut it all out!

3. Use a small, sharp pair of scissors to cut out the image.

4. Paint the cutout with a coat of black acrylic paint and let it dry for several hours or overnight. 

5. Glue the cutout to the white paper. Glue the white paper to the larger, colored, piece of card stock. Insert into the frame and you are done! These are so fast you may find that you'll want to do a whole series of silhouettes! ENJOY!

Monday, May 16, 2011

Springtime Still life

Whew! It's been a busy couple of weeks for me! I've been applying for a teaching job for next year and finishing up my current art class with the home school cooperative. In just a couple of days the co-op will have its Grand Finale and the children from my art class will showcase their artwork! I can't wait! I am so proud of them!


I thought that I'd put a project on here from last year's art class that is perfect for celebrating Spring and Mother's Day: Spring Still life pictures featuring forsythia blossoms. This project can be done by a variety of ages, although little ones might need some grown-up help. This project is from the book, "Kids Art Works," by Sandi Henry--an awesome book. Enjoy!

Just one example of a beautiful forsythia still life!

Background Info:
When I teach this class, I start by having a beautiful arrangement of forsythia blossoms in a vase available in the classroom for the children to look at and touch. I have the children notice how a forsythia blossom is constructed and how it looks up close and far way.

I also like to have a couple of postcards or pictures of still lifes from art history for us to look at and discuss what makes a still life--a type of painting that has as its subject inanimate objects such as fruit, flowers, dishes or food.

Materials Needed:

• 1 9x12" sheet of construction paper either white or light blue for background
• Scissors
• Pencil and eraser
• Glue stick
• Markers, brown for stems and other colors to decorate vase
• Small piece of construction paper for vase (maybe 4x6")
• Yellow tempura paint
• Paper Plate for palette
• Kitchen sponge cut to about 1" long by 1/4" wide

Directions:

1. Cut the vase out of the smaller piece of the construction paper (you can do this by folding the paper and cutting through 2 layers of the paper--good introduction to symmetry). Glue the vase to the along the bottom edge of the larger piece of construction paper so that you have lots of space above the vase for your blossoms.

2. Using the brown marker, draw some stems from your vase into the space above.

3. Place some yellow tempura paint on the tray. Dip your sponge piece into the paint and stamp it gently onto the paper along the stems, creating the forsythia blossoms.

4. If you'd like, use the markers to decorate the vase with designs such as lines, dots, etc.

Voila! A spring still life to brighten up a rainy spring day!
Related Posts Plugin for WordPress, Blogger...