Showing posts with label american. Show all posts

Saturday, September 7, 2013

Plimoth Plantation and Wampum Belts

This past weekend my family and I took our final camping trip of the season. We camped in Plymouth, Massachusetts so we could explore Plimoth Plantation, a living history museum. There are a few different sections to the place:
A view from the fort at the top of the hill.
One section of Plimoth Plantation has a recreation of the first settlement of the pilgrims with people dressed up and acting like pilgrims. It's pretty neat and the children enjoyed watching woman working in the kitchen and got a tour of a surgeon's garden where he pointed out all sorts of plants and their medicinal properties. My husband and I thought there could have been more work happening. We wanted to see people baking bread and making clapboards for siding, mending fences, etc. But my children liked chasing the chickens and looking at the goats and talking with the people.

Another area of the museum is a craftsman's area. This was not part of the reenactment area. Here there are modern craftspeople working creating all of the neat things the pilgrims are using in the settlement: pottery, leather cups and jugs, and wooden chairs and chests. There were two craftsmen there that day, one was making leathercrafts and was very talkative, knowlegable and helpful. The second, the potter, was there but wasn't working at that time. There was also an area for a person who might have been doing Native beadwork, but that person wasn't there. So, while that area could have been interesting, it wasn't as active as it could have been.

Another section of the museum was the Wampanoag settlement. This area was a reenactment of a Native settlement from the time of the pilgrims and, while there were real people dressed as Native Americans doing things here, they do not act like they are from the 1600's--they are themselves as Native representatives. I have to say, they were super-talkative and super-knowlegable and I loved this area most of all. We saw a lady making dinner for her children (her children were actually there running around and playing with other worker's chidren). She was roasting corn over the fire and making a stew that all of the children were going to eat when it was done. She had a baby on her hip and, as he started to get fussy, she laid a fur on the ground and he took a nap.

There was another lady making woven mats for the homes on site. Beside her were a number of toys that Native children may have played with: a canoe, a couple of dolls, and a game made of bones that is like the "ball and cock" game that we played as kids.

Here are the mats inside the longhouse. This is the winter house.

There was also a man creating a canoe by burning the wood center out of a log. We got some serious time looking at that! My boys were fascinated!


And finally, there was a lady in the longhouse talking about pretty much anything you'd like to know: what Natives would eat, who lived in the long houses, what they wore, how they repelled bugs, how they prepared their food...the list went on and on. We sat in that longhouse for while just listening to her talk about all sorts of stuff. This area of the museum felt real and comfortable to me. I think I could have spent all day there. My oldest (a 6th grader) whispered to me:  "When I grow up, I want to be a Native American and work here."

Now, the Wampanoag people are from the Massachusetts area and I've mentioned them before on my blog. One of the artforms they are known for are their Wampum beads that are made into Wampum belts and other items. See my post about a cool art/math/social studies project you can do on this theme here.

While I was in the gift shop at Plimoth Plantation, I noticed all sorts of jewelry made from Wampum--the shell of the quahog clam. But alas, real wampum is too expensive for this art teacher (even as a tax write-off...What? It's for a lesson!). But I was able to get a real quahog shell for $2--and that price is just right!
The humble quahog shell...


Enjoy this repost of the Wampum Belt project!

Wampum Designs


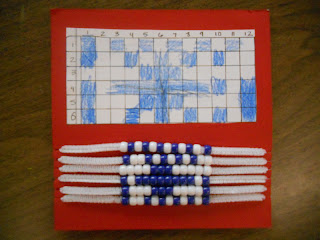
Wampum are beads made from the quahog shell and strung on string in intricate patterns of purple and white (although some sources say that red and black beads were used sometimes too). Quahog's are endangered today and, I guess, artisans can only get one or two truly purple beads per shell, so one wampum bead costs around $5--way too pricey to use for large belt designs. The beadwork we did today had 72 beads per child so each child would have used $360 worth of beads for their project. The children loved hearing that!

We used plain old pony beads I bought from Michael's for our designs. I had been looking for a way for students to easily realize their own bead designs without sewing or doing crazy things with string (my students are in 2nd-4th grade) and I finally found a solution on the blog Mrs. Erb's Art Page. Mrs. Erb uses pipe cleaners (chenille stems) to hold the beads in each row. Perfect! I had the children fit them onto matte board that had been donated to me. This allowed a nice way to display their original designs along with the finished wampums. They came out great and didn't take long at all.

Beaded Wampum

Supplies Needed:
  • Worksheet for practicing designs
  • Crayons in purple (and red and black if you want to use those)
  • Six chenille stems-white
  • Purple and white pony beads (ours were more royal blue)
  • Matte board (ours were red and about 8" square)
  • Clear tape (I used packing tape because it's stickier than regular tape)
  • Scissors
  • Glue stick
Directions:

1. I passed out the worksheets and instructed the children to create a couple different designs using geometrics shapes and using pattern. My worksheet had two 6x12 grids so the children could try out a couple of designs before beginning to bead. We looked at real wampum for inspiration. Word of advice: only put out the crayon colors that correspond to the colors of beads you will be using. If you are only using purple beads, only put out purple crayons for them to diagram with. Trust me.

2. Once they had a couple of designs down on paper, they could bring them to me and we'd discuss which one they wanted to do. 

3. Our designs were 6 rows of beads, each with 12 beads per row. My directions will reflect that. I had them start off with the first pipe cleaner (which represents the first row) and follow their diagram to place 12 beads on it. After that, they worked down the rows, using their diagram as a guide. I cautioned them to keep their rows in order so they didn't get mixed up. If you are doing this with a group you could have them label the chenille stems with a piece of tape or prepare the matte board (as in step 4, below) and have them transfer each row, as it is finished, to the matte board.

4. Once all of the rows were completed, I had them affix them to matte board, again using their diagram as a guide. The way I did it was to cut 1/4" slits on the right and left side of a piece of matte board. Since we have 6 rows, I cut 6 slits in each side of the board (one for each row). The children then slipped the chenille stem in the slits (pulling tight) and we wrapped the ends around the back and secured them with the packing tape to the back side of the matte board. I thought this looked tidy, although there was space enough for the children to do a much larger design (maybe they could repeat their design twice next time...).

5. I then had the children cut out the diagram they had used to create their wampum and affix it above the beadwork on the matte board using glue stick.


Monday, August 26, 2013

Three Sisters Pottery Lesson

This pottery lesson is perfect for introducing Native American heritage and basic pottery techniques to children.

In this activity, children will learn how to make a pinch pot, a coil pot, and a slab pot.


Because of the complexities of the later clay techniques, this lesson is best for students in grade 3 or so. Of course, if you are working one-on-one, younger children may be able to complete all three pots. This would also be a nice project to spread across grades: have a first-grader do the pinch pot, a second-grader create the coil pot, and a third-grader complete the slab pot--THAT would be great!

Begin by reading the Legend of the Three Sisters to the children. With this legend, students are introduced to the foods, customs, and stories that evolved from the planting of corn, beans, and squash--the three sisters. This is a tradition of several Native American tribes from the northeastern United States.

For this art activity, students will create a pinch pot to represent a squash (mine looks like a pumpkin), a coil pot to represent a string bean (mine is open slightly so you can see the "seeds" or beans inside), and a slab pot to represent an ear of corn and the husk. I chose those particular clay handbuilding techniques for each vegetable since they shared similar attributes: the pinch pot is round and simple like a squash, the coil pot reminds me of the tendrils that allow the bean plant to clim way up high, and when I am shucking corn, the husks come off in sort of flat planes that remind me of the slab technique.

Here's the project! Enjoy!

3 Sisters Pottery

Supplies Needed:
  • Legend to read aloud
  • Real examples of pumpkins, green beans and corn in its husk to look at (or really great pictures)
  • Clay (we used Crayola air dry clay since I don't have a kiln)
  • Plastic knife, optional
  • Paint (we used tempera)
  • Paintbrushes, water bucket, paper towels
  • Newspapers to work on
Directions to make the SQUASH SISTER:
1. Take a bit of clay about the size of an egg and gently press your thumb into the clay squeezing the wall of your pinch pot between your thumb and pointer finger, moving around the wall of the pot, enlarging the opening. You're making a little bowl. Make sure the sides of the bowl don't flare out too much, since you are creating a pumpkin-looking squash. 

2. Once you are happy with your pinch pot, gently turn it over and use a plastic knife to gently make the indents you see in the sides of a pumpkin. Don't press too hard or saw through the dough, you are just adding a little interest to the pot. 

3. Use a pea-sized amount of clay for a stem and gently attach it to the center of the pot.

4. Let dry and use at least two colors to color the pumpkin and the stem of your piece. Let dry.


Directions to make the BEAN SISTER:
1. Take a piece of clay the size of an egg and pinch off a bit the size of a grape, set aside.

2. Take the larger portion of clay and roll it out into a big, long, "snake" of clay. 

3. Starting at one end, coil the clay around and around in an oval shape, gradually stacking the coil upon itself to make the outer portion of the bean. 

4. Divide the small portion of clay into three or four bits and create the bean "seeds" that are inside a green bean. They are kidney-shaped. Place them inside your coil pot bean. 

5. Let dry and use at least two colors to color the bean. Let dry.


Directions to make the CORN SISTER:
1. Take a piece of clay about the size of a baseball and roll it out on the table to 1/4" thickness. Make sure it is nice and even. For this part, I created a template out of cardstock that was a slightly curved,  elongated triangle. I had my children cut five of those triangles from the clay using the knife. Three will be the corn cob: before assembling, use the end of a marker or your knife to gently press corn kernel texture onto those three pieces. 

2. Gently pinch the edges of the three corn cob sections together to make a 3D corn cob.

3. Take the other two triangle sections and "scratch and attach" them to your corn cob--these are the leaves of the corn husk. Gently fold the corn husk portions down and out a bit.

4. Let dry and use at least two colors to color the corn cob and the husk of your piece. Let dry.


I printed out a copy of the legend, glued it to a scrap of mat board
and then hot-glued the three pots on there so the 3 Sisters can be displayed together.


-------------

NOTES: You may be able to use Model Magic for this project, I didn't have any to experiment with. In that case, you could use colored Model Magic and you'd be done quicker.

If you use air dry clay and some bits fall of during the drying precess, just attach with hot glue or tacky glue.

There are many follow-up activities to a project like this. You could have students write about their work, plant the vegetables mentioned in the legend, cook a recipe containing all three of these vegetables (search for Three Sisters Stew on the internet), act out the legend, and much more!

Here are two nice links to get you started:

Cornel University:
http://blogs.cornell.edu/garden/get-activities/signature-projects/the-three-sisters-exploring-an-iroquois-garden/

The Michigan Land Use Institute:
Has this wonderful lesson by FoodCorps Service Member Kirsten Gerbatsch from Michigan. This file is a pdf.

Wednesday, April 17, 2013

Inspired By Spring and Alma Woodsey Thomas

I posted a project idea about African American artist Alma Woodsey Thomas awhile back, check out the post here. Thomas was a art teacher for almost 4 decades, became a prolific Abstract Expressionist painter during her retirement, and had her first show at 80 years old! WOW! How inspiring!
Here's the group project: "Sunset Over the Ocean."
For my last Modern Art class with my homeschool kiddos, I thought we'd do a relaxed collage project based on Thomas' work. The children had fun and created some very beautiful pieces. It was also a great opportunity to use up all of those paper scraps I've been collecting all year!

When they were done their personal pieces, they could work together to create a group piece that will be on display at the Grande Finale next month. I love how the group project came out--so different than the one the group in the original post created (and I loved that one too!). Amazing!

Enjoy this one-day, earth-friendly project!

"Colours"

"Falling Fire"

"Falling Leaves"

"Flowering Meadow"

This one had a title,
but he wrote it after I took the picture!
I think the bits are falling stars...

"Color Wave"

Monday, January 28, 2013

American Masters Shrink Art Bracelet

I am SO thrilled with this project! I have been trying to think of some ways to create a project where children could create a series of mini masterpieces after famous artists and then put them all together as one project at the end. My take on this: the Mini Masters Shrink Art Bracelet! A great project for a survey of art history! You could focus on whatever type of art history you'd like, or create a series of panels focusing on one artist.


In this project, I took 1 1/2" x 1 3/4" pieces of shrink art film (plastic) and created a series of mini masterpieces patterned after famous American artists. I had originally created WAY too many, but the final bracelet has 8 panels to fit my wrist. This is a lovely way to introduce students to basic jewelry making skills as well.

These are the tiles after shrinking, but before I linked them with the jump rings.
Can you name all of the artists? The first one is tricky since it is so dark,
it's a heart like Jim Dine...
The finished bracelet, all linked together. Some of the panels (above)
didn't make it since I only needed 8 for my wrist.
I'll be making a version of these with my Middle School students after school on February 8th. I'll post detailed instructions and their versions after that.

Enjoy!

Tuesday, January 8, 2013

Igloo Landscape With Northern Lights

I'm really excited about this project! I did this project as part of a special winter-themed afternoon with the Kindergardeners at Clark School this week. Previous visits have used cut paper and printmaking and they've learned all sorts of great skills and art techniques. This little lesson uses something every teacher on hand: bulletin board borders to give that wavy look in the sky. I bought mine at the dollar store (a package of 14 for $1).


The art concepts that the children learn with this project are the parts of a landscape (foreground, background, ground, sky), as well as collage, cutting with scissors & working on a multi-step, multi-layered project. The children can rip the paper for the ground and use geometric shapes (squares and rectangles) to create the semicircular igloo. They create their own shape for the moon--that can vary quite a bit and they are all darling. Pastels can be messy, and this project uses that to its advantage! The pastels are perfect for the bright colors and streakiness of the Aurora Borealis, or Northern Lights.

There are also great literature, music, science and cultural links to this project as well: the Northern Lights are part of the rich spiritual culture of the Inuit people (indigenous people of the arctic), as are igloos. The Inuit people live in stick framed houses now, but there are still times when igloos are used as shelter today. Igloos are temporary shelters that can be erected in as little as two hours! WOW!

There are many tales associated with the Northern Lights. I found a great book called The Fiddler of The Northern Lights by Natalie Kinsey-Warnock about the Northern Lights, that is a bit of a different tale. In the book, there is a man from Cape Breton who plays the fiddle and his music makes the Northern Lights dance. I was fortunate to find that my library had two CDs of fiddle music from Cape Breton--so I could share this great music with my students!

I hope you enjoy this lovely little lesson!

Igloo Landscape With Northern Lights

Supplies Needed:
  • 12" x 18" piece of black construction paper
  • 1 bulletin board border from the dollar store (or you can cut a wavy template from poster board)
  • Masking tape and clear cello tape
  • Chalk pastels
  • Tissues
  • Elmer's glue (or other white PVC glue)
  • White construction paper (some ripped into strips, some cut into 1" squares)
  • Semi-circle to trace for igloo shape
  • Pencil
  • Scrap of yellow construction paper (for moon and window)
  • Scissors
Directions:

1. Tape the border to the table: tape it on either end with a piece of clear tape so that it is nice and secure, but your sheet of black paper can slide under it.

2. Slide the black paper under the border. Use the pastels to color on the paper along the top edge of the border. It's OK if you get the pastels on the border and on the black paper at the same time. Just keep the black paper still while you are doing it. Once you've traced along the entire edge of the border piece, take a tissue and gently rub upward (away from the border), along the entire edge of the border. This will give you the lovely, streaky look of the Northern Lights. Don't scrub with the tissue--that won't give you the same effect. Repeat this 2 or 3 more times on the page.

3. When you are done your sky, move over to the collage table. Apply a thin line of glue along the bottom edge of the black paper. Attach strips of white paper along the bottom to make the snowy ground. Ripping the strips of paper gives a nice effect.

4. Trace a semicircle onto the background with the pencil--make sure you are having the igloo rest ON the ground--not float in the air! We used paper plates cut in half as our templates. Apply some glue to the inside of the semicircle area you've traced on the paper. Use the white 1" squares of paper to fill in the semicircle for the igloo.

5. When your igloo is done, cut a 1" square of yellow for the window of the igloo and attach.

6. Cut a moon shape from the yellow construction paper and glue in the sky area.

What a serene landscape! Enjoy the view!


Monday, December 3, 2012

Story-Telling Animal Pelts

For week three of my Tribal Art of North America after school art class, I thought we'd do a project I saw over at Sleepyhead Design Studio. This is similar to my cave painting project, but easier to do with a larger group (no lacing the piece to a twig frame) and A LOT LESS MESSY! Yee haw!


We followed Sleepyhead's project instructions and prepped our pelts (crumpling and rubbing the paper bag to create a fuzzy, wrinkled texture) and then the children used Sharpies to cover the pelts with symbols (I had printed out some symbol sheets for them to refer to). They were encouraged to create their own symbols, too--I just had them add their symbols to the sheet and label their symbols with the meaning.

When doing a test run at home, my children just placed random symbols all over their pelts, but my students chose to use the symbols to tell a story or talk about the things they like (animals, nature, nice weather, etc.). If I were to create one of these, I think I would talk about when my family and I went camping this summer since many of the symbols on the "Picture Dictionary" sheet could be transferred to a story of a camping trip.

Once the children were done creating the symbols on their pelts, I had them use acrylic craft paints and tiny paintbrushes to add color to their pieces. We used a limited color palette: black, brown, ochre, white and turquoise. My art students argued that green and red could also be made from natural ingredients, so I let them have those too. Sleepyhead used oil pastels to add color in her project--that works well, too (I tried both in my samples). Then we mounted the pelts to a 12" x 18" piece of construction paper using a few staples (probably not authentic) and glued the "Picture Dictionary" page of symbols onto the back of the piece using a glue stick. This way, the children wouldn't have to worry if they forgot the meaning for some of the symbols.

I did this project with children in Kindergarten through grade 4 and they all enjoyed it. It's a keeper!

Soap Carving and a Collaborative Totem Pole

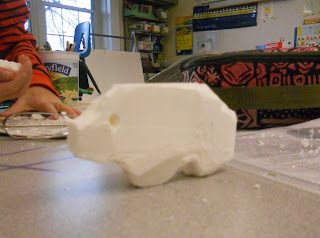
In my Tribal Art of North America class, we were able to do a fun technique that the students always enjoy: soap carving. I've done soap carving with my students before when I taught Inuit carvings (see my original  post here). This time, I thought the children could carve the soap and work together to make a totem pole.


The completed Totem Pole--each of the students
created a section (one animal). I placed them on
a background that looked like sky just to snap the picture.

I found a great handout online about totem poles. It gave some background information as well as great images of some typical animals that appear on totem poles along with a description about the symbolism of each animal. The children chose one of the animals to replicate in soap and began carving with their tools: a vegetable peeler, plastic spoon and a toothpick. Features such as beaks, tongues and wings that protruded far away from the main carving were added later using craft foam. I had a sheet of white craft foam on hand for these "extras," but encouraged the children to do most of their carving in the soap.

Detail of the BEAR (symbol of power on the earth).
The tongue is made with a bit of craft foam.

Once the children were done carving their individual totem animals, we put them together into one totem pole and I snapped a picture. The children took their individual pieces of the totem pole home, but before they left, they had enough time to create a second carving of their choosing that was more like the Inuit. We had a great discussion of how different their two sculptures were: the totem was more of a shallow carving meant to be viewed from a very limited radius, but the Inuit-inspired carving was meant to be held and seen from all angles. The carving was much more intense on the Inuit piece in that they had to think about removing the excess and accurately carving their animal on a variety of planes.

And here's one of the Inuit carvings: a polar bear.
These soap carvings are hard to take pictures of
with my camera--sorry they are blurry!
The children did a great job! ENJOY!


Thursday, July 5, 2012

Super Simple Dream Catcher From a Paper Plate

Third son had a terrible dream last night. It didn't help that he fell out of bed (which I hadn't heard but was described by my first son as "something crashed into the house--it made the whole house shake!" A few minutes later I heard the little guy crying and went in & located him (still on the floor). He was shaking and crying and still dreaming away. Man, that's tough!

$1 for the pony beads at the Dollar Store and $2 for feathers-
the rest of the supplies I had on hand. What a nice and easy craft!
So today, we made a super simple dream catcher to hang above his bed to catch all of his bad dreams. This is a lovely craft to do as part of a summer camp, Native American craft session or part of the library's summer reading program (our local library's theme this summer is "Dream Big!").

Well here's the super simple dream catcher and may all of your dreams be pleasant!

Paper Plate Dream Catcher

Supplies Needed:

  • One paper plate
  • Scissors
  • Hole punch
  • Yarn (four 12" sections and one 48" section)
  • Clear tape
  • Pony beads
  • Feathers (ours were about 3 1/2-4" long)
  • Markers
Directions:

1. Cut a 5" (or so) circle from the center of the paper plate, leaving the outer rim of the plate intact.

2. Use the hole punch to make a series of holes every inch or so around the inner edge of the ring.

3. Use markers to decorate the ring with patterns and images as desired.

4. Weave the 48" piece of yarn through the holes in the inner edge of the ring going across the ring to create a web for the bad dreams to get caught in. This is the fun part--even young children can relax and weave this inner section. The funkier, the better! We secured the beginning and ends of our yarn to the back of the ring with clear tape.

5. Use the hole punch to create a single hole at the top of the ring to hang the dream catcher. Make a loop from one of the 12" long strands of yarn, run it through the hole and knot it to secure. If you like, you can string a couple of pony beads onto the hanging loop to add some color.

6. Use the hole punch to create three holes about an inch apart along the bottom edge of the dream catcher. Feed the remaining 12" strands of yarn through the holes and double knot to secure. Feed pony beads onto the yarn coming from each hole. Knot and then use clear tape to attach a feather to the bottom of each strand. Trim excess yarn with scissors. Repeat to make three strands of beads with feathers coming off the bottom of the dream catcher. I made the center stand slightly longer than the other two.

7. Hang above your bed to catch all of those bad dreams! Nighty-night!


Friday, May 11, 2012

Rainbow Valley: Inspired by Alma Woodsey Thomas

I had never heard of Alma Woodsey Thomas until I received an art catalog in the mail and saw a tiny reproduction of her "Eclipse" painting being sold as a poster. WOW. Where has she been all my life?! Thomas began her art career as an art educator (for 38 years!) and after retiring, was able to devote more time to painting. Her first solo show was at the Whitney Museum when she was 80 years old! Her lovely paintings are colorful and abstract and my students really enjoyed looking at them and we had quite a discussion about many of her paintings. I enjoyed hearing their opinions of the pieces as well as hearing them using art terms easily in our discussion. It was wonderful being able to share the work of a contemporary female African American artist with them (Thomas passed away in 1978).

"The Eclipse," by Alma Woodsey Thomas

I left the project somewhat open-ended for my after school Modern Art class: they could create a radial, linear, or all-over, random composition based on Thomas' work BUT they had to use ripped paper pieces to create it. I showed the students how to create ripped pieces of construction paper (tear the sheet lengthwise into a strip and then into little squares/rectangles). I then passed out white card stock for them to use as a base.

Some of the students went with a radial composition and started with a circle. Others decided to do straight columns of paper pieces and many chose to just have random patches of color all over. It was all good. I didn't want to have a bunch of cookie cutter pieces of artwork all looking the same, so I'm glad I left it open-ended. Each piece has elements of different styles of Thomas' paintings.

The supplies for this project were few: card stock, construction paper and glue sticks. When they were done, they could work on a group piece that was larger: 20" x 30." The finished piece was a collaborative effort of the entire class and the title, "Rainbow Valley," was voted on by all. Enjoy these lovely, colorful pieces of Abstract Expressionist art!

"Rainbow Valley" made by my Modern Art class
This student was inspired by Thomas' paintings that had
multicolored backgrounds. This background was done
with crayon and then she glued the pieces over it.

This student also wanted a colored background, but chose
to use a solid piece of construction paper. This piece uses
a more radial composition, but it goes off the page.

And here are some pieces that have more of a scattered composition.
Lovely colors!

Saturday, December 31, 2011

Easy Silhouettes

I love the look of silhouettes! They can go with just about any decor: traditional, modern, eclectic--you name it! They are a great way of preserving your child's image at a certain point in time, and they are also a great example of positive and negative space. 


A silhouette of my oldest guy--so handsome!


Positive space is the space an object occupies (in this case, the head of the person whose silhouette is being done). Negative space is the area around the object. I chose white paper to highlight the negative space around my silhouettes. Although this craft is simple, it may be best for older children or a grownup to do the actual cutting of the silhouette so that facial features stay intact. This is an inexpensive craft that would be perfect for a gift (think grandparents).

Supplies Needed:

  • Camera
  • Ultra fine point marker
  • Small, sharp scissors (I used embroidery scissors)
  • Black acrylic paint (I used flat paint in "lamp black")
  • Paint brush
  • 3 1/2" x 5" rectangle white paper (I used scrap booking card stock)
  • 5" x 7" rectangle colored paper, your choice of color (I used scrap booking card stock)
  • Black 5" x 7" frame (I bought mine at the dollar store)
  • Glue stick

Directions:

1. Take a profile picture of the person whose silhouette you will be creating. Make sure they are looking straight ahead and that their hair is neat (girls with long hair can pull it to the side or have it fall down their backs).

2. Print out the picture onto plain white paper. Use the fine point marker to outline the features of the subject. Add a gradually sloping neckline. You may need to draw in the bottom edge of their hair if it went beyond the picture. I try to keep the bottom edge of the silhouette simple and neat, but I do have a little fun when I'm drawing in the ends of the hair. Just don't go too crazy--remember, you'll have to cut it all out!

3. Use a small, sharp pair of scissors to cut out the image.

4. Paint the cutout with a coat of black acrylic paint and let it dry for several hours or overnight. 

5. Glue the cutout to the white paper. Glue the white paper to the larger, colored, piece of card stock. Insert into the frame and you are done! These are so fast you may find that you'll want to do a whole series of silhouettes! ENJOY!

Thursday, December 1, 2011

Story Totem Poles

The last time I taught an art class about totem poles I had the children create family totem poles. They could bring in pictures of their family members or draw them. They came out great and the children were very happy with them. While looking online for totem pole images, I came across an idea that got me thinking a bit: Story Totem Poles from Art Smarts 4 Kids. She used a simple story, Goldilocks and the Three Bears, and had the children illustrate the characters and plot on a totem pole.

In this piece, the student shows the Old Man with his cloak, and then attached the Old Man and Rock with the same fastener so that he could show 1. the rock on top of the fallen Old Man and 2. the rock cracking in two. The Night Hawk is on a tab so that it moves down the Totem pole and can touch the rock (and crack it in two) as in the story.
So clever!

I decided to have the children illustrate a Native American tale and I found a few great ones at Apples 4 The Teacher. I chose "Why The Night Hawk Has Beautiful Wings." Besides having a couple of moral lessons, it is also a funny story and has great visuals for the children to explore. Here's the tale.


Supplies Needed:

  • Paper towel roll
  • Construction paper (I used green, brown and white)
  • Markers/Colored Pencils/Crayons
  • Scissors
  • Glue stick
  • Clear tape
  • Wing template, optional
  • Brass fasteners, optional
  • Images of totem pole figures and a picture of a Night Hawk for reference, optional
Directions:

1. Read the story to the students. Once I was finished, we discussed characters and plot. I then gave a brief discussion on totem pole art, highlighting some of the features they may want to include in their totem pole designs (3D wings, etc).

2. I gave each student a 6 1/2" x 12" piece of construction paper (green) to use as a base for their artwork. The children then divided it into about 5 horizontal sections (change this based on how many characters and plot points you want to show). I instructed the students to work directly on or attach their work on this piece of paper--flat on the table--and then when it was done, they could glue it to the tube.

The children could draw right on the background paper, or could illustrate their characters on a half sheet of white construction paper, cut them out and glue them to the background paper. I also gave them a half sheet of brown to use for the Night Hawk and/or the stone from the story, if they wanted. 

I also showed them how they could add motion to their totem poles (not really traditional, but fun!), by attaching characters to the background paper with brass fasteners (you know, the ones that allow things to spin. See the pictures for reference). I showed them how they could attach a picture of a stone with a brass fastener to make it roll, a key point in the "Night Hawk" story. They loved that idea and many of them took the mechanical aspect of the project even further (see photos).

3. Once the characters and images of plot points are completely colored in, cut them out and attach them to the background paper with glue. Work the story from the bottom of the totem pole up (that is more traditional). Attach any pieces that require the brass fasteners to the background NOW (before you glue the paper to the background). Wings and other 3D elements are added later, in step 5.

4. Once all of the pieces are on the background, turn the entire thing over and spread glue on the back (we used a glue stick, but white school glue would work). Roll it around the paper towel roll and secure with a couple pieces of clear tape, if needed.

5. Add any 3D elements such as wings or a beak using the glue stick.

Done! Enjoy watching your child retell the story using his or her Story Totem Pole!


Wednesday, November 16, 2011

Burlap Weavings (Class #2)

My homeschool art class also did burlap weavings this week (just like my after school class, see the original post here). 

The project was slightly different since the class is shorter (only an hour) and my class is made up of students in 2nd through 5th grade. I brought out my samples from my original post, but did not have the paint element this time. The burlap was also cut into smaller pieces and I did not mount them to mat board, but affixed a layer of masking tape on the back of the top edge so the piece didn't unravel while the children were working in it.

Done this way, the project makes for an inexpensive project for a group. Many of the children were able to complete their pieces in this session, but two sessions could be used. This really got the children thinking and working with their hands in a new way!

Here are some examples of the finished pieces:

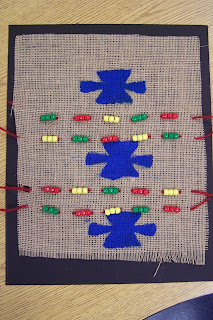
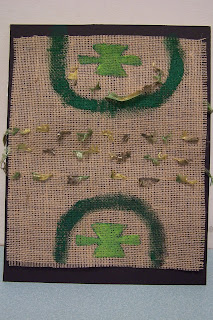
Beadwork and straight stitches to create an image.

Exploring color, texture and stitching.

Love that variegated yarn!

Beautiful! Great Job Everyone!

Tuesday, November 15, 2011

Burlap Weavings

This week I wanted to introduce my after school students to the art of weaving. Weaving many times makes people think of the Native Americans, but I pointed out to the children that almost every culture has some form of weaving: Africa, Mexico, South America, China, and Japan as well as Europe in the Middle Ages.

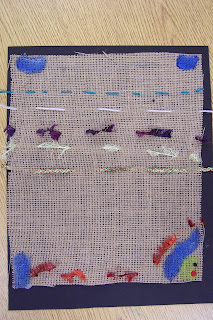
I gave each student a piece of burlap that had been hot-glued to a piece of mat board. Burlap is great because it has a nice open weave, so it is easy to see the WARP (threads that run vertically) and WEFT (threads that run right to weft, er, I mean LEFT).

The students can weave yarn into the spaces of the fabric or can gently pull on the weft threads of the burlap and remove them to create spaces where the exposed warp threads can be tied together or larger ribbons can be woven in.

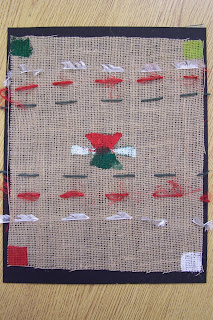
I created an example board for the students to view during my discussion. It shows the following:

First Example:

1. Yellow thread: Single strand woven in one row.

2. Purple threads: Single strand woven into three rows (multiple rows).

3. Multi-colored Fuzzy Yarn: Single strand using large "stitches" so that the fuzzies can be easily seen.

4. Dark Purple Eyelash Yarn: Single Row, large stitches.

5. Burgundy Yarn: Single row with beads and a fuzzy yarn stitched along with it. Stitched in an open area of the burlap where the weft threads have been removed.

6. Burgundy Yarn (2):  Single row stitched into the plain burlap

7. Pale green: Single strand woven in a pattern. You could also do X's or other patterns.

Burlap Weaving: First Example

Second Example:


8. Ribbon woven into a section where the weft threads have been removed. Ends are tacked down with hot glue on the back of the piece.

9. Section where weft threads were removed and remaining warp threads were gathered and tied. Some with yarn and one with yarn with bead added.

10. Stamping with acrylic paints. Diamonds, squares, etc.

11. Fringe: Fringe created using yarn and an example of fringe created by removing the last few weft rows.
Burlap Weaving: Second Example

The possibilities are endless with this. I also provided some acrylic paints and stamps with Navajo motifs that the children could add to their pieces. Here are the step-by-step directions:

Supplies Needed:
  • Burlap (I bought ours at a fabric store)
  • Mat Board, optional (I glue to top edge of the burlap to the board to keep the whole thing from fraying apart as the children work. The final piece looks more finished this way)
  • Hot glue gun & glue sticks
  • Assorted yarn and ribbon 
  • Beads (I used plastic pony beads)
  • Scissors
  • Plastic needle (easy to thread the yarn through and won't poke little fingers)
  • Acrylic Paints, brushes, craft foam, optional
Directions: 

1. Cut the burlap to size: ours was 10"x13." The students I have are 3rd and 4th graders and we have an hour and 15 minutes to work, so that size seemed appropriate. Younger students and less time would require a smaller piece of burlap to work with. When cutting burlap, wear eye protection since the fibers may scratch your cornea.

2. Cut a piece of mat board slightly larger than the burlap square: ours was 11"x14."

3. Hot glue the burlap to the mat board along the top edge of the burlap (leave the bottom edge unattached so that the child can work with it).

Stamps Include a starburst-like shape, diamonds and squares.
4. If you would like to use the paints to stamp Navajo motifs, do so now. I cut a motif from craft foam and had the children apply paint to the shape with a brush and stamp it onto the burlap. 

5. While the acrylic is drying, plan the rest of your design. Choose a few different types of yarn and ribbon to complete your design. Weave the yarn into the fabric using the plastic needle, adding beads if you'd like. If you would like to use ribbon, remove a few of the weft threads first to create an open section. Instead of the plastic needle, we used a safety pin to weave the ribbon into the fabric. You can also sew around the stamped designs, if you'd like.

6. Create fringe at the bottom of your piece by removing the last few weft rows and/or using yarn knotted into the fabric.

This piece is very open to the student's individual creativity. Have fun and encourage self-expression. Here are a few of the examples from today's class. ENJOY!

The student said this is an "Elvis-inspired" weaving!

The student said this is a Christmas-inspired weaving.
Lovely Beading!

Painting and eyelash yarn create a nice symmetrical image. 


Related Posts Plugin for WordPress, Blogger...