Showing posts with label paper. Show all posts

Saturday, July 3, 2021

Watercolor Necklace & Cricut Love

One thing about watching kid shows with your kid is that you get to see all sorts of fashion for the younger set. A couple weeks ago we were watching "Nicky, Ricky, Dicky and Dawn" on Netflix and their friend Mae (who's like 10, mind you), was wearing this awesome geometric watercolor necklace. 


I sat up and took notice! WOAH! As an art teacher, watercolorist AND funky homemade jewelry-wearer, I WANTED THAT NECKLACE!!

But how? I searched the interwebs to see if I could find it--or anything like it, but, nope. So I started plotting, I mean, making a plan...I wanted something sturdy and the edges needed to be sharp and clean. My son has a 3D printer, but the thought of plastic poking me made me sad. And trying to get a 19-year-old boy to get all hyped up about jewelry and design his mama something ASAP might be tricky and involve lots of bribery.

And then, I got the Cricut machine I ordered. I splurged (for me) on the Cricut Explore Air 2 Everything Bundle from Cricut.com. I wanted lilac but waited too darn long and needed to get the mint. Also an OK color (but I looooooove lilac. SIGH.). 

Anyway! I was scrolling through the Cricut Design Space, teaching myself how to do simple projects to get acquainted with the machine and (cue angels singing) I saw the necklace! OK, it was teal and full of holes where the watercolor bits should be, but you know what I'm saying!! And it had earrings!!! I love me a matching jewelry set!


So, I made it! It's multiple layers of black cardstock and one layer of Cotman Watercolor Paper (similar) I had painted with my favorite colors. The watercolors I'm using are professional grade and from my second time going to college (or maybe even my first--it was a summer class, so its hard to remember. SO let's just say, they are, AHEM, old). Just use the best quality watercolors you can if you are looking for something to last and stay bright. Then I mod podged the heck out of the layers. And then added more mod podge. Like a lot. Work on wax paper so that it doesn't stick to your work surface. 


Then I added findings (similar). This is another one of the projects I'm doing this summer that uses stuff I have on hand. I'm trying not to buy more stuff unless necessary to finish a project. We'll see who that goes!


I made both the original (full of holes) and my version. The earrings are full of holes and are meant to match both necklaces. 


I'm in love!!!

Supplies: 2-3 pieces of 12" square black cardstock, one 4"x6" piece of watercolor paper, watercolors, watercolor brush and supplies, Cricut machine and supplies, Mod Podge glossy, brush, waxed paper, jewelry findings in silver. 


Monday, June 8, 2020

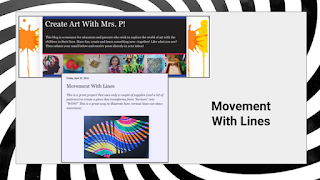
NEW OP ART VIDEO LESSON: Movement With Lines

Hello artists!

During distance learning I created a bunch of videos--I HAD to! Being an art teacher is sooo much easier when you can SHOW people what you are talking about! Some of the videos were just screen recordings I did in Zoom, and my philosophy, at first, was get the videos done to the best of my modest abilities so the students could connect with me and do the work. But towards the end, I started to get a little more fancy. 

Don't get me wrong. I didn't WANT TO learn how to do anything with video. OK, that's kind of a fib. I love to learn, but I had learned SO MUCH new stuff while being home for 10 weeks. So many new programs, so many new ways to get content out there to students (and did I mentione I was home with my four kids?). So many things in my brain!! I really didn't think I handle more or give more of my time.

But, I wanted the videos to be better. So I forced myself to try a video editing program. I chose to go free and online, so I tried out WeVideo. I really liked it! There was a 30 day free trial and I just sneaked this video in at the last minute. It's a how to for my most popular post ever--"Movement With Lines" this post has had almost 120,000 views since 2012.


I was looking back through the blog the other day, saw it, and noticed that in the comments someone had asked if I had a video for the lesson. Ummmm. No. BUT I COULD! I started planning the video out and, guys, I FORGOT HOW FUN THIS PROJECT IS!! Really, I ended up making a few just for fun.

I changed this up for students who were working at home--using index cards as the base for the art since I thought many people would have index cards on hand. I also scaled it down so that it could be done during one of my weekly hour-long Art-a-Long sessions I offered to students and families. If you want to go bigger (or smaller), please do! The original post has students use 8 1/2" x 11" paper and clever teachers photocopy the numbered lines on the back BEFORE having students do the work.

So, here's my quickly cobbled together video for "Movement With Lines." It's not going to win any video awards, but it's out there for the masses. I hope you can use it with your classes, your children and you try it yourself! I promise, it's fun and you can totally do it!

ENJOY!


Wednesday, August 19, 2015

FREE ART BOOK GIVEAWAY!

We all can use a little inspiration, can't we?

I have some WONDERFUL news to share: SIX art ideas of mine have been published in the book "500 Kids Art Ideas" by Gavin Andrews published by Quarry Books! 


This soft-cover book is chock-full of great ideas that will really get your creativity going! There are eleven different chapters in the book that show full color pictures of a variety of art media and projects created by a wide range of ages. There are great ideas for working in felts, fibers, paper and book art, sculpture and 3D, technology and more!

It truly is a beautiful book! Each of the 500 projects has a full color illustration along with a quick list of materials used. While there aren't step-by-step directions for each project, there's enough information to get you started and art teachers, homeschoolers and creative kiddos will be inspired none-the-less.

Author Gavin Andrews is an art educator and artist who is currently employed at the Peabody Essex Museum in Salem, Massachusetts. I love what is written about her on Amazon (on the "About the Author" section for this book), "She is dedicated to the role of art and creativity in people's lives, especially those of her two children, and strives to have people understand that everyone can be creative." I couldn't agree with her more!

Want a copy? Well, I have one right here for you! I'm giving away a FREE copy of the book "500 Kids Art Ideas" by Gavin Andrews published by Quarry Books in my first-eva giveaway! Here are the details:

If you would like to be entered in the drawing to receive a copy of the book, leave a comment below with your name, email address and let me know what book YOU can't live without in your classroom or one that you've read that inspired you. 

I will choose a winner at random on August 31st, 2015. Sorry, only those in the continental United States are eligible for this giveaway.

So, get to writing that comment below to enter! Good luck!

Friday, August 14, 2015

REPOST: Symmetrical Paper and Clay Butterflies

It's been a long summer here in New Hampshire--my kiddos have been on break since June 10th and don't start school again until September 8th--WOW! So, the long and lazy days of summer need some crafting with mom time. Here's a butterfly that Little Miss did today. This is a post from back in September of 2012, but it's a good one--very fun (and shhh....educational too!). ENJOY!


And here's the original post:

Do you know some students who are studying butterflies? This is a great project for children in Kindergarten and elementary school. You can work in so many great concepts with this project: parts of an insect, symmetry, pattern, and more.


I started by having my students cut out the wings and design them and then I walked them through the making of the butterfly body. We finished up by adding the details such as antennae and legs. I really enjoyed this project because it taught science and art concepts, but it also because it allowed the students some self expression; a win/win in my book!

Clay Butterfly With Paper Wings

Supplies Needed:

  • One 6" x 9" piece of construction paper for the wings (light color)
  • Pencil with eraser
  • Scissors
  • Assorted markers
  • Model Magic by Crayola (about the size of a chicken egg), whatever color you want
  • 3 pipe cleaners (chenille stems), whatever color you want

Directions:

1. Fold the construction paper in half the short way (hamburger or taco fold).

2. Arrange the construction paper so the fold is on the left. Draw a capital letter "B" on the paper extending it so the top and bottom of the "B" touch the top and bottom of the paper.

3. Cut out the "B" shape, but don't cut the middle line (in between the upper and bottom bumps). Write your name on the paper and open it up so your name is face down. These are your butterfly wings.

4. Decorate the wings with whatever designs you would like: big dots, little dots, lines, etc. I showed a couple of butterfly books to the children before they started drawing. I asked them to make their designs symmetrical, or the same on both wings.

5. I then gave each child a ball of Model Magic the size of a chicken egg. I had them pull off a piece and roll it into a 3/4-1" ball. This is the butterfly's head. Place this ball of dough at the top of your butterfly's wings and press down slightly.

6. Divide the remainder of the dough in half (two equal parts). Form he first into a ball. This is the thorax for your butterfly. Place this ball of dough below your butterfly's head on the wings and press down slightly.

7. Roll the remainder of the dough into a hot dog shape about 3" long or so. This is the abdomen of your butterfly. Place this ball of dough below your butterfly's thorax on the wings and press down slightly.

8. Use scissors to cut each pipe cleaner into three equal sections. Poke 2 pipe cleaner pieces into the butterfly's head as his antennae. Wrap another pipe cleaner piece into a coil and poke it into the head for the butterfly's proboscis.

9. Poke the remaining 6 pipe cleaner pieces into the butterfly's thorax (3 on one side, 3 on the other). These are the butterfly's legs.

You're done! Enjoy your colorful butterfly!

Friday, January 2, 2015

And another calendar idea! Ripped Paper Winter Landscape

It's not too late to celebrate the New Year!

Here's a quick idea for a calendar you can make with scraps of paper. It's a nice way to use up scraps and practice ripping paper. I made this project with a variety of kiddos from pre-K to 4th grade and they all enjoyed it. I think they especially enjoyed adding the splatter-paint snow at the end!


Here's a close-up of a couple of the calendars. As you can see, some of
the older students added a few details to their scenes.
These were done as part of my "Gifts from the heART" class.

Ripped Paper Winter Landscape Calendar

Supplies Needed:

  • A black or dark blue piece of paper for the night sky (ours was 4 1/2" x 8 1/2")
  • Various white and blue pieces of paper for the snow
  • Small scraps of various green paper for the trees
  • Scissors
  • Glue stick
  • Gold star stickers
  • White tempera paint
  • Stiff bristled brush
  • Paper plate palette
  • One 2015 Year-at-a-glance calendar printed on the bottom half of an 8 1/2" x 11" piece of white paper
  • Laminator and 8 1/2" x 11" laminating pouch
Directions:
1. Rip some strips of white and light blue papers and layer them together onto the black paper to create the illusion of snowy hills. When you like the arrangement you have, glue the layers onto the black background using the glue stick. This part is where younger kids may need a bit of assistance, but they usually catch on fast. :-)

2. Cut some little triangles for trees out of the green papers. Glue them onto the hills you've made. Trees in the way back of your landscape may appear smaller than the ones in the foreground of your landscape. 

3. Add sparkly star stickers to the tops of your trees or in the sky or both. Don't forget to sign your work at this time.

4. Place your completed landscape into a box to reduce splatters. Dip your stiff bristled brush into white paint and use your finger to flick the bristles to splatter paint "snow" onto your landscape. A grown-up may choose to do this, but kids do really enjoy it (yeah, it makes a little mess).  Add the desired amount of snow to your landscape and let dry.

5. Once your landscape is dry, use the glue stick to glue it to the 8 1/2" x 11" piece of paper that has the calendar printed on it. 

6. Run the entire piece through a laminator to seal it and protect it for  a year's worth of use.

ENJOY! Happy New Year!!


Sunday, November 23, 2014

Make a quilt in an evening--A PAPER ORIGAMI quilt that is!

Once upon a time, I used to quilt. I wasn't super-great at it, but I loved it and had fun. I think it's the graphic designer in me seeing all of those neat little shapes in neat little rows just makes me happy! But now I have four kiddos and I'm going to grad school. As for quilting..."Ain't nobody got time for that!" But, my sister is a wonderful quilter and churns out quilts left and right. And her work is better than mine ever was or will be--she's into detail and hand-stitching and all other sorts of craziness :-) And she has a stash of fabric that is *to die for!!*


I thought my quilting days were done (or on hold for a good long time), but, stay with me on this...

My family and I also *LOVE* origami--I don't know what it is about folding a tiny piece of paper a few times and magically getting a little shirt, a ballon, a lantern, or a samurai hat, but we can't get enough! So, awhile back, I saw this neat origami piece that had a bunch of what I figured out were origami samurai hats/helmets arranged on a colored background that looked like--a QUILT! OK, now quilts are still one of my favorite things--so I pinned it and would look at it fondly whenever I saw it in amongst my 5000+ pins...


The last time I stumbled on my origami quilt pin, I thought, "Hey that would be great for my sister!" So, I bought a pack of origami paper from the craft store (about $12.00 for 200 sheets) and coerced my kiddos to help me make a bunch of samurai hats.

Samurai hats are easy to make and even my four-year-old could do them. She ended up making about 15 or so! They were a little "unique" but usable, nonetheless! Here's link to see how to make a samurai hat.


You'll need 32 hats for this arrangement. We made so many, we had enough to make two "quilts"--one for me and one for my sister! The hats are mounted on 18" x 24" piece of Canson pastel paper. You could use mat board, but this is what I had on hand and it is wonderful quality paper and comes in a bunch of colors (and it is easy to measure and cut at home).

This project would make a great class project either for a teacher or for a group auction piece. It's also great for anyone who loves quilts and quilting. It's unusual and a conversation starter! The project took us a night to make two completed "quilts." You could make smaller versions that would fit in a 12" x 12" frame (so three rows of 6 samurai hats) or you could work with the mini origami paper (it's about 3" square) to make cards for your friends.

I hope you try this project and have fun with it and origami! ENJOY!

Sunday, November 2, 2014

Fall Still-life With Glue and Pastels

Here are some pretty still-life creations my after school art class finished up this week. OK, I can use other, more "artsy" words like "dynamic" or "engaging" to describe these, but MAN, are they pretty, too! I've done this project before, and the students are always amazed at how the pieces come out (me too!). This group had students who are in first grade through fourth--so you can see it's pretty accessible to all with the right amount of scaffolding.


I made the mistake, this time, of using clear glue (gel and plain clear) since that's what other art teachers have said they used for this project with great success. I tried it because, in the past, I had found the regular  Elmer's glue can dry a bit cloudy. Anyway, I WAS NOT happy with the results. The clear glue soaked into the paper and ran off as the students were moving them to the drying space leaving drips and blops all offer the classroom and my car (a.k.a. the mobile art studio). It also soaked through the paper and glued the pieces to tables and the seats of my car...(big unhappy face for Mrs. Pettus) ;-)

So, if you do this project--which a HIGHLY suggest you try--use plain old Elmer's. It's fine for this project. So fun and magical (and "pretty")! Check out my previous post about this technique here.

ENJOY!

Saturday, April 5, 2014

Silly Seussical Hats at the PTA Fair!

Today I had a fun time at the second annual PTA Family Fun Fair making silly hats! I had a display about the Art of the Play explaining all of the different jobs or roles that people can do in a play (or behind the scenes) if they have an interest in dance, music, theater, building, drawing, painting, or playing an instrument! When putting on a play, there truly is something for everybody!


Yep, that's me in my silly hat--I wore it all day! I even saw a bunch of people
I went to high school with while wearing it! :-)
I had  originally wanted to have children create masks as a tie-in to the play and costume design. However, I didn't want the children to churn out the same masks or have it cost too much. But I wanted them to have fun and come away with something they designed to wear.

I decided to have the children create silly hats instead (or headbands if you want to be super-technical about it!). These are made from 1" and 2" strips of construction paper (12" long) and staples. That's it.

I toyed with the idea of bringing pom poms, pipe cleaners, feathers, hole punches, and peel and stick foam shapes, stickers, glue sticks, and tape. But I didn't. And it was great!

Some old friends stopped by to create and say "Hello!"
I did, however, make a few hats and pass them around for grown-ups who were working the fair to wear. And I was wearing the one in my pict above that demonstrated a few paper tricks (folding, twisting, linking, curling) and that got them going an showed them some options. I also had a poster showing some paper tricks (pretty much the same as above).

And then I crossed my fingers. Was it too simple? Would anyone want to make a silly hat? I did have a couple children look frightened at me when I asked them if they wanted to make one (kind of a deer in the headlights look!). Gradually, however, children (and some grown-ups) began to create and design.

I really suggest this easy, wonderful project if you have a little time and some paper strips (and a whole bunch of staplers!).

And thank you to the grown-ups who were such good sports!
This hat seriously went beyond anything I could have dreamed!

Some other projects that are like this, appear on these fabulous blogs, so check 'em out!

Seussical Landscapes from Mrs. Knight's Smartest Artists:
http://dolvinartknight.blogspot.com/2014/03/making-art-in-media-center.html

Cut Paper-Collage Hats from Art For Small Hands
http://www.artforsmallhands.com/2010/08/cut-paper-collage-hats.html

ENJOY!

Friday, March 7, 2014

Lenticular Animation Tutorial

As I've said in previous posts, I am trying to use technology in my teaching a bit more. I've been working with the Educreations App for the iPad a bit and really love it (along with Screen Chomp). Both Apps just make explaining things so easy. 
Educreations is free in the App Store
So when I decided to make two lenticular animations for a display I am doing, I thought..."wait a minute, this would be great to explain how to make these!" I've posted about Lenticular Animation before, but it was way back when I first started blogging and my project was pretty complicated. I even had a student get super-frustrated with the whole technical aspect of the project as I had designed in. It had to be easier, and I found a way!

I attended an awesome conference session at the Integrated Arts Conference in Plymouth, NH held by Timm Judas and he explained how to make a Lenticular animation and his way was just....easier.

So here's how it works: Students need to create two images that are on the same size paper but VERY different (that way the transformation is the best). Cutting and gluing needs to be pretty precise, so this is best done with students in grade 5 or above, I think (unless you are working in small groups or one-on-one).

In the video I made, I show you how to make simple Lenticular Animations at home. I'm making two pieces for a display I'll be using at the PTA Math and Science fair I'm attending on Monday night. I'm Integrating art with Science and my Lenticular animations are "One Fish, Two Fish" and "Red Fish, Blue Fish."

Lenticular animation is fun and really has a great "WOW!" factor--even grown-ups are wondering how it's done! So watch my Educreations video and try it out--and please send me an email or post below letting me know how your Lenticular design came out--I love to see what people are creating!

ENJOY!

Friday, January 24, 2014

The Heart Needs ART!

I just got home from a wonderful conference at Plymouth State University on Integrating the Arts. So awesome! I met a ton of great educators. You'll be hearing more about my findings from the conference soon since I'm taking a related course for Grad credit. Now I need to come up with a project that integrates the arts with other subjects in the curriculum...now, if you're like me, I can't teach a lesson without tripping over a dozen standards! So hopefully this integrated arts project will be fun to create!

One thing we did to wrap up the conference was that we each created a "quilt square" from a variety of media that represented something we learned at the conference. Here's mine:


It's a positive/negative space Notan that is meant to show how the arts are related and connected to one another (theater, visual arts, music & dance) and the top triangle represents one of my loves: New Hampshire! It's supposed to depict the mountains of NH--hey, I only had about 15 minutes or so! Maybe I could go as far as to say the top triangle represents the NH Common Core Standards!?! See how the Common Core standards are connected to the Arts? Man, I'm good!

But really, this image is based on something one presenter said: "New Hampshire has a long-standing tradition of a love for the arts!" And another presenter said "The Heart Needs ART!"

I'm happy to be a part such a great profession!

FYI: the quilt squares made by the conference-goers were complied into a larger paper quilt that was displayed at the performing arts center at PSU. What a great idea, huh? Having everyone create a bit of art to get them thinking about what they learned during the day. It was great to see how different all of the squares were.

So make your heart happy--and do some ART!

The 2014 AIC Reflection Quilt

Thursday, October 24, 2013

Fall Compositions With Elmer's & Pastels

Fall is my favorite season and I have been LOVING driving my hour-an-a-half drive up to my Grad School twice (sometimes three times) a week...I pop in a book on tape and enjoy the beautiful fall folliage that New Hampshire has to offer! Ahhhh!


The focus of my after school art class for my 1st-4th graders is "Fall Into Art"--fall-themed art activities...last week, we drew apple still lifes inspired by Cezanne, and this week we took advantage of the nice weather and beautiful fall displays outside the school that had been donated by the Amherst Garden Center in Amherst, NH. The Garden Center had flanked the entrance of the school with pumpkins and gourds, hay bales, scarecrows, and beautiful mums! I couldn't ignore all of the visual stimuli out there ready to draw!

We spent some time looking and touching the displays, then we sketched them. We moved inside and selected one the things from our sketches to "draw" on black paper with Elmer's glue. The students were VERY skeptical when I told them we'd be drawing with Elmer's and you should have seen the surprised looks when I did my demo and piped glue along the lines of my drawing!

I had seen this Elmer's glue/pastel combination online before but had never tried it. I think it would be great for winter snowmen as well...

Anyway, we let the Elmer's glue dry (they rode around for a week in the back of my minivan--the mobile art studio.

The next week, I showed the students how to color in the non-Elmer's areas--the negative space--with the chalk pastels, encouraging them to add highlights and shadows to make their pictures really "pop" and look more realistic. I suggested using my "use at least three colors in each section" rule...

The students were VERY pleased with this new "technique" and, at the end of class, we discussed some other compositions they could use this technique on. The fourth-graders were very specific with their questions about materials: where I purchased the materials, what they are called, how much they cost. They want to make sure the next time they go to Michael's Crafts Store they purchase the proper things so they can do this technique again--THAT (to me) is a sign of a successful art lesson--my students wanted to take something they learned in class and go with it.

Enjoy!


Thursday, June 13, 2013

Easy Paper Name Sculpture For DAD

Yep, Father's Day is right around the corner, but don't fret if you haven't made Dear Old Dad a present yet...here's a fun and easy sculpture you can make for him that will look nice on his desk or toolbox (that's how the dads in our family roll). 


This project is based on one I saw on pinterest that had no destination or info--it was pretty much a picture on the internet. I've tried to do it justice, so here's my version. My early finisher students did this one day after painting some other sculptures. I'd say this project takes less than a half an hour to do if you choose an easy word like "dad."I'd love to have my students create multi-leveled sculptures with their entire names (more letters = a more exciting sculpture), but that's for another time!

Paper Name Sculpture For DAD

Supplies Needed:
  • 3" x 5" index cards, white on both sides (one for each letter of the name you choose)
  • Pencil
  • Scissors
  • Markers
  • Clear Tape
  • Mat Board, we used black
  • Oil Pastels
Directions:

1. Draw nice, thick letters onto the index cards making them as big as you can (touching all edges of the index card, if possible). Cut out your letters with scissors.

2. Decorate both sides of each letter with markers. Use at least two colors on each side of every letter. Try using different patterns and colors for each letter--have fun!

3. Use clear tape to attach the letters to the mat board so they stand up. Make your letters touch and lean against one another, if you'd like. The more letters you have, the more elaborate your sculpture will be. You can even make your sculpture go up vertically if you have enough letters. Think of building this sculpture like you would build a house of cards with a deck of playing cards, but you can hold the letters together with clear tape (bonus!).

4. Once all of your letters are taped where you'd like them, use the oil pastels or craypas to write a message on the base such as "I Love You!" or "Dad Rocks!" The decorate the rest of the base with the oil pastels with swirls, lines, and patterns.

Now you have a colorful sculpture for Dad! Enjoy!


Some students made sculptures with their initials instead.

And this student made a sculpture for his dog, Lulu!

Wednesday, June 12, 2013

Check out these projects...

"Busy, busy," is the lament of the art teacher and mom at this time of the year! I've been running all over doing some super-awesome art projects with kiddos in Kindergarten all the way to 8th grade. I had been shying away from a couple of art projects because they were beyond my comfort level, but I made myself push on and try some projects I really thought would be worthwhile. Here are the projects I tried with my students with my notes on each project. I didn't get photos of any of these since I was very, ahem, engaged due to messes, etc. But check them out...


Kimmy Cantrell slab masks: So awesome and very engaging! I saw this project on Shine Brite Zamorano. I had never heard of this contemporary artist, but once I saw his work I knew my kiddos would love them. 

Pros of this project:
  • Students get to work with clay--yippee! Who doesn't love that!? Learn slab techniques and "scratch and attach" method using slip to adhere clay pieces together
  • Students draw out their masks before creating in clay. Great for them to work from a plan!
  • Students learn about symmetry/asymmetry 
Cons of this project (for my situation):
  • I don't have access to a kiln, so I used Crayola air dry clay. It works well, but it isn't as sturdy as fired clay. I've hot glued finished air dry clay projects to mat board for stability, that helps most times.
  • I needed to transport these between home and school for the drying stage (I don't have a classroom) and I am super-paranoid that something will happen to these in transit or at my home. If you have a classroom, this is a non-issue, I guess.
VERDICT: This is a keeper!

----------

Marbled Paper Journals: I love Mr. E's site so when I saw his super-simple technique for doing Marbled paper using shaving cream and tempera paints, I thought, "I can do this!" I thought the marbled paper would be great as covers for art journals. What a unique keepsake for my "All About ME!" after school art class.

Pros of this project:
  • Students get to learn about marbling and making a book. Wow!
  • Students get to have a wonderful tactile experience with the shaving cream and get to do all sorts of experimenting with drizzling paint and choosing their own color combinations.
  • The shaving cream smells good (teachers from other classrooms kept coming in to see what smelled so good!).
Cons of this project:
  • I had an energetic group that had some, ahem, listening problems. This was a bad idea for them. Many of them would have been happy just playing in the shaving cream. The. Entire. Time. That's fine, but they were playing in the shaving cream that had paint mixed into it and it was dripping on the floors, the tables, their clothes, etc. And then when they "helped" to clean up, the water from the sink somehow poured onto the floor and we had GIANT puddles everywhere. It was a bit of a challenge. So that brings me to my next "con:"
  • This project can be messy if not managed well. I take responsibility for the mess, certainly, but it's pretty bad when I go through an entire roll of paper towels and I have to ask the custodian for a mop and bucket and spray and spend 45 minutes cleaning with said items--and that was one class!
  • This technique is very teacher-focused. I worked with three kids at a time and they made two prints each. This focus made it so some of my rowdy students had some time to wind-up and get into trouble. I felt like I was constantly juggling naughtiness and shaving cream. It was a great stress test! :-) I think I passed, but then I had lots of time to think about it as I cleaned up after class...Mr. E--you are a saint!
VERDICT: Not again.

--------------

Kinder Rainbow Windsocks: I had my final volunteer art session with the Kindergarteners at Clark School in Amherst in May. I had done all sorts of wonderful projects with them using collage, printmaking, and paint (a bit), but I wanted to make the final project special. I knew I had my project when I saw these beautiful rainbow windsocks online at Kinder Craze. The windsocks have paint and streamers to create the most awesome and beautiful windsocks perfect for Spring! But 60+ kids with 6 different colors of paint and 30 minutes? Was this beyond my skillset? I worried, I planned, but it was awesome in the end...

Pros of this project:
  • Paint! Rainbows! Streamers! Need I say more!?!?
  • The children needed to use each of the colors to made large arcs on their papers moving from left to right. Great for hand/eye control, especially since subsequent arcs needed to touch the previous arc. Also, colors needed to be painted in rainbow order.
  • Children saw that a 2D piece of art, could transform into a 3D form: a cylinder
  • Children needed to share the foam brushes and practice patience. I placed a muffin tray in the center of each table with one of the six colors each well. One brush in each color. I had the first person start with red, paint their arc, and then pass the red brush to their neighbor who would paint and then pass the brush to his/her neighbor. This was repeated through the colors. I was worried this would take too long, but it was awesome.
Cons of this project:
  • It uses 6 colors of paint and six colors of streamers, so it would be pricey if you were buying everything for this one project, but we had everything we needed already.
  • Cleanup can be difficult. I had a helper who rinsed my brushes and trays, but I'd allow for 1/2 hour cleanup. It really wasn't all that bad at all. Those Kinders are awesome.
  • It doesn't get done in 1 day. We glued the streamers on first, then painted and then put them on the drying rack to dry. The teachers then formed the pieces into cylinders and stapled them closed the following day. They said it was super-easy (I try not to leave the classroom teachers with anything to do once my visit is done).
VERDICT: This is a keeper!

-------------------

Jean Dubuffet Paper Sculptures: What could be easier-a sheet of white paper, some markers (limited color palette--2-3 colors, plus black), scissors, glue stick and a piece of black mat board--TA DA! Instant art just like Jean Dubuffet. I've had this one pinned for a while now, but never quite had the chance to get to it. Then, in Sculpture class, we had a little free time after painting our Kimmy Cantrell masks (see above) and I thought I'd try this project. I'm glad I did--it was perfect! See a similar project here at Art Smudge.


Pros of this project:
  • Limited supplies (and the supplies needed are inexpensive).
  • Limited teacher involvement--YEAH! This is great for a sub or if you are helping students finish up/clean-up.
  • Children saw that a 2D piece of art, could transform into a 3D form.
  • Allowed for creativity in the lines, pattern, color, and 2D and 3D shapes and forms.
Cons of this project:
  • It is over quickly--I'd say, 1/2 hour from start to finish. That could be a pro, but if you are planning for it to take an entire class session, it's a con.
  • They are relatively delicate. May not make it home on the bus and cannot be stored, really.
VERDICT: This is a keeper!


-------------------

I'm very happy I tried these projects! What projects have you been hesitant to do but, in the end, were glad you did? I'd love to hear about them!

Thursday, April 18, 2013

All About Me: More Faith Ringgold Story Quilts

The other day I started a new series of classes called "All About Me" which is, sigh, not actually about ME, but has children creating artwork inspired by THEM: their portraits, their names, their interests.


With the first project I wanted to do something that would get their imaginations going, so we created quilt squares inspired by Faith Ringgold's "Tar Beach." I had originally posted this lesson here.

This project is great because the main character of the story is the same age as my students (about 3rd grade). In this lesson, the children are asked "where would you fly if you could go anywhere, real or imagined?" This project is a wonderful way to get to know my students--they come up with the best places to fly to! This project originally took two one-hour class sessions with my homeschool kiddos, but I only wanted to devote one class to this project with my after school kiddos. So, I downsized the project a bit. Here's how:

  • For the background, we used 8" x 10" rectangles of mat board 
  • For their drawn image, we used a 6" square of white paper
  • For the area they wrote on, we used a 2" x 6" rectangle
  • The patterned paper pieces, we used 1" squares (as in the other post)
How'd it go?

I was very happy with the process! The prep was easy and the project very portable (that's important since I am an "art-on-a-cart" teacher. We had time to read the entire book, discuss it a bit and then take our time drawing where we would go if we could fly. After the initial discussion, the children just worked along. This was a bit of a larger group than the last time I presented this project (we had 13 Daisy Girl Scouts visiting the classroom), but it was a smooth-running lesson. Some of the children finished about 10 minutes early (we meet for an hour and fifteen minutes). Early finishers could look at quilt-related books or work on quilt coloring pages.

When they were done, I put all of the quilt squares together and magically our finished quilt appeared. Enjoy! 

If I could fly I would go to...
the moon, Atlantis, Hawaii, out for ice cream,
to the beach, to Chihuahua Land, to a horse farm...

Wednesday, April 17, 2013

Inspired By Spring and Alma Woodsey Thomas

I posted a project idea about African American artist Alma Woodsey Thomas awhile back, check out the post here. Thomas was a art teacher for almost 4 decades, became a prolific Abstract Expressionist painter during her retirement, and had her first show at 80 years old! WOW! How inspiring!
Here's the group project: "Sunset Over the Ocean."
For my last Modern Art class with my homeschool kiddos, I thought we'd do a relaxed collage project based on Thomas' work. The children had fun and created some very beautiful pieces. It was also a great opportunity to use up all of those paper scraps I've been collecting all year!

When they were done their personal pieces, they could work together to create a group piece that will be on display at the Grande Finale next month. I love how the group project came out--so different than the one the group in the original post created (and I loved that one too!). Amazing!

Enjoy this one-day, earth-friendly project!

"Colours"

"Falling Fire"

"Falling Leaves"

"Flowering Meadow"

This one had a title,
but he wrote it after I took the picture!
I think the bits are falling stars...

"Color Wave"

Related Posts Plugin for WordPress, Blogger...