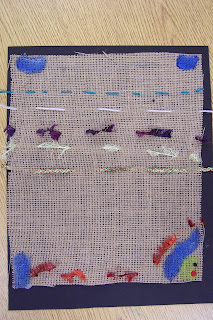
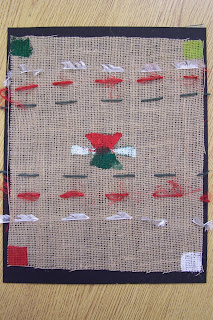
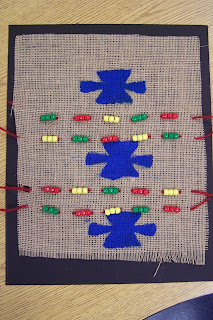
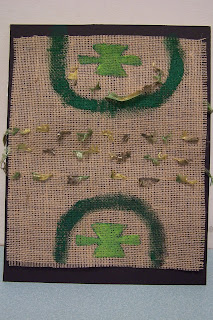
This week I wanted to introduce my after school students to the art of weaving. Weaving many times makes people think of the Native Americans, but I pointed out to the children that almost every culture has some form of weaving: Africa, Mexico, South America, China, and Japan as well as Europe in the Middle Ages.
I gave each student a piece of burlap that had been hot-glued to a piece of mat board. Burlap is great because it has a nice open weave, so it is easy to see the WARP (threads that run vertically) and WEFT (threads that run right to weft, er, I mean
LEFT).
The students can weave yarn into the spaces of the fabric or can gently pull on the weft threads of the burlap and remove them to create spaces where the exposed warp threads can be tied together or larger ribbons can be woven in.
I created an example board for the students to view during my discussion. It shows the following:
First Example:
1. Yellow thread: Single strand woven in one row.
2. Purple threads: Single strand woven into three rows (multiple rows).
3. Multi-colored Fuzzy Yarn: Single strand using large "stitches" so that the fuzzies can be easily seen.
4. Dark Purple Eyelash Yarn: Single Row, large stitches.
5. Burgundy Yarn: Single row with beads and a fuzzy yarn stitched along with it. Stitched in an open area of the burlap where the weft threads have been removed.
6. Burgundy Yarn (2): Single row stitched into the plain burlap
7. Pale green: Single strand woven in a pattern. You could also do X's or other patterns.
 |
| Burlap Weaving: First Example |
Second Example:
8. Ribbon woven into a section where the weft threads have been removed. Ends are tacked down with hot glue on the back of the piece.
9. Section where weft threads were removed and remaining warp threads were gathered and tied. Some with yarn and one with yarn with bead added.
10. Stamping with acrylic paints. Diamonds, squares, etc.
11. Fringe: Fringe created using yarn and an example of fringe created by removing the last few weft rows.
 |
| Burlap Weaving: Second Example |
The possibilities are endless with this. I also provided some acrylic paints and stamps with Navajo motifs that the children could add to their pieces. Here are the step-by-step directions:
Supplies Needed:
- Burlap (I bought ours at a fabric store)
- Mat Board, optional (I glue to top edge of the burlap to the board to keep the whole thing from fraying apart as the children work. The final piece looks more finished this way)
- Hot glue gun & glue sticks
- Assorted yarn and ribbon
- Beads (I used plastic pony beads)
- Scissors
- Plastic needle (easy to thread the yarn through and won't poke little fingers)
- Acrylic Paints, brushes, craft foam, optional
Directions:
1. Cut the burlap to size: ours was 10"x13." The students I have are 3rd and 4th graders and we have an hour and 15 minutes to work, so that size seemed appropriate. Younger students and less time would require a smaller piece of burlap to work with. When cutting burlap, wear eye protection since the fibers may scratch your cornea.
2. Cut a piece of mat board slightly larger than the burlap square: ours was 11"x14."
3. Hot glue the burlap to the mat board along the top edge of the burlap (leave the bottom edge unattached so that the child can work with it).
 |
| Stamps Include a starburst-like shape, diamonds and squares. |
4. If you would like to use the paints to stamp Navajo motifs, do so now. I cut a motif from craft foam and had the children apply paint to the shape with a brush and stamp it onto the burlap.
5. While the acrylic is drying, plan the rest of your design. Choose a few different types of yarn and ribbon to complete your design. Weave the yarn into the fabric using the plastic needle, adding beads if you'd like. If you would like to use ribbon, remove a few of the weft threads first to create an open section. Instead of the plastic needle, we used a safety pin to weave the ribbon into the fabric. You can also sew around the stamped designs, if you'd like.
6. Create fringe at the bottom of your piece by removing the last few weft rows and/or using yarn knotted into the fabric.
This piece is very open to the student's individual creativity. Have fun and encourage self-expression. Here are a few of the examples from today's class. ENJOY!
 |
| The student said this is an "Elvis-inspired" weaving! |
 |
| The student said this is a Christmas-inspired weaving. |
 |
| Lovely Beading! |
 |
| Painting and eyelash yarn create a nice symmetrical image. |


