Showing posts with label middle school. Show all posts

Tuesday, August 13, 2024

Color Scheme Practice: Mandala-Sub Activity Early Finisher

Use this black and white Color Scheme Practice Worksheet as a follow up activity on your color theory lesson. I usually have students complete it AFTER they've completed a practice color wheel.


HOW TO USE:
This worksheet is great for early finishers (I have them hold onto it all semester and work on it whenever they have free time). OR, this could be a great sub activity.

AGE RANGE:

I use this activity with my 7th and 8th graders, but it would be appropriate for high school students. For younger students, check my other listing for a simplified version of this activity (fewer color schemes).


GETTING STARTED:

I usually start it with the students as a demo, and work on it here and there myself to model exectations for the activity.

This pdf also incudes a slide with a partially-colored example and tips for use. This can be used by the teacher or displayed (or printed) for student use.


Go to my Teachers Pay Teachers store for more info: https://www.teacherspayteachers.com/Product/Mandala-Color-Scheme-Practice-Worksheet-Sub-Early-Finisher-12022312

Thursday, August 11, 2022

New Demo Video: How To Use Hot Glue/How To Use a Hot Glue Gun

Hi friends and enemies!

The past couple of days I've spent trying to build some videos for demo purposes. I'm trying to be able to allow my students more independence and autonomy with art room techniques and materials.


Well if you've been following my posts recently, you may have seen this video coming. I've posted videos on using a glue stick and how to use Elmer's glue and here's my final offering: How To Use Hot Glue/How To Use a Hot Glue Gun.

A necessary skill for a middle schooler and for those who have never used a glue gun before. Yeah, there's people out there that DON'T EVEN OWN A HOT GLUE GUN. GASP! I grew up in the 1980's when crafting with glue guns became a thang. I thought everyone had one of these! 

If you don't have one, they are super handy. My kids and I use them all the time for projects. They are especially good for building 3D and for those times when you are too impatient to wait for Elmer's Glue to dry. 

Here's the link for the video on my Youtube channel.

Enjoy!

Monday, June 8, 2020

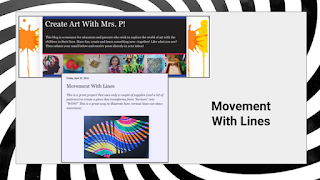
NEW OP ART VIDEO LESSON: Movement With Lines

Hello artists!

During distance learning I created a bunch of videos--I HAD to! Being an art teacher is sooo much easier when you can SHOW people what you are talking about! Some of the videos were just screen recordings I did in Zoom, and my philosophy, at first, was get the videos done to the best of my modest abilities so the students could connect with me and do the work. But towards the end, I started to get a little more fancy. 

Don't get me wrong. I didn't WANT TO learn how to do anything with video. OK, that's kind of a fib. I love to learn, but I had learned SO MUCH new stuff while being home for 10 weeks. So many new programs, so many new ways to get content out there to students (and did I mentione I was home with my four kids?). So many things in my brain!! I really didn't think I handle more or give more of my time.

But, I wanted the videos to be better. So I forced myself to try a video editing program. I chose to go free and online, so I tried out WeVideo. I really liked it! There was a 30 day free trial and I just sneaked this video in at the last minute. It's a how to for my most popular post ever--"Movement With Lines" this post has had almost 120,000 views since 2012.


I was looking back through the blog the other day, saw it, and noticed that in the comments someone had asked if I had a video for the lesson. Ummmm. No. BUT I COULD! I started planning the video out and, guys, I FORGOT HOW FUN THIS PROJECT IS!! Really, I ended up making a few just for fun.

I changed this up for students who were working at home--using index cards as the base for the art since I thought many people would have index cards on hand. I also scaled it down so that it could be done during one of my weekly hour-long Art-a-Long sessions I offered to students and families. If you want to go bigger (or smaller), please do! The original post has students use 8 1/2" x 11" paper and clever teachers photocopy the numbered lines on the back BEFORE having students do the work.

So, here's my quickly cobbled together video for "Movement With Lines." It's not going to win any video awards, but it's out there for the masses. I hope you can use it with your classes, your children and you try it yourself! I promise, it's fun and you can totally do it!

ENJOY!


Friday, April 24, 2020

Distance Learning Lesson: Virtual Museum Field Trip

Hello artists!

One of the first lessons I assigned to my 6-8th grade students when we started Distance Learning was a Virtual Museum field trip. All of my students were sent home with laptops, but nothing else. So while I was figuring out how to teach art without art supplies to students I had never even met--I decided everyone was going to get out of their houses (at lease virtually) and go on a field trip!

So, there were two parts of this field trip: the Google SLIDESHOW and a FORMS the students would fill out about their trip.
Here's the intro slide--Let's go on a field trip!

I gave the students eight choices for museums to visit. My choices were, at first, based on an article I read from Travel and Leisure. When we were transitioning to at-home learning, I was overwhelmed, to say the least. We had a little but of training and then, poof! We were at home. So when I read the Travel and Leisure article, I thought I had read the answer to my dreams!

Once I started reviewing the exhibits Travel & Leisure suggested, I realized that some of the suggestions weren't gonna cut it for my middle school kids. So, I used some of their suggestions and added a few of my own. You could choose TONS of museums, I was just looking for about 8 choices total and they had to be based on Google Arts and Culture AND I needed to get this done ASAP while my four kids were home and I was setting up classes on Google Classroom (which I hadn't really used before and learning Zoom and everything else). Whew! That was 5 weeks ago and it seems like forever!

Once the students clicked on a museum choice on the slide above they were taken to a slide for that museum.
The slide for the Isabella Stewart Gardner Museum

I put a little write-up for the museum on the slide along with a link that will take them to the Google Arts and Culture page for that museum. 


What I like about Google Arts and Culture is that there's so much on a museum's page, like the one for the Isabella Stewart Gardner Museum. There's exhibits, TONS of artwork, street views of artwork, museum views and a link to the museums official site. 

What My Students Did For this Project

I made my students a VIDEO explaining what I wanted them to do with this project. Again, we're using Google Classroom, so the SLIDESHOW and the FORMS (I'll tell you about those in a minute) were uploaded and assigned to them in Google Classroom. 

Here's what I asked them to do:

  1. Look through the slideshow and choose a museum to visit.
  2. Click on the link in the slideshow to visit the Museum's page on Google Arts and Culture.
  3. Poke around. Visit an exhibit. Look at the art. Scroll all the way to the bottom of the page and click on the link for the Museum's website. Check it out!
  4. While you are looking around, set a 15 minute timer. See how many see how many items you can find from the scavenger hunt form. 
  5. Pick two pieces of artwork from your trip--one you have questions about and another that you love. Write about those on the museum response page.
I used the forms from Kitchen Table Classroom. I downloaded them (they're free!) and made them fillable forms on Google Slides. Other options would be just having students use printed versions (we aren't allowed to ask kids to print anything at home--most aren't able to) or you could create a google form where they can fill out the info as they go, etc.

How'd It Go?

Almond Blossom by Vincent van Gogh
Image courtesy of the Van Gogh Museum, Amsterdam, Netherlands

Pretty good! This was the first thing my students did for me and I had never had them in class before (the trimester switched as we were transitioning to online learning). There were some issues, but most of my 6-8th graders were able to complete this project successfully. What I liked about this project is that students were able to select a piece of work that was their favorite and tell me why. This was a nice way to get to know the students!

It was fun to see the work the student chose. Van Gogh was a favorite and so was Diego Rivera. The most often visited museums were The National Museum of Modern and Contemporary Art in Korea, the Van Gogh Museum in Amsterdam and the Museo Frida Kahlo in Mexico. The most often-liked image out of the hundreds they could choose, was Almond Blossoms by Vincent van Gogh.

Do You Want To See What They Liked? 

Some of the surprises that my students said were their favorites.

Sure! Because the artwork was all on Google Arts and Culture, I was able to create an online Gallery of their favorite pieces.This is great because they can see what other students liked and the work can be used for a future project or reflection.

I'm so glad that I had the students "get out" and explore some museums from around the world! If you are looking for a fun lesson to get your students looking at and thinking about art--I hope you give this a try!

Monday, April 6, 2020

Distance Learning: Student Contact Log

Happy Monday!

Our district has been doing distance learning for three weeks and I wanted to share this "Student Contact Log" I created and have been using.

For our students, we need to track a couple of things:

  1. Tasks Assigned (Projects, questions, etc)
  2. Contact we've had with students (Via email, Live class sessions, Personal comments in Google Classroom, and Other)
  3. Grades (we use the online software Empower and a four point grading system)
WHAT I LIKE ABOUT THIS FORM:
I can track all sorts of things, such as: what I've asked from students, what they've done and when I've heard from them and there's a comment area so I can write when I've had to reach out to guidance, or a parent, etc. It's all available at a glance. 


But no matter what you are doing in your school, you may need a system for keeping track of it all. Check out this form and feel free to make a copy and make it your own.

My advice: Just keep it simple. If this is too much (or not enough), then create something even better. We are all under an enormous strain right now. We need to keep things as manageable (read: easy) as possible!

We've got this!


Thursday, March 19, 2020

Using Google Slides to Create a Distance Learning Routine

Ok, maybe it's time to get back to the blog! I've been away for a while juggling full time art teacherin' and living life with my four kids, husband and myriad of pets.

Working from home has just started for me. I'm teaching Art to grades 6-8 art and monitoring the studies of my four children who range from elementary age to high school. I'm a bit overwhelmed, but keeping a semblance of a schedule is hopefully going to help.

In my art in-school class, students are greeted with a slide projected on the whiteboard telling them what they'll be learning today. I thought doing the same for my personal children would be nice--so out came the computer and Google Slides. I've been waking my children up and we have breakfast together at 8:00. We "meet" and go over the day's slide with the plan for the day.
An example of today's slide.
Google Slides makes it easy to create
a slide with images from the internet or your computer.

For my personal children I also have a second slide. This is more of a schedule to show major meetings and appointments that we all need to be aware of. I set this slide up on an ipad in the kitchen and the kids can walk by and "swipe up" to see the slide and check in. I probably check this far more than they do, but my littlest one has enjoyed it.
Slide 2: This is the slide that is displayed during the day
to keep us on track.

Do my children like this? Well, some are tolerating it (high schoolers), and others are pushing back on having a schedule at all (middle schooler!). But my elementary kiddo and I really like it. I cannot possibly keep track of everyone without some sort of schedule. Also, this isn't vacation--at least in my district. I'm still expected to work and my kids are expected to be doing work. It cannot be a free for all.

Will this work for you? Maybe. Maybe not. But I will tell you that this is a HUGE transition and if I can create a sense of normalcy during this time, I will. Keep it simple. This is what I know. If you know someone who home schools already, reach out--home schoolers, we need you! Or find a trusted friend and ask what they are doing. Stay away from the negative people and the ones who say they aren't having their kiddos do anything--that's not going to help you feel any better or come up with solutions for how to work through this time.

Be kind to yourself.
Your house will get messy.
You will feel overwhelmed.
You may get frustrated at times.
You won't always stick to the schedule (especially if you are in the zone having fun or working on a project).

I hope you find this helpful. Please share how YOU manage work and kiddos at home to keep everyone on track--I'd love to hear from you!


Saturday, December 16, 2017

STEAM Project: Mark-Making Machines

Hello!

Are you looking for an engaging project that will provide lots of discussion, movement, creativity and problem-solving with your artists BUT not take for-eh-ver to do? Well, I have a project for you!!

Here are a couple of Grade 8's Mark-Making
Machines with a bit of the display. 

My grade 8 art students began trimester 2 with an exciting art and engineering challenge! I began the activity with a discussion of the most basic art element--the mark. Students discussed and decided upon definitions for "mark" and "machine" and were then challenged to either work individually or in teams to create mark-making machines. Their constraints? The machine needed to use K'Nex building tools (I had a HUGE bucket of them), an art supply from the classroom (paint, markers, pencils, etc.) and use a simple machine (lever, pulley, wheel and axle, wedge, inclined plane or screw).

Students had two class periods to create, test and revise their machines. The process was messy and exciting and really got everyone moving, talking, sharing and working together. A great discussion about "what is art?" ensued as well as a larger discussion of "why?"--as in, "Why are we doing an engineering project in art class?" Students were able to brainstorm skills that they needed in this fun engineering challenge that they would be using this trimester in art class (and throughout their educational career): creativity, resourcefulness, grit, perseverance, working with others, problem solving and more.

By the end of day two, students were required to pass in their machine, an example of the "marks" their machines made (some of the pieces were quite beautiful!) and the video they created of their machine in action (they used iPads to take their videos). I had a hunch that this project would make a great display in our school's lobby so I wanted to make are I had the students give me the "fodder" I would need to showcase these machines!

I was able to create a QR Code for the videos of each of the machines and put them on the finished display, so visitors can scan the QR codes and see the machines in action. Here are a few of the videos for you to see:


This project was a fun way to start of the trimester! ENJOY!!

Monday, November 14, 2016

Looking at a NH Artist: Don Gorvett

Hello!

I never know where I am going to find inspiration for my art lessons! A couple of weeks ago, I was browsing a craft fair in New Hampshire (by myself--Yay! MOM TIME!!) and I was chatting with lots of the artisans there. To one couple, I had mentioned that my 7th graders were learning about relief printmaking and they mentioned they had seen a feature on NH Chronicle about a woodcut artist named Don Gorvett. Of course, I HAD to check it out! Boy, am I glad I did! Don Gorvett, a woodcut artist with galleries in Portsmouth, NH and Ogunquit, ME, does these amazing seaside-themed reduction prints that my seventh graders were in awe of.

Another great video about Don's work is "Moonlight Drawbridge"


I showed this video AFTER my seventh graders had completed a linocut project, so they had a bit of experience from which to view this video and process Don's work. Of course, their pieces were 4" x 6" and done using flexible printing plates I had in my new classroom. In contrast, Don's work is done on large piece of plywood and he sometimes uses up to 8 colors to our humble 1 color. After I showed this video to the students, there was silence. And some of them had their mouths gaped open. Seventh grade! :-) Yipes! 

Anyway, fast forward to the weekend. My hubby and I went away on a 23-hour anniversary celebration and we drove up to the Portsmouth, NH area to see the sites, shop a bit and have dinner at one of my, ahem, OUR favorite restaurants. My husband suggested we go to Don's gallery, and who do you think was there? Don himself, working away. He graciously took time away from his work to talk to my husband and I about his work and gave me some tidbits about being an art teacher and how I can foster a climate of creativity and wonder in my students. I am so glad we stopped in to visit! I also was able to post a picture of Don and me on "The Instagram"--the account I have for my students' work and artsy happenings at our school! Having an Instagram account is new for me, but I am trying (10 followers-YAY!)!
Hanging with Don Gorvett in his Portsmouth, NH studio/gallery.
So, I would HIGHLY recommend looking at Don's work as well as taking the opportunity to show the work of local (to you) artists. This can be done by showing the students real work or artifacts, a video from the Interweb, or a video you made yourself, or having the person come to your school for an artist visit and demonstration. BTW: Cassie Stevens just began a new series on her blog called "field trip" where she takes her students on a virtual video field trip to meet artists. Her first installment features a musician and visual artist named Bebo. Check that out too!

Enjoy!!

Friday, September 16, 2016

Break out the sketchbooks!

My team teacher and I decided to have the students use sketchbooks this year and we are really excited about them. We ordered basic two pocket paper folders with tabs (1 for each 7th and 8th grader) because we felt this was a good option. Using folders is inexpensive and flexible--we were able to use the stacks of newsprint, copy paper, lined paper and graph paper that were in the room already and the folders also have a place for handouts to be three-hole punched and inserted.


We started the first day having students hand letter their names and draw at least three things into the design that told us something about them. I showed them illuminated manuscripts and graffiti for inspiration. I had them use 4x6 index cards and ink and colored pencil. They worked on these for a couple of days and then affixed them to their sketchbooks with glue stick.

We also gave them handouts to keep in their sketchbooks. So far, they have the copy of the art contract we have the students bring home for the parents to sign as well as the "What Will I Learn in 7th (or 8th) Grade?" handout inspired by the Art of Education. See their version here.

We also wanted to have them jump right into drawing in these sketchbooks, so I thought this would be a great time to do Danny Gregory's AWESOME sketchbook activity I learned about during the Art of Education's Summer 2016 Online Conference. Basically, students grab a Sharpie (I know! How permanent!!) and move about the room drawing different things for two minutes a drawing. It was awesome and a very good way to get them to loosen up! Here are some of their pages from the day:


Students were asked to star their most successful piece and explain
in the margin why they thought it was the best.
This was a great activity to break in the sketchbooks. This week students are working on a graphic design piece, so they are adding notes to their sketchbooks, but more sketchbook activities will be coming soon! ENJOY!

Monday, February 1, 2016

7th and 8th Grade Final Projects

A rite of passage in the art room for the middle school students at Amherst Middle School is the final project. Despite its name the project is started pretty early on in the semester because it has a bunch of components to it.

Anthony's project inspired by Roy Lichtenstein

Here's a basic outline:

  • Students are shown a Powerpoint presentation of famous artists and artwork (7th grade focused on the art from 1900-1950; 8th grade focused on 1950-today)
  • Students choose an artist to research
  • Students create a paper/brochure/poster/oral report, etc. about the artist's work and life (details below)
  • Students propose a project to do that is inspired by the artist they researched, but should be personal to them (the sky's the limit here--they can use whatever media they wish, but no copying the artist)
  • Students complete a final project
  • Students write an artist statement about their project
It's quite the process and it really was a wonderful opportunity for me to get to know the students and help them explore a variety of materials. Some of the students struggled with the open-endedness of the project, or with the writing component, and again, it was a great opportunity for me to hone my teaching skills to help each student succeed. I really love these projects and how unique they are! Unfortunately, I do not have photos of all of the projects--that's the problem with doing something like this at the end of the semester--final grading and clean-up take away from documentation, but you get the idea. Students worked in acrylics, watercolor, colored pencil, clay, assemblage and more. We had a great range of 2D and 3D pieces. When I do this project again, I also have some ideas for tweaking it slightly to make it easier for the students to understand and to push them to develop their ideas even further, but it was a great first run for this project--definitely a keeper!

The graphic organizer I created for the students to use for research.
I was hoping a design like this would help them organize the information better
than giving them a list of what was required. 
Here's the final project proposal form they needed to fill out
prior to starting their final project. This gave me a chance to meet with them
and SEE what they were thinking of doing for their final piece.

Beka's piece inspired by van Gogh, I think (it's hard to remember!)

Carrie's piece inspired by Claes Oldenburg

Clayton's helmet and shield inspired by ancient Greece

Hannah's piece inspired by James Audubon

Hunter's house design inspired by Frank Lloyd Wright
(designed on the computer and printed in 3D)

This little house was a lot of work! :-)

Nathan's still life inspired by Paul Cezanne

Nolan's sculpture inspired by Alberto Giacometti

Top: Daniel's piece inspired by Robert Delauney
Bottom: Patrick's piece inspired by modern street art

Trey's piece inspired by Roy Lichtenstein


Friday, January 29, 2016

Happy Birthday, Paul Cezanne! (On January 19th)

In honor of Cezanne's birthday, I thought I would REPOST a popular lesson from 2013 that is fun and easy and is appropriate for a wide range of students. The painting below is my youngest son's and was featured in the book "500 Kids Art Ideas" by Gavin Andrews published by Quarry Books. While this is a nice fall-inspired still life, you could change it to pears or lemons/limes for a more winter or spring theme. Either way, the results are fabulous and the lesson is chock-full of active learning.

-------------------------------

We are all into fall over here and I thought this week would be a nice time to do a still life with apples with my after school art class. This is the first time we've met this school year, and the group has 1st-4th graders in it. I had an idea of what I wanted to do, it's actually a combination of two lessons I saw out there:
My 1st grader's example with Cezanne's reproduction.
I can't show you the still life--he ate it!
(UPDATE: He's now in 3rd grade, but still eats still eats everything in sight!)

"Still Life With Oil Pastels and Baby Oil" (2 posts) from Fine Lines
http://kids-finelines.blogspot.com/2012/04/still-life-with-oil-pastels-and-baby.html
http://kids-finelines.blogspot.com/2012/04/oil-pastels-and-baby-oil-part-2.html

That was pretty much the lesson I used, but I modified my talk in the beginning to be about Paul Cezanne's work showing them "Still Life With Apples."

I then used the talk I found on That Artist Women: "Open vs. Closed Composition"
http://www.thatartistwoman.org/2011/09/open-vs-closed-composition.html

I really like how she shows real art examples in her post. I showed those to my kiddos as well.

Then I gave them time to experiment with arranging the apples (and one girl's donated pear) into closed and open compositions. There were three students to a table and the table needed to agree on a composition they liked best.

And then we were off! I walked them through drawing, demoed how to use the oil pastels and baby oil, and gave a quick watercolor demo.

These are their creations! Beautiful! They are so proud (me too!).

Enjoy!


Related Posts Plugin for WordPress, Blogger...