Showing posts with label cake. Show all posts

Tuesday, August 18, 2015

Sculpture with Grade 5? It's a piece of cake!

The school I was substitute teaching at was celebrating its 40th birthday while I was there. Naturally, I had to have the students create some yummy cake-themed art in celebration! I decided on a Wayne Thiebaud theme for two of the grades. Grade 5 made these awesome 3D papier mache and collage cakes frosted with (get ready) shaving cream mixed with Elmer's glue. Yeah, I know, kind of crazy--but it was AWESOME!!!


Let's get ready to PARTY! Cakes, cakes & more cakes!! YUM!

I got the idea for these cakes from Mrs. Hahn at Mini Matisse and the students had a blast creating these. This was a great project because it used up lots of little bits of paper, sequins, beads and more and allowed the students TONS of creativity. We received so many compliments on them and they truly looked good enough to eat! Definitely a keeper!

ENJOY!!


Friday, March 7, 2014

My SEUSS-ical Bulletin Board


Here's a bulletin board I created for the PTA at the local Middle School. It's my first bulletin board ever (given my art-on-a-cart status), and I'm pleased. I tried to choose Dr. Seuss quotes that would inspire middle school students and catch their eye. Hopefully it works and we drum up some interest in the PTA play coming in April and the cake decorating competition the PTA will be having--so fun!

Wednesday, June 27, 2012

Math & Art & Giant Cake!

Before school let out I was able to squeak in projects with two of the teachers at a local elementary school. I had tons of fun doing both projects! Here's the first...

The first was with Mrs. Nagy and her fourth grade class. We made 3D food sculptures inspired by the work of Claes Oldenburg. My original project idea appears here. But with this class, I limited the children to creating a slice of cake or pie so that we could study the math concepts associated with those shapes.
Mmmm...blueberry swirl cake!

I know, I know, math and art together? SIGH....isn't that going to be a bit, ahem, boring? Not at all! Here's how it's done...

I started with MY favorite part: the ART. I gave a short presentation on the work of Oldenburg and showed some examples of his sculptures.

Then, we focused on my other favorite part of this lesson: the FOOD part. We looked at some yummy examples of Oldenburg's sculptures such as the big soft sculpture of chocolate cake. These portions of the presentation allowed me to talk about art concepts such as sculpture, soft sculpture, form, scale, surface and design. We also discussed placement of art in certain environments.

Then we got down to the MATH portion of the exercise. Don't worry, it's a "piece of cake" to create a piece of cake (come on, I HAD too!)! We created our 3D cakes from a 2D surface: a piece of paper. Our cakes are made from two equilateral triangles and have three square sides. This solid form is called a triangular prism. I brought in some other solids that the children would easily know for comarison: a pyramid, a sphere, a cone, a cube and a rectangular prism.

I had the students begin the construction of their pieces of cake by creating two identical equilateral triangles (one for the top of the cake and one for the bottom). Ours are 9" on each side. The children then figured out how big the sides of the cake needed to be. That led them to create three 9" squares (one for each side of the cake slice). This is where the discussion of height, width and depth can come in.

The children then attached the pieces together using staplers to make "seams" and stuffed their sculptures with crumpled newspaper before sealing the solids up (more info about this can be found in my earlier, related post).

WHEW! Cake slice made! Then, the children happily "decorated" their cakes using tempera paints. It was lovely to see al of the awesome cakes they made: chocolate tortes, red velvet, chocolate cake with vanilla frosting--YUM!

If your group is very comfortable with these math concepts (as was this group), you can try your hand at making a slice of pie. Make the top and bottom equilateral triangles (two 9" equilateral triangles were used by these students), but reduce the height of the sides of the sculptures (ours were 4.5" x 9") because pie is generally not as tall as cake. Proceed as above to create the solid and stuff the sculpture and decorate it accordingly. These students created chocolate cream pie, key lime pie and cherry pie.

This is a wonderful exercise illustrating all sorts of math concepts in an easy-to-understand and enjoyable way. It really does combine art and math perfectly and it's FUN! I hope you are able to try it with your kiddos!
Cherry and blueberry pie--great lattice tops!
(Sorry the photo is blurry, but you get the idea!)

Chocolate torte and black forest pie!

Key lime pie with whipped cream on top! YUM!

Tuesday, April 3, 2012

Claes Oldenburg Giant Food Sculptures

I just started my latest after school art class and the theme is Modern Art! I'm so excited! I love Modern Art and children usually do too. For our first class, I wanted to do something that was fun and allowed for a good amount of creativity, so I chose to have the children create giant food sculptures similar to those by Claes Oldenburg. I had a HUGE roll of medium weight paper that was given to me from a printing company and it was easy to work with and didn't get flimsy when painted with tempera paint. 
Ummmm...I think I'm gonna need a bigger plate!

I began by showing the children some examples of Oldenburg's famous sculptures such as the huge soft sculpture chocolate cake he created. I had also created my own version of it (chocolate cake with white frosting, sprinkles and a giant birthday candle on top) that was about 3 feet tall so they could really see what I was saying about LARGE food. I brought the templates in for them to create a slice of cake (like Oldenburg's) or a slice of pizza (very simple to do), but the children had ideas of their own so I decided to go with it and let them create whatever food they wanted to. We had quite a selection: popsicles, chocolate bars, a cheese wheel, cupcakes and more!

I think next time, if I do this with a larger group, I would stick to the same food--have them ALL do a slice of cake or a slice of pizza, but it worked out and I think the children learned so much about constructing 3D forms. I could see this project also being linked cross-curriculum to math and have the children create a slice of cake and then figure out, mathmatically, what size paper they need to go around the sides of the cake slice. I'll need to explore this more....

Claes Oldenburg-Inspired Giant Pizza Slice

Supplies Needed:

  • Medium weight paper (large sheets or a roll of paper)
  • Scissors
  • Ruler
  • Newspaper or paper scraps to stuff the form
  • Stapler with staples
  • Tempera paint, assorted colors
  • Paint brushes
  • Water bucket, paper towels
  • Paper scraps, optional, for pizza toppings, etc.
  • Glue sticks and Elmer's glue, optional
Directions:

1. Cut two triangles from paper for the top and the bottom of the pizza slice. They should be the same size. Our triangles measured 24" x 24" x 18" but that is approximate.

2. Layer the two triangles on top of one another and staple along the two 24" edges, through both layers. Leave the 18" edge open, creating a pocket.

3. Crumple up newspaper, lightly, and stuff the pizza slightly, to give the pizza slice some dimension. Leave about 4" unstuffed at the end (you'll be making the pizza crust with it).

4. Roll the 18" edge of the pizza slice inward a couple inches to create the pizza crust and secure with a couple of staples. You now have a giant slice of pizza!

5. Use tempera paints to paint the crust, sauce and cheese on your slice of pizza. While it dries, you can use paper scraps to create toppings.

6. When the paint is dry, attach the toppings to your pizza slice with glue OR just paint toppings on with additional paint.

YUM! Let's eat!

Giant Wheel of Cheese

Super-Giant Chocolate Bar

Yummy Cupcake
(This size looks like a regular serving for me!)

Giant Taco! Olé!

Tuesday, March 6, 2012

SHARK! A Dollar Store Birthday Party

My littlest guy turned 5! He's a firecracker, and he decided he wanted a shark party (mostly because he saw a shark cake dripping fake blood when I was browsing online). SIGH.

I was excited to make a shark cake, but the kids and I created a few other things for the party that you might like. I have Pinterest to thank for many of them! Many of these supplies can be found at the dollar store.

The cake:


My family loves to watch the Cake Boss. I took cake decorating classes but the Cake Boss has really made me step up my cake decorating style! So, in true Cake Boss style, I shaped Rice Krispie Treats into the shape of a Shark's head, covered it with a light coat of frosting and then covered that with fondant tinted pink, white and grey. I added teeth and black bits for the nostrils and eyes. Then I put that on top of a 10" round of strawberry cake (little guys' choice) and covered the cake in bluish frosting. Voila! Great White lunging out of the water! (I was asked "Where's the blood?" since mine was gore-free--Hey, I didn't want to freak out the four- and five-year-olds that were going to be in attendance!)


Shark Attack Cake--Just like Little Guy Wanted
(OK, minus the blood)
Decorations:
Shark jaws: Made from dollar store paper plates! I couldn't believe this when I saw it! Easy, inexpensive and fast! And the kids LOVED them! We got many a picture of the kids holding scary shark teeth! I saw this idea on www.dollarstorecrafts.com.

Shark Jaws made from paper plates and view of the Table Runner
(After this photo was taken I set the table with plates and napkins, etc. )

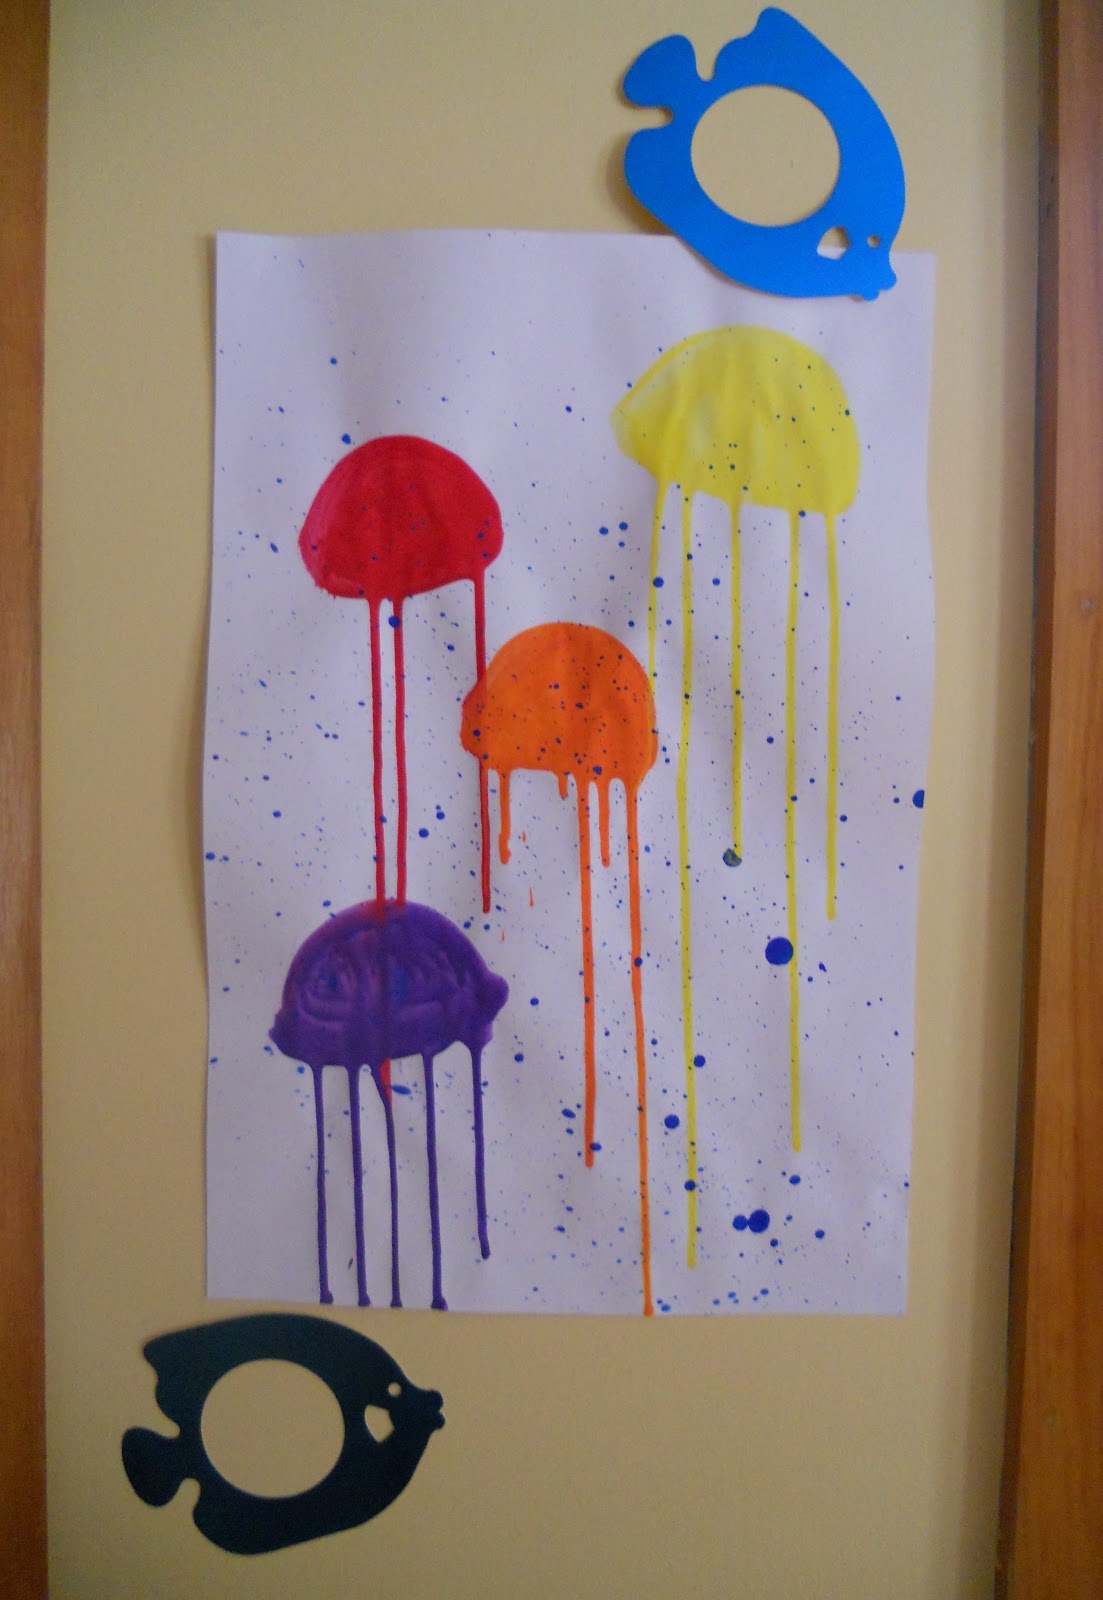
Wall art: I saw the jellyfish pictures on a favorite art blog of mine: "For The Love of Art" and I thought they were so pretty. I made a few of them, hung them on the wall and added some blue metallic fish shapes I bought at the dollar store.
My version of the jellyfish pictures don't do this art activity justice--
go to "For The Love of Art" to see the originals.
Table runner: We used tempera paints in a variety of colors with a big paint brush to make waves along a piece of paper from a roll. We then stamped on a few shark shapes cut from craft foam to give that "sharks are circling" effect.

Goodie Bags: I kept these simple since the children were making some crafts. I stamped a shark fin on the side of each and added blue "waves" from the scraps of the table runner. I then included a Star Wars coloring book (little guy's choice), a set of colored pencils, a couple of lollipops and a bag of Swedish fish (all from the dollar store). I put each child's name on his/her bag and as s/he would finish a craft I'd pop it in the corresponding bag.

Printmaking and Eric Carle-inspired waves!

Crafts:
Shark clips: I saw these on Pinterest originally and had to do them with the kids. They took no time at all and the children loved them (the four-year-olds as well as the ten-year-olds loved them!). I drew them on card stock, had the children color them in and hot glued them to clothespins (card stock and clothespins are from the dollar store).

Easy to make and fun!
T-shirts: OK, I didn't get the t-shirts from the dollar store, but I did get them from the craft store on sale for 4 for $10. I had originally wanted to have the children create shark t-shirts like one I saw in Family Fun Magazine years ago, but ran out of time to do the prep work necessary. So, I let the older kids design their own shark inspired t-shirts using clear contact paper and sprayable fabric paint. I purchased the clear Contact paper at the dollar store and one roll was enough for 8 t-shirts. The older kids went with a "Shark Attack" theme with their shirts. For the little ones, I cut shark head shapes from the contact paper and the little ones got to spray and draw on their shirts with fabric paint.


A shark coming up from the deep to investigate a swimmer...

This isn't going to end well...

This shows the empty shark cage and the shark with feet sticking out of its mouth.
YIPES! I assure you these are by well-adjusted children!

And the "Rest of the Story..."
I was also able to get "Happy Birthday"-themed paper products at the dollar store (cups, plates, napkins) as well as streamers, and balloons. They weren't "Shark"-themed, but were bright and colorful!

All-in-all I think the party went well! And little guy said he had a wonderful time hanging out with his friends!

Related Posts Plugin for WordPress, Blogger...