Showing posts with label party. Show all posts

Thursday, December 6, 2012

Pinterest Party 2012!

My friends are too busy to get together over the holidays. They work, they have children, they have large families with lots of commitments. Me too, but sometimes going without seeing or talking to my friends for two months, or so, is too long! Friends are what help me get through all of that everyday stuff and offer me a bit of comic relief--and I certainly need that when I'm up to my eyeballs in "to do's" and tinsel!
Look at this LOOT!
I mean, look at all of these presents I was able to make...
I could have had a cookie swap, but I didn't want the stale cookies or calories. I could have had a gift swap, but that didn't seem right either. So, I had a Pinterest Party. Here's how it worked:

How It Works:
I invited 7 of my crafty friends. I asked that they choose an easy, gift-worthy craft from Pinterest, make a sample of it and bring the supplies needed to make 7 more. Making a sample beforehand let us know what we'd be making and allows the person to work all of the kinks out beforehand. I asked that they only spend $20-$25 total for all of the supplies necessary to make their craft. Then, the plan was for us to all get together, eat, drink and craft and go home with one of seven different crafty gifts.

I also asked that they bring a snack, drink or dessert from Pinterest to share.

What I Did To Prepare:
Along with making my own craft, I made sure I had a few tables on hand for us to craft on (instead of my one little dining room table). It's great to have some basic supplies like a hot glue gun, scissors, glue sticks, extra ribbon in various sizes and colors (I just grabbed my ribbon bin) and tape. Having a cleaning spray, paper towels and dustpan and broom easily accessible will also help when you need to tidy between projects.

I think next year I will have a gift bag station for wrapping the gifts and a dedicated place for people to put their gifts as they finish them (maybe a large gift bag or grocery bag with handles).

I also set up a group board on Pinterest and invited all of my guests to pin their craft and food item so that, after the party, we'd have access to the directions and recipes, if needed. Our Board is here.

The Projects:
Wow! I was so thrilled at the diversity of the projects! Here's what we made:

  • Alcohol Ink Coasters (set of 4)
  • Birdseed Wreaths
  • Mason Jar Soy Candles
  • Terrariums in a Glass Ornament
  • Desktop Dry Erase Board
  • No-Sew Lanyards
  • Washer Necklaces

We took turns having the person who brought a specific project lead the rest of us through it in a mini tutorial. We learned so much about so many different types of crafts and we were able to try things that we might otherwise have never done.

Working on the No-Sew Lanyards
The Food:
YUM! Too many good things and WAY too much food! But I enjoyed working my way through the buffet! I had coffee and tea on hand as well as juice spritzers. One of my good friends brought eggnog from a local dairy. These are some of the recipes from Pinterest that were there (Check out the Pin Board for the links/recipes):

  • Pumpkin Whoopie Pies
  • Candy Cane Dip With Apples & Oreos for dipping
  • Asian Slaw With Ginger-Peanut Dressing
  • Buffalo Chicken Enchilada Roll-ups
  • Goat Cheese Stuffed Bacon Wrapped Dates
  • Seven Layer Bars
  • Hummus & Salsa with veggies and chips, etc.

Some of the coasters drying--these really brighten up
after they are sprayed with the sealant.
Some Thoughts:
If you think you'd enjoy a Pinny Party, do it! It was fun and it's great to come away with lots of little gifts for giving. It does take some advance planning since you have to give your guests time to come up with an idea, try it at home, and shop for the supplies to create enough for your guests.

We had allowed three hours for the party (from 1:00-4:00 on a Sunday afternoon). That really wasn't enough time. Have your guests think of how they can prep some of their supplies ahead of time to save time and try to keep each project to about 1/2 hour. Limiting the guest list to 4-6 can help with time, but who wants to limit the guest list too much! Maybe if the party is held a bit earlier in the year (mid-November?) and there are two evenings of crafting (3-4 projects and evening) then that would allow for more time and more fun. But I wouldn't try to hold a party with two sessions in December--much too crazy!

But I LOVE the projects we made and I'm worried I won't be able to part with them! I'm so thrilled I was able to spend time with my friends and have some crafting therapy! I may not be entirely ready to face the holidays, but when things get stressful, I'll try to remember the good time I had with my friends this weekend.

And a present for our feathered friends, too!

Tuesday, March 6, 2012

SHARK! A Dollar Store Birthday Party

My littlest guy turned 5! He's a firecracker, and he decided he wanted a shark party (mostly because he saw a shark cake dripping fake blood when I was browsing online). SIGH.

I was excited to make a shark cake, but the kids and I created a few other things for the party that you might like. I have Pinterest to thank for many of them! Many of these supplies can be found at the dollar store.

The cake:


My family loves to watch the Cake Boss. I took cake decorating classes but the Cake Boss has really made me step up my cake decorating style! So, in true Cake Boss style, I shaped Rice Krispie Treats into the shape of a Shark's head, covered it with a light coat of frosting and then covered that with fondant tinted pink, white and grey. I added teeth and black bits for the nostrils and eyes. Then I put that on top of a 10" round of strawberry cake (little guys' choice) and covered the cake in bluish frosting. Voila! Great White lunging out of the water! (I was asked "Where's the blood?" since mine was gore-free--Hey, I didn't want to freak out the four- and five-year-olds that were going to be in attendance!)


Shark Attack Cake--Just like Little Guy Wanted
(OK, minus the blood)
Decorations:
Shark jaws: Made from dollar store paper plates! I couldn't believe this when I saw it! Easy, inexpensive and fast! And the kids LOVED them! We got many a picture of the kids holding scary shark teeth! I saw this idea on www.dollarstorecrafts.com.

Shark Jaws made from paper plates and view of the Table Runner
(After this photo was taken I set the table with plates and napkins, etc. )

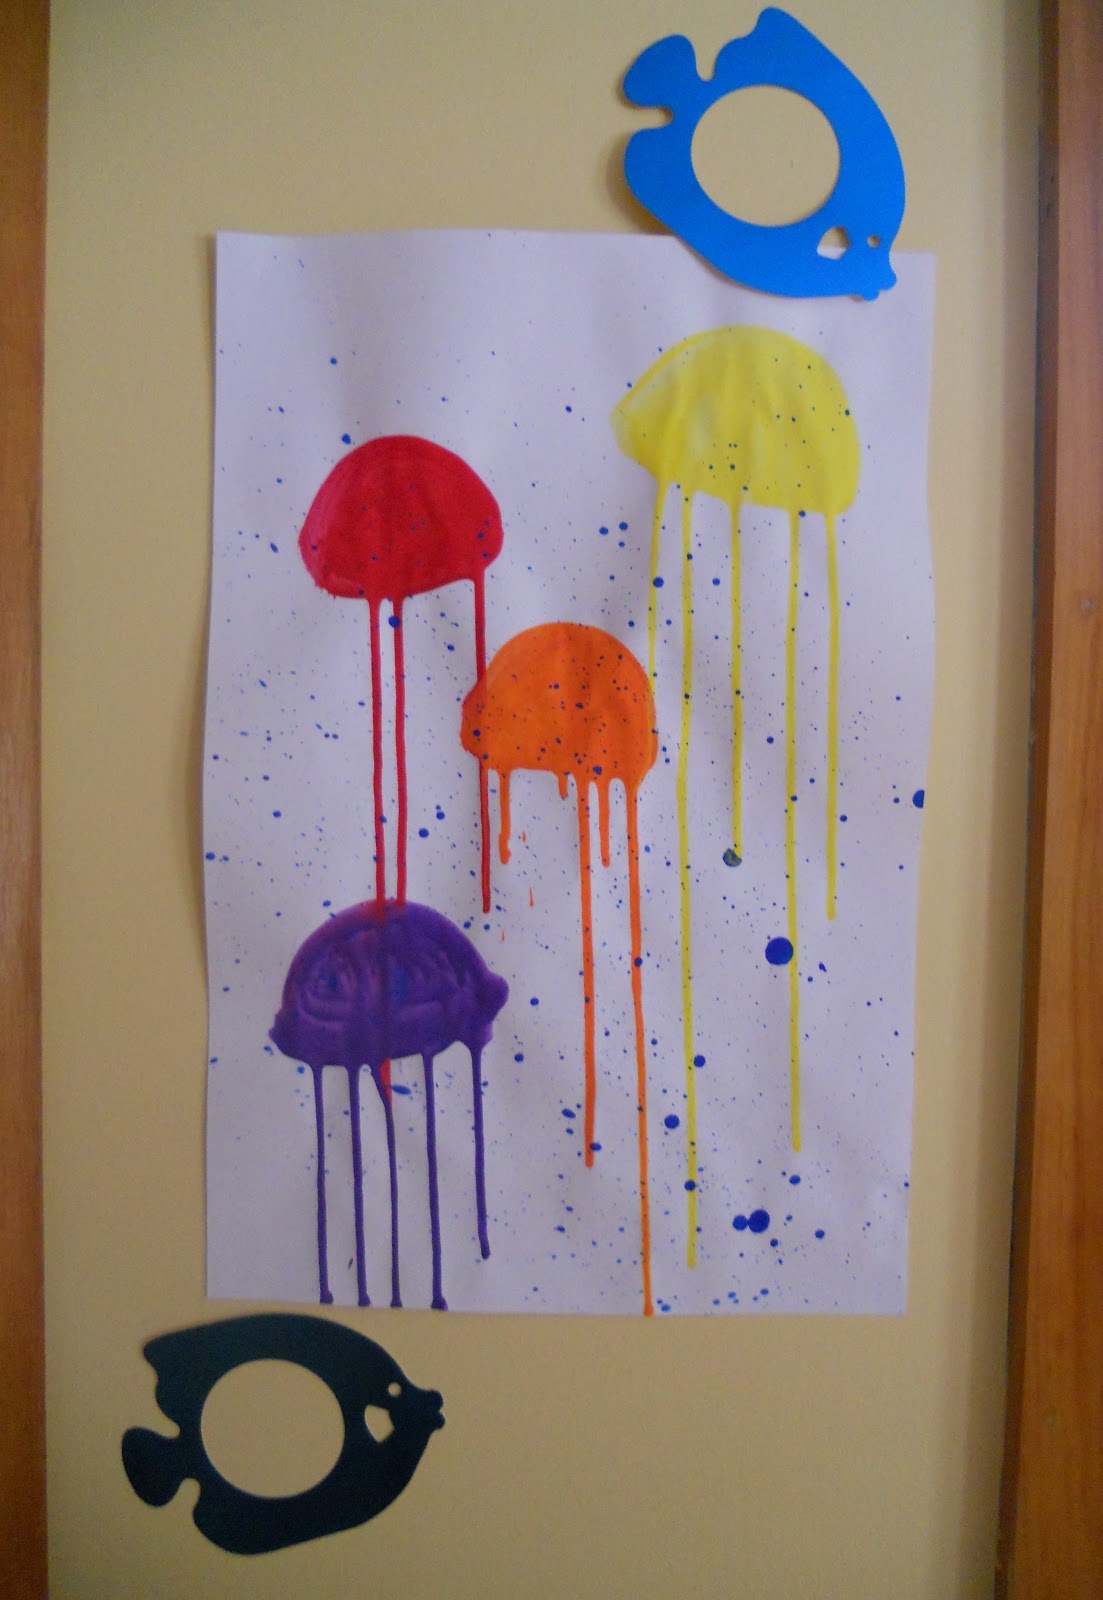
Wall art: I saw the jellyfish pictures on a favorite art blog of mine: "For The Love of Art" and I thought they were so pretty. I made a few of them, hung them on the wall and added some blue metallic fish shapes I bought at the dollar store.

My version of the jellyfish pictures don't do this art activity justice--
go to "For The Love of Art" to see the originals.
Table runner: We used tempera paints in a variety of colors with a big paint brush to make waves along a piece of paper from a roll. We then stamped on a few shark shapes cut from craft foam to give that "sharks are circling" effect.

Goodie Bags: I kept these simple since the children were making some crafts. I stamped a shark fin on the side of each and added blue "waves" from the scraps of the table runner. I then included a Star Wars coloring book (little guy's choice), a set of colored pencils, a couple of lollipops and a bag of Swedish fish (all from the dollar store). I put each child's name on his/her bag and as s/he would finish a craft I'd pop it in the corresponding bag.

Printmaking and Eric Carle-inspired waves!

Crafts:
Shark clips: I saw these on Pinterest originally and had to do them with the kids. They took no time at all and the children loved them (the four-year-olds as well as the ten-year-olds loved them!). I drew them on card stock, had the children color them in and hot glued them to clothespins (card stock and clothespins are from the dollar store).

Easy to make and fun!
T-shirts: OK, I didn't get the t-shirts from the dollar store, but I did get them from the craft store on sale for 4 for $10. I had originally wanted to have the children create shark t-shirts like one I saw in Family Fun Magazine years ago, but ran out of time to do the prep work necessary. So, I let the older kids design their own shark inspired t-shirts using clear contact paper and sprayable fabric paint. I purchased the clear Contact paper at the dollar store and one roll was enough for 8 t-shirts. The older kids went with a "Shark Attack" theme with their shirts. For the little ones, I cut shark head shapes from the contact paper and the little ones got to spray and draw on their shirts with fabric paint.


A shark coming up from the deep to investigate a swimmer...

This isn't going to end well...

This shows the empty shark cage and the shark with feet sticking out of its mouth.
YIPES! I assure you these are by well-adjusted children!

And the "Rest of the Story..."
I was also able to get "Happy Birthday"-themed paper products at the dollar store (cups, plates, napkins) as well as streamers, and balloons. They weren't "Shark"-themed, but were bright and colorful!

All-in-all I think the party went well! And little guy said he had a wonderful time hanging out with his friends!

Friday, February 11, 2011

St. Valentine's Day--Little Scribblers

So, St. Valentine's Day always gets my creative juices going since I need to come up with something for my kids to give away at school and I usually volunteer to send in a craft for the kids to do during their parties.

So, my criteria for both are: cheap, easy & fun (usually something that lasts and doesn't get thrown away the minute it arrives in the house).

One of my sons is giving away pencils with cute little bee toppers I picked up a few months ago at a discount store. We taped mini granola bars to them to make them "more." I think they are cute, but they weren't the first choice of the kids. Unfortunately, I didn't have enough supplies to make the "Little Scribblers" that the other son is taking to school to hand out. "Little Scribblers" are bits of old, broken crayons melted down in a muffin tin to create swirly, beautiful chunks of colored wax that children can scribble with.

I first made the "Little Scribblers" many years ago when my first son was about 2 years old. He was in the habit of peeling the paper off of his crayons and breaking them. Frustrating for mom! I felt as though he was wasting them, but then I found a recipe for "Scribble Cookies,"* as one author called them. I was able to repurpose the broken bits and made a batch of colorful crayon chunks for him to use.

I was reinspired by Family Fun Magazine, when I saw that they published a recipe just like it, and suggested making the cookies in heart shapes to give away for St. Valentine's Day. Ah-ha! I could do that! The kids were very excited and I started peeling, chopping and melting our old crayons.

But alas, the Scribblers take a good amount of old crayons so I only was able to make enough for one class (with a few to use at home).

"But wait," you say, this is a craft for a little kid--like a preschooler. "My children would never use this!!" I disagree. This craft is awesome on many levels.

First, it recycles something that everyone with children has a bucket of already in their homes.

Second, you can do this with your children. Anytime you can sneak some family time or one-on-one time into your life is a bonus. You can talk with your kids while they peel the crayons and my littlest boy (who is three), used a safety knife and his little hands to break the pieces of crayons up.

Third, it facilitates a discussion of colors. Warm colors, cool colors, colors that mix well and those that don't mix so well! As your children are plopping the crayon pices into the muffin tins, they are learnng about color theory. You could whip out a color wheel to show them if they are older.

Fourth, they are fun to use for little and big kids! While my 3yo just scribbles along all over the paper, my older kids use them to make multi-colored mohawks on the people they've drawn or make awesome sunsets on pictures (the scribblers are great to fill in large areas of drawings). They are also good to use when making rubbings. Children can study textures by placing different elements such as bubble wrap, leaves, coins, etc. under a white piece of paper and rubbing over the area with their Little Scribblers.

Wonderful! Something that looks beautiful (wait 'til you see how the Scribblers look when you pop them out of the pans with all of their swirly colors!), reuses something I was gonna throw out anyway, and inspires creativity!

Enjoy!
Mrs. P

Here's the link to the recipe on the Family Fun site:
http://familyfun.go.com/crafts/crayon-hearts-671639/?CMP=NLC-NL_FFUN_Crafts_021011_crayon-hearts

If the link above doesn't work, go to www.familyfun.com and search for "crayon hearts"

*I've looked around for the source of the Scribble Cookie recipe in my stacks of books, but I'm unable to find it at this time. I'll keep looking and credit the author when I find the info.
Related Posts Plugin for WordPress, Blogger...