 |
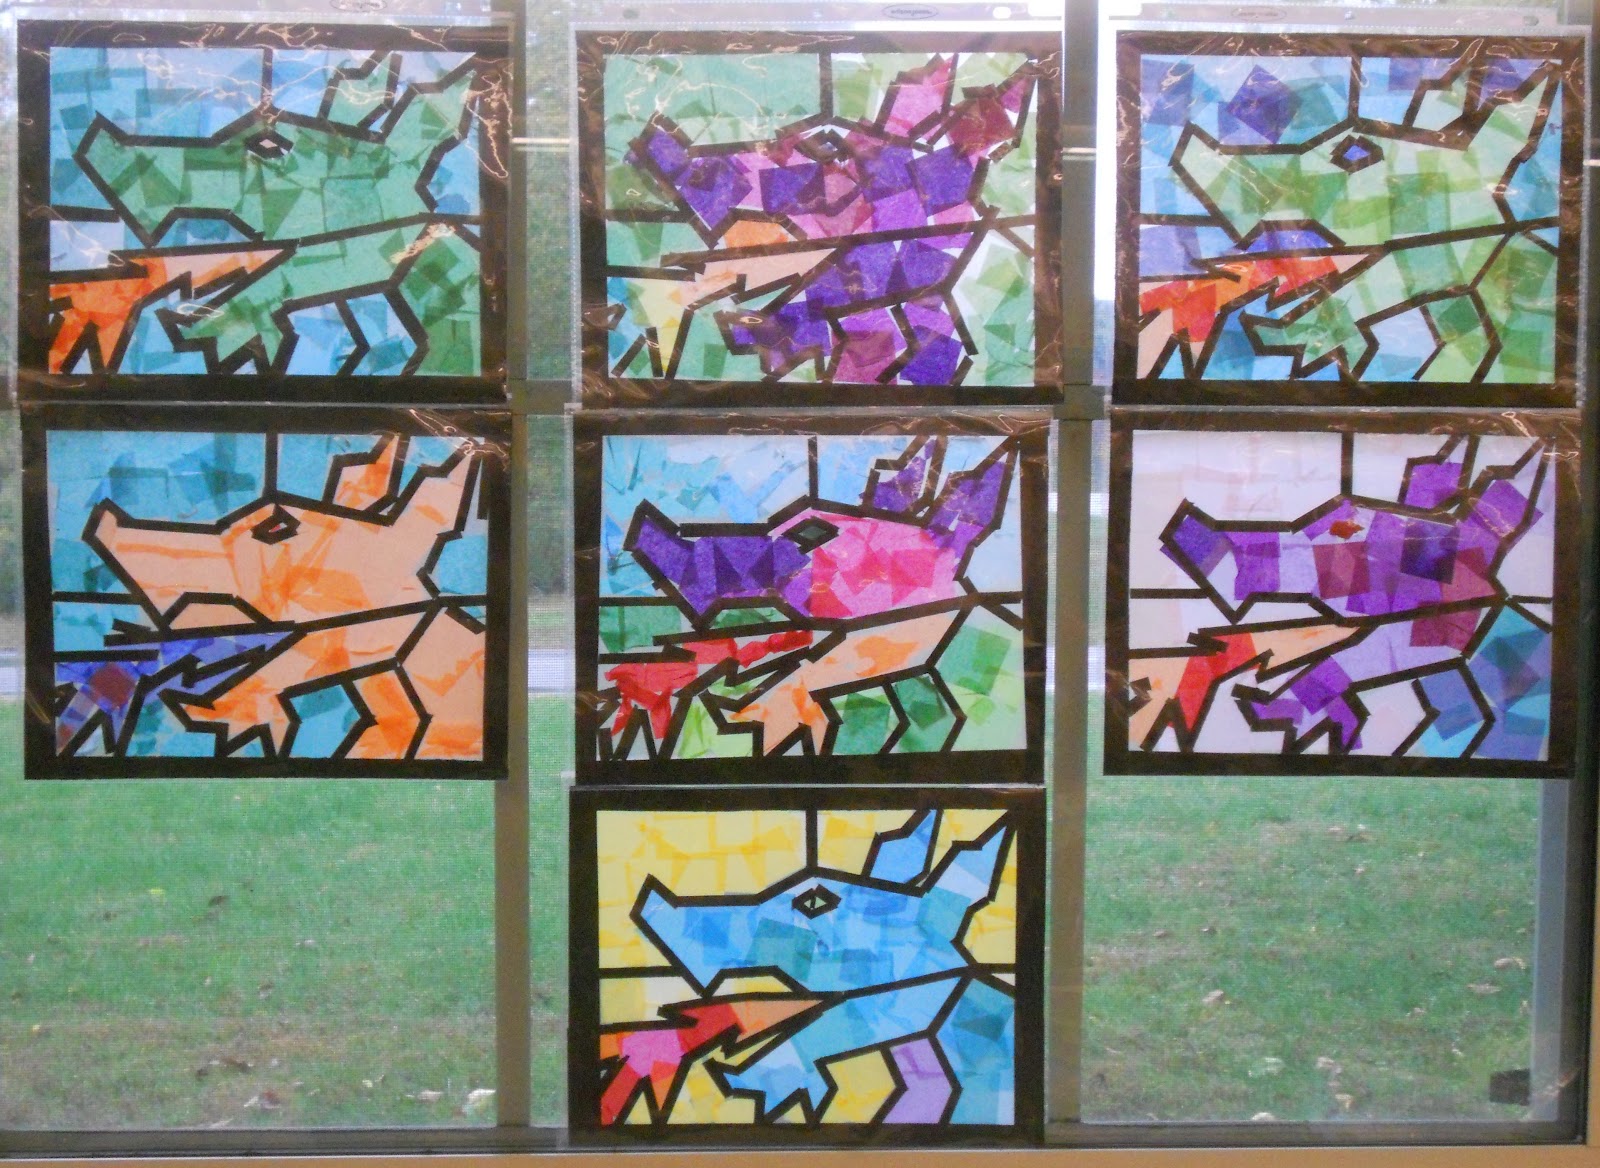
| Aren't these fabulous?! |
I showed the children pictures of stained glass from medieval times, making sure that I had examples of traditional stained glass (tall and rectangular), some details showing the brushed-on enamel details, and an example of a rose window with its circular design.
I then provided them with a guide that had the dragon image on it with all of the sections labeled so the children would know what was fire, what was dragon and what was background (sometimes that gets confusing). Using a template like this is actually very traditional. In medieval times artisans would sketch the designs for windows onto wooden panels and the artisans would fabricate the windows on top of the wooden templates.
The end results of this project were gorgeous! It is funny how different the pieces can be even thought they are all the same subject.
One bit of warning, using tissue paper squares with children can be, um...tricky. This group wasn't bad at all: I had the tissue paper squares in a tray in the center of each table and I warned that crazy movements can cause the squares can fly up and get on other people's work (not cool!). Once the tissue paper is on the Contact paper, it cannot be removed, so the children need to be mindful of their neighbors' pieces and move slowly and carefully.
I do hope you try this project, it really is a cool one!
Here's the method:
Dragon (Faux) Stained Glass
Supplies Needed:
- Template (I copied mine on 8 1/2" x 11" paper)
- Pencils, Ruler & Sharpie to create your template
- Piece of clear Contact paper slightly larger than your paper guide
- Clear tape
- Four 3/4" x 12" strips black construction paper "(for frame)
- About four 1/4" x 12" strips black construction paper "(for leading)
- Many 1" squares of tissue paper, assorted colors
- Scissors
- 1 clear sheet protector, optional
Directions:
1. Make your template: Draw a border around the copy paper that is about 1/2" wide. Use the pencil & ruler to create a simple, bold image made up of straight lines. Don't make anything too detailed! You can use the dragon image for inspiration. Once you have your design down, use the Sharpie to go over the lines. These will be the guide lines you will use when placing your construction paper leading. You may want younger children to work from a template image you've created, but older children could create their own over a period of classes.
2. Tape the template to the table using clear tape.
3. Remove the paper backing from the Contact paper and place it on top of the template sticky side up. You will be doing all of the work on the sticky side of the Contact paper. Tape the Contact paper to the table using a couple pieces of clear tape to hold it in place while you work.
4. Place the 3/4" pieces of black construction paper over the areas of the template designated as your border. Place the paper strips directly onto the sticky side of the Contact paper and press lightly. It is OK if the strips extend beyond your template--you'll be trimming the piece later.
5. Using your template as a guide, place the 1/4" strips of construction paper over the leading lines on the image you drew. Simply rip (or cut) the construction paper strips to the proper length to cover your leading lines. Cover all of the lines in your drawing.
6. Once you have the border and all of the leading lines covered in construction paper, start filling in the remaining sections with colorful pieces of tissue paper. The squares can overlap each other and can overlap the black construction paper lines a bit (you are actually working on the piece from behind). But take care to make sure the tissue paper goes where you want it to. It is almost impossible to remove the tissue paper from the Contact paper once it gets on there.
7. Once all of the sections are filled in with color, trim the piece down to 8 1/2" x 11" and slip it into a clear sheet protector to protect it. Other options would be to use another sheet of Contact paper on the other side of the piece to seal the tissue paper and construction paper safely inside. Or you could run the piece through a laminator (maybe), I don't have one at my disposal, so I'm not sure of that, but it may work.
Place in a sunny window and enjoy!
 |
| Working on our dragon (faux) stained glass windows. Everything is taped down with clear tape and the tissue paper squares are in the center of the table in cardboard trays. |


