My Modern Art Class created some lovely faux stained glass windows based on the work of American architect, Frank Lloyd Wright. I've done this project with students before, and the process can be seen in this post.
This time, I tweaked my presentation a bit. I showed a large poster of Fallingwater, one of Wright's most famous houses. I talked about what an architect does, and about Wright's design philosophy. We made some observations about the building and I pointed out the horizontal, vertical & diagonal lines of the building (later on, I showed how these same lines appear in his stained glass windows).
Then we discussed how Wright was, um, a bit of a control freak when it came to his interior designs. He designed every little pillow, lamp, rug and even the dishes that would go into the house. We looked at some of his stained glass window designs. I was fortunate to have a great article that I have had FOREVER, well, since 1995 anyway, that appeared in American Patchwork & Quilting Magazine about a quilter named Jackie Robinson, who recreates Wright's stained glass windows in fabric. This is an awesome article because it shows how she constructs the quilts and really helps the children see the windows broken down into sections; leading vs. glass, and shapes such as squares, rectangles, rhombi, and triangles. I think this article really helped me simplify his work for the children.
I tried to access the article through the American Patchwork & Quilting's official site, but they didn't have it available. However, Jackie Robinson has her own site called Animas Quilts Publishing. Robinson had published an entire book of quilt designs based on Wright's stained glass windows titled, "Quilts In The Tradition of Frank Lloyd Wright." It is currrently out of print, but there are a few copies still floating around out there. There is a Frank Lloyd Wright section of her site showing examples of Wright-inspired quilts made from her book.
So, here are the beautiful results of my Frank Lloyd Wright lesson! Enjoy!
This blog is a resource for educators and parents who wish to explore the world of art with the children in their lives. Have fun, create and learn something new--together!
Showing posts with label leading. Show all posts
Friday, December 7, 2012
To Brighten Your Day: Frank Lloyd Wright Windows
Labels:
animas quilts,
architect,
collage,
diagonal,
elementary,
faux,
frank lloyd wright,
glass,
horizontal,
jackie robinson,
leading,
line,
middle school,
modern,
paper,
quilt,
shape,
stained,
tissue,
vertical
Wednesday, October 3, 2012
Dragon (Faux) Stained Glass
Yesterday was the first session in my after school Medieval Art Class! What a blast! I have a great group of kids and a nice mix of boys and girls!
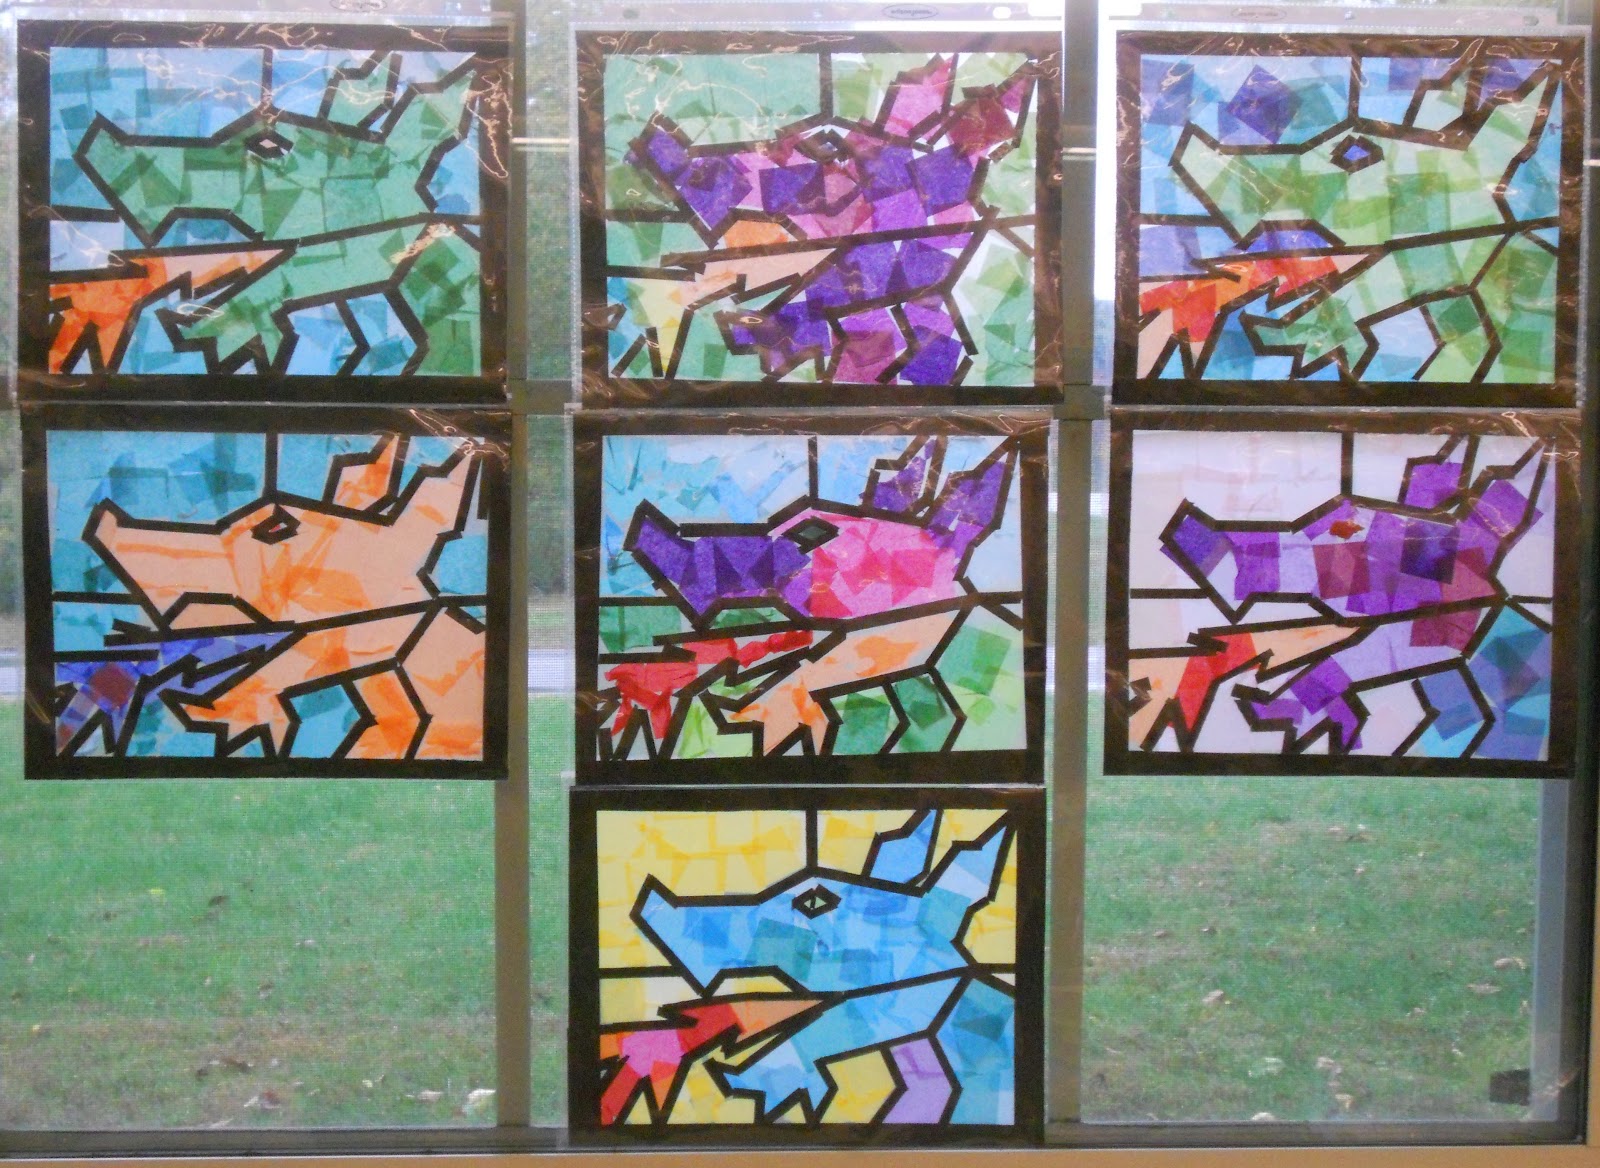
We did a variation on a project I saw in the book, "Medieval Projects You Can Do" by Marsha Groves. The image is pretty much the one Groves uses, but I used the Contact paper technique that I've developed with my students over the last couple years.
I showed the children pictures of stained glass from medieval times, making sure that I had examples of traditional stained glass (tall and rectangular), some details showing the brushed-on enamel details, and an example of a rose window with its circular design.
I then provided them with a guide that had the dragon image on it with all of the sections labeled so the children would know what was fire, what was dragon and what was background (sometimes that gets confusing). Using a template like this is actually very traditional. In medieval times artisans would sketch the designs for windows onto wooden panels and the artisans would fabricate the windows on top of the wooden templates.
The end results of this project were gorgeous! It is funny how different the pieces can be even thought they are all the same subject.
One bit of warning, using tissue paper squares with children can be, um...tricky. This group wasn't bad at all: I had the tissue paper squares in a tray in the center of each table and I warned that crazy movements can cause the squares can fly up and get on other people's work (not cool!). Once the tissue paper is on the Contact paper, it cannot be removed, so the children need to be mindful of their neighbors' pieces and move slowly and carefully.
I do hope you try this project, it really is a cool one!
Here's the method:
Dragon (Faux) Stained Glass
Supplies Needed:
| Aren't these fabulous?! |
I showed the children pictures of stained glass from medieval times, making sure that I had examples of traditional stained glass (tall and rectangular), some details showing the brushed-on enamel details, and an example of a rose window with its circular design.
I then provided them with a guide that had the dragon image on it with all of the sections labeled so the children would know what was fire, what was dragon and what was background (sometimes that gets confusing). Using a template like this is actually very traditional. In medieval times artisans would sketch the designs for windows onto wooden panels and the artisans would fabricate the windows on top of the wooden templates.
The end results of this project were gorgeous! It is funny how different the pieces can be even thought they are all the same subject.
One bit of warning, using tissue paper squares with children can be, um...tricky. This group wasn't bad at all: I had the tissue paper squares in a tray in the center of each table and I warned that crazy movements can cause the squares can fly up and get on other people's work (not cool!). Once the tissue paper is on the Contact paper, it cannot be removed, so the children need to be mindful of their neighbors' pieces and move slowly and carefully.
I do hope you try this project, it really is a cool one!
Here's the method:
Dragon (Faux) Stained Glass
Supplies Needed:
- Template (I copied mine on 8 1/2" x 11" paper)
- Pencils, Ruler & Sharpie to create your template
- Piece of clear Contact paper slightly larger than your paper guide
- Clear tape
- Four 3/4" x 12" strips black construction paper "(for frame)
- About four 1/4" x 12" strips black construction paper "(for leading)
- Many 1" squares of tissue paper, assorted colors
- Scissors
- 1 clear sheet protector, optional
Directions:
1. Make your template: Draw a border around the copy paper that is about 1/2" wide. Use the pencil & ruler to create a simple, bold image made up of straight lines. Don't make anything too detailed! You can use the dragon image for inspiration. Once you have your design down, use the Sharpie to go over the lines. These will be the guide lines you will use when placing your construction paper leading. You may want younger children to work from a template image you've created, but older children could create their own over a period of classes.
2. Tape the template to the table using clear tape.
3. Remove the paper backing from the Contact paper and place it on top of the template sticky side up. You will be doing all of the work on the sticky side of the Contact paper. Tape the Contact paper to the table using a couple pieces of clear tape to hold it in place while you work.
4. Place the 3/4" pieces of black construction paper over the areas of the template designated as your border. Place the paper strips directly onto the sticky side of the Contact paper and press lightly. It is OK if the strips extend beyond your template--you'll be trimming the piece later.
5. Using your template as a guide, place the 1/4" strips of construction paper over the leading lines on the image you drew. Simply rip (or cut) the construction paper strips to the proper length to cover your leading lines. Cover all of the lines in your drawing.
6. Once you have the border and all of the leading lines covered in construction paper, start filling in the remaining sections with colorful pieces of tissue paper. The squares can overlap each other and can overlap the black construction paper lines a bit (you are actually working on the piece from behind). But take care to make sure the tissue paper goes where you want it to. It is almost impossible to remove the tissue paper from the Contact paper once it gets on there.
7. Once all of the sections are filled in with color, trim the piece down to 8 1/2" x 11" and slip it into a clear sheet protector to protect it. Other options would be to use another sheet of Contact paper on the other side of the piece to seal the tissue paper and construction paper safely inside. Or you could run the piece through a laminator (maybe), I don't have one at my disposal, so I'm not sure of that, but it may work.
Place in a sunny window and enjoy!
| Working on our dragon (faux) stained glass windows. Everything is taped down with clear tape and the tissue paper squares are in the center of the table in cardboard trays. |
Monday, April 9, 2012
Frank Lloyd Wright Faux Stained Glass
Last week my after school class created Frank Lloyd Wright-inspired stained glass windows. I showed them a variety of his stained glass designs and then let them explore line, shape and pattern to create their own stained glass designs. They looked wonderful on the windows with the bright spring sun shining through!
Frank Lloyd Wright-Inspired Stained Glass Windows
Supplies Needed:
Frank Lloyd Wright-Inspired Stained Glass Windows
Supplies Needed:
- 1" Grid template, optional (more info below)
- Clear Contact paper (2 sheets 18" x 12")
- Black construction paper strips, some 1" wide and some 1/4" wide, 18" long
- Additional black construction paper for circles or other non-linear shapes
- Scotch tape
- Scissors
- Ruler
- Pencil and eraser
- Tissue paper, various colors
Directions:
1. This piece is worked from the back. I created a grid template for my students to use that had 1" squares on it. I used two sheets of 8 1/2 x 11" paper taped together. This is a nice space to work on encouraging the students to use the grid for their pieces. Some disregarded it and others really utilized it for the creation of their designs. I had each student tape a template to their desk.
2. I then had the students remove the paper film from the Contact paper and lay that on the grid template sticky side up. This is the surface on which the window will be created.
3. I had the children place 1" wide black construction paper strips around the outside of the grid gently pressing them onto the Contact paper. This creates the frame for the window.
4. I then had the children create a Wright-inspired design over the grid using 1/4" wide strips of black construction paper. This is the leading of the stained glass window. I explained that the lines can be horizontal, vertical or diagonal. Also, the intersection of the lines can make shapes such as squares, rectangles, triangles and rhombi. Circles and portions of circles could also be added.
I told them that they did not need to fill the entire window with lines and shapes (look at Wright's work) . I also kept encouraging them to take their time and plan.
5. Once their leading was done, I took a quick look and then demonstrated how they could add color to their piece. Some of the more geometric shapes could easily be cut from tissue. They could use the grid to help: if they had a shape that was 2 squares by 3 squares on the grid, they could cut a 2" x 3" rectangle from tissue paper. For younger students or for shapes that were trickier to cut from tissue, I suggested the children tear off pieces and just fill in the section with "bits" of tissue. The tissue easily sticks to the Contact paper. I told the children it is OK if the tissue paper extends onto the black lines a bit since this is the back of their window and that won't be seen when it's done. I suggested that the children not fill the entire piece with color since Wright often left portions of his windows clear.
6. Once the children had added all the color they wanted I adhered a second piece of Contact paper over their work creating a sandwich to seal the tissue and construction paper inside. I've done a similar project to this using just one sheet of Contact paper and it doesn't hold up as well as the "sandwich" of two pieces of Contact paper).
7. The children could then use their scissors to cut the excess Contact paper from around the piece using the outer edge of the frame as a guide.
Subscribe to:
Posts (Atom)