Showing posts with label craft. Show all posts

Thursday, November 13, 2014

Love printmaking? Try these lessons!

I've rediscovered printmaking over the last month or so. I love printmaking because it is easy and can be done on the cheap. Well, sort of. The process is always so fun for the students and the results are magical--I love to watch them "ooh" and "aah" over their prints!

Well, here's a round-up of some past printmaking lessons from my site that may have you rocking and rolling with your students!

Matching Mittens with Found Object "Snow" Prints

USING FOAM TRAYS:
Reduction Prints (Using Styrofoam trays and found objects)
Andy Warhol Self Portraits (Using Styrofoam trays and a pencil to "carve" an image)
Reduction Print Selfie (Using Styrofoam tray and gradually removing portions of it between inkings)

USING CRAFT FOAM:
Haunted Houses (Using sticky-backed foam shapes)
Fall Banner (Using foam shapes to make stamps--can be changed for any theme or season)

FOUND OBJECTS AS STAMPS:
Create Your Own Stamps (Using found objects and wine corks to make your own stamps)
Matching Mittens and Snowflakes (Cut paper mittens with found object "snow")
Focal Point Fruit Prints (Using an apple or pear to print--exploring focal point too).
Leaf Prints (This is mine, it's from Deep Space Sparkle, but it is my go-to early finisher activity in the fall).
Modern Day Adinkra Cloth (Using stamped symbols on sections of card stock that are joined together into one "cloth")
Spring Forsythia Still Life (Using pieces of sponge to make a lovely arrangement of forsythia blossoms)
Not-So-Scary Dancing Skeletons (Uses doggy bone treats for unique stamps)

USING YOUR HANDS:
Andy Warhol Hand Prints (Seriously one of my most popular posts, but not mine--from Artolazzi--so easy!).

And one of my all-time popular posts--
Quick Andy Warhol Hand Prints

Tuesday, September 17, 2013

Colonial Leather Jugs and Mugs With Printable PDF

When I was with my family at Plimoth Plantation, I saw a craftsman making these neat jugs and mugs entirely from leather. I didn't actually see any of the people at Plimoth Plantation using these, but the leathersmith said that he was relatively new there and starting to supply the Colonists with these.


In the background you can see one of the mugs that haven't been dyed.
The mug in the foreground still needs the inside finished.

Here's the bottom view of the colonial leather mug.
See how there are two rows of neat stitches--this is all done by hand!
He had them in various stages of completion, they are cut from leather, sewn by hand, colored using a variety of dyes, the insides are then coated with a pitchy substance and they are ready-to-go! This was an interesting project and I thought my students (and my children) would like a variation of this.

The leathersmith suggested I check out Tandy Leather for kits for my students, and there sure are a bunch of kits on their site, though I didn't see a kit for making a leather mug. I'm just not sure that we are ready for real leather just yet.

So, I thought of an easy, inexpensive alternative that will get my students to understand the idea of crafting this product, along with the cutting, punching and sewing, that the real process has, but without the expense of buying leather and fancy tools. They can even use this project afterwards! You know they'll be excited about that!


So, here it goes:

Colonial Faux Leather Mug

Supplies Needed:
  • 1 9" x 12" piece of brown craft foam
  • 1 9 oz paper cup (I bought mine from Walmart as a pack of 10 for $.78)
  • Template pdf (hopefully this template uploads well below!) *needs to be printed on 9"x12" paper, so download the file and have printed on larger paper and trimmed-sorry for the waste! 
  • Pencil or pen
  • Scissors
  • Masking tape, optional
  • Small hole punch (mine is 1/8")
  • Hot glue gun, optional
  • Braiding cord or any thin, strong cord you can sew with
  • Metal needle in which you can tread the cord through
Directions:

1. Print out the template on 9" x 12" paper (sorry, that is the size paper that matches the craft foam sheet). And that's the size that works with these standard size paper cups.

2. Cut out the cup body and the bottom circle from the paper. Punch holes in the paper template using the hole punch wherever you see a little circle.

3. Place your prepared template onto the craft foam, I hold it in place with a couple rolls of masking tape. Use your pencil or pen to trace around the outside of the template. Before you remove your template, make sure you trace around the inside of the mug's handle.

4. Use scissors to cut the cup body and the bottom circle from craft foam. Cut out the inner shape of the handle and discard. These pieces would have been cut from thick, tanned leather in Colonial times.

5. Use the hole punch to punch holes into the craft foam, using your paper template as a guide. Hold the template and the craft foam together and punch through both layers. The leathersmith would have used a tool that looks like a multi-pronged wheel with a handle and roll it along the leather to make little pin pricks nice and even along with path he wanted to sew. Then he would take a sharp metal awl and poke through the leather, making a hole every place he wanted to stitch.

6. This is where I do something that is not-so-Colonial, but helpful for little sewers (you can skip this step, if you'd like). Fold the cup body in half, and line up the handles. Use a couple dabs of hot glue to hold the two layers of the handle together, making sure that you aren't getting hot glue in any of your sewing holes. Make sure you only tack near the sewing holes--don't glue to cup totally together! This will hold the cup body together for you to begin sewing, so you don't have to manage holding the pieces and sewing stitches at the same time. Older kiddos won't need this step, probably.

7. Take a length of cording and knot it at one end. Hide the knot inside the two layers of craft foam and begin sewing the two layers of the handle together. Sew around the handle and down the side of the mug (it will look like an uppercase letter "D"). Leathersmiths would use strong string they imported from England and other parts of Europe to sew the pieces of the mugs together by hand. I'm not sure of the stitch they used, but I used a running stitch.

8. Position the bottom of the mug and, using the photos as a reference, begin sewing around the bottom edge of the mug. Make these bottom stitches snug, but don't pull too hard or you will pull the cording right through the craft foam.

The bottom view of my mug.
9. When you are done, knot your thread and hide the knot inside the mug, if you can. You can secure the knot with a little hot glue, if you'd like. I know, not very Colonial, but bear with me! Colonial leathersmiths would now dye the outside of the leather mugs. The dyes are made by putting metal shavings in vinegar. Once that has oxidized overnight, the dye is painted on. The mug continues to patina as it is used. 

10. Slip a paper cup into your craft foam mug. With this design, the rim of the paper cup is visible. I did this because I wasn't sure that children should be putting their mouths on the craft foam, with this design, the child's lip touches the paper cup. Obviously, this mug should NOT be used for hot liquids, this project is for fun. Colonial leathersmiths would now pour a thick, tarry substance inside the mugs to make them watertight, thankfully, we are using a paper cup that should be watertight already!

Enjoy your handmade faux leather mug!

Wednesday, August 14, 2013

Survey Says: CLAY!

I'm going to be returning to my teaching schedule soon and wanted to poll my previous after school students to see what they wanted to see more of in the coming year and the media that won was: CLAY!

This is probably no surprise to some of you, but this means I am going to make a serious effort to include some awesome clay projects with this year's classes! This does take a bit of planning since I don't have a kiln--this means air dry clay it is. I have some plans for Model Magic, Crayola Air Dry Clay, and plans to test a couple of new (to me) air dry clays on the market. Any suggestions?

Another downfall: drying space. Since I'm "art on a cart" I don't have space to store the items safely where I teach while they dry. That means I pack all the clay items up, load them in the car and bring them home to dry until the next class. This stresses me out! I worry that one of my kids will get into them or the dog will knock them over. I'm come up with some good ways to transport and store clay creations in progress, but it will be nice when I don't have to worry about moving them.

So, without further ado, I repost this lovely "Forever Sandcastle" post I did awhile back. The lesson is from Family Fun magazine and is really fun for the children to make. Make one yourself and enjoy those summertime memories all year long!

Whip up a batch of air dry sand clay
to make a forever sandcastle of your own!

Friday, August 24, 2012

Rockin' Robins


In Art/Nature Camp, we talked about birds. We went on a hike and I gave each of the children a homemade pair of binoculars to help them with their bird watching. As we hiked around we looked for signs of birds and, of course, actual birds. Signs of birds included: bird droppings, nests, bird feeders and bird houses. I had a couple of bird identification books on hand in case we spotted birds.


Rockin' Robins--simple and fun!
We discussed what makes a bird:
  • Have bills, but no teeth
  • Have feathers
  • Hatch from eggs
  • Have wings (but not all can fly!)
  • Have hollow bones
  • Breathe oxygen
  • Are Warm blooded
And then we talked about the parts of a bird:
  • Head (with two eyes and a bill)
  • Body (with feathers)
  • Two Wings (more feathers)
  • Two Legs and Feet
We then created Rockin' Robins. This is an easy craft that is inexpensive to make. The resulting bird easily rocks back and forth--it's up to you to sing, though! My students and my children particularly loved hearing me sing "Rockin' Robin" to them (poor guys!).

Rockin' Robins

Supplies Needed:


  • One lightweight paper plate
  • Pencil
  • Crayons (brown and red are what we used)
  • Scraps pieces of brown and yellow construction paper
  • Scissors
  • Glue stick
  • Eyeball stickers (optional, you could use white paper and draw two eyes)
  • Feathers
  • 5" piece of yarn
  • Tape
Directions:

1. Write your name on the side of the paper plate you would eat off of.

2. Fold the paper plate in half with the name on the inside.

3. Open up the plate and color a 1" wide border of red around the entire plate. This will be the robin's red breast and belly when the bird is finished.

4. Color the center circle of the plate brown. This will be the robin's back when the bird is finished.

5. Cut a triangle of yellow construction paper for the beak. Attach to the underside of the plate at one of the fold lines for the beak of the bird.

6. Add two eyes to your bird. I found some neat eyeball stickers in the supply closet at PMEC, but you can cut them from construction paper.

7. Cut two brown wings from construction paper and glue to each side of the bird.

8. Glue feathers to the wings and at the tail end of the bird.

9. We taped a piece of string to the underside of our birds to keep the two edges of the plate from moving apart (and make it so the robin was able to rock back and forth).

The underside view of the Robin, showing the yarn
that we taped to the bottom to keep it from flattening out.

Sing the song as your Robin rocks out!

Rockin' Robin (Excerpt)
Originally performed by Bobby Day


He rocks in the treetops all the day long
Hoppin' and a Boppin' and a-singin' his song
All the Little Birds on Jaybird Street
Love to hear the robin goin' "Tweet, Tweet, Tweet!"
Rockin' Robin
Tweet, Tweet, Tweet
Rocking Robin
Tweet, Tweet, Tweet
Go Rockin' Robin 'cause we're really gonna rock tonight!


Tuesday, June 26, 2012

Dollar Store Flip Flop Collage Craft

I live in my flip flops during the summer (and have the tan lines on my feet to prove it!). So when I saw this cute project on Artrageous Afternoon, I knew it would be great for my Recycled Art class, but also just plain fun, too! 

You'll "flip" for this summertime craft!

First, we traced my flip flops onto lightweight cardboard (we used poster board). Make sure you make two flip flop soles--one for each foot! We also cut out some 1" x 8" strips of card stock for the straps of the flip flops (you'll need 2 strips per flip flop).

Then, we decorated our flip flop "soles" by using strips of magazine paper to fill up the background and then cut neat summery images from magazines to show our summer plans or what we love to do during the summer. I encouraged the children to cover the entire surface of the sole--I didn't want to see any cardboard showing through.

We used hole punches to punch holes in the straps and the sole of each flip flop and then secured them together with one of those metal fasteners (mine were leftover from another project, but you can get them at craft stores and some office supply stores). We secured the other ends of the straps to the underside of the soles with tape.

Lastly, we hot glued our flip flops to a piece of sandpaper (a pack of 12 is $1 at the dollar store) to make our flip flops on a sandy beach. So fun!!


Wednesday, May 2, 2012

Inspiring Art Books: "Only One You," by Linda Kranz

I'm an avid reader and I'm always looking for ways to create a multi-layered experience in the art classroom: music, movement, looking at a real piece of artwork, performing a play, etc. I also like to bring in books to share. This is kind of tricky since I have a short period of time to teach and I don't want to spend the whole class reading a book AND some children want to get creating when they get to my classroom (and won't sit still for me to read an entire book)....BUT, nonetheless, I keep trying!


Sometimes I show them the pictures (illustrations) from the book and comment about the images and then while the children are working I actually READ the book to them. This seems to be what works right now with my students.

Anyway...I heard about this great little book and it is perfect for an art project! "Only One You," by Linda Kranz, is a wonderfully colorful book full of great litle nuggets of wisdom. The story itself is of a mother and father fish imparting words to live by to their son, Adri. The illustrations are simple and combine underwater photo backgrounds with rocks painted to look like fish. But these aren't the fish you are used to--they are painted with tons of bright colors and patterns--the artwork is truly inspiring! And don't miss the endpapers (the paper on the inside of the front and back covers), they are filled with little sayings that are great and are good reminders to us all.

Of course, you could paint rocks to link to this book, but I thought a project I saw on Art Moments could be tweaked a bit and work nicely.

Only One ME Paper Plate Fish

Supplies Needed:

  • Paper plate
  • Pencil and eraser
  • Scissors
  • Glue stick and Elmer's glue
  • Sharpie or other black permanent marker
  • Colored markers (we used Crayola washable markers)
  • Large sheet of blue construction paper (12" x 18")
  • Green and brown construction paper
  • The book, "Only One You," for inspiration!
Directions:

1. Cut away a triangle shape from one side of the paper plate to create the fish's mouth. Glue the triangular piece you removed onto the side of the fish opposite the mouth to represent the fish's tail (see photo).

2. Use the pencil and draw an eye, lips, and a fin on your fish.

3. Look at the book for inspiration and discuss line, pattern, color, etc. With younger children, you may want to have them practice drawing lines and patterns to get their creative juices flowing. Use the pencil  to divide the areas of the fish into different patterns. The sky's the limit!

4. Once the fish is all patterned-up, have the child draw over the pencil lines with a permanent black marker (if you use a washable marker for this, it will bleed later on). Erase the pencils lines after you've inked the entire fish.

5. Fill in the areas of the fish with color using the markers. Everyone's fish will be different, and that's the point! Make sure the fish is nice and colorful!

6. Have the child rip green and brown paper for the seaweed and ground and adhere them to the blue construction paper background using a glue stick. I used Elmer's glue to adhere the fish to the background.

7. You could add another layer to this project by having the child either write his/her name in a speech bubble coming from the fish's mouth OR have the fish be imparting a bit of wisdom. The children can make up their own bit of advice or use one of the quotes from inside the end pages of the "Only One You" book such as: "Enjoy Every Day."

Another great idea for this project would be to create a bulletin board with all the fish from one class. Decorate the bulletin board with blue paper and add seaweed and a ground from ripped construction paper. Then add a special quote from the book or one that has particular meaning to your class and arrange all of the fish around the quote.

No matter how you do this project, it is a great way to learn some of the basic elements of art while allowing children to express their individuality. The words of wisdom will also spark quite a bit of discussion, no matter what age group you try this project with. Enjoy!

Tuesday, April 3, 2012

Claes Oldenburg Giant Food Sculptures

I just started my latest after school art class and the theme is Modern Art! I'm so excited! I love Modern Art and children usually do too. For our first class, I wanted to do something that was fun and allowed for a good amount of creativity, so I chose to have the children create giant food sculptures similar to those by Claes Oldenburg. I had a HUGE roll of medium weight paper that was given to me from a printing company and it was easy to work with and didn't get flimsy when painted with tempera paint. 
Ummmm...I think I'm gonna need a bigger plate!

I began by showing the children some examples of Oldenburg's famous sculptures such as the huge soft sculpture chocolate cake he created. I had also created my own version of it (chocolate cake with white frosting, sprinkles and a giant birthday candle on top) that was about 3 feet tall so they could really see what I was saying about LARGE food. I brought the templates in for them to create a slice of cake (like Oldenburg's) or a slice of pizza (very simple to do), but the children had ideas of their own so I decided to go with it and let them create whatever food they wanted to. We had quite a selection: popsicles, chocolate bars, a cheese wheel, cupcakes and more!

I think next time, if I do this with a larger group, I would stick to the same food--have them ALL do a slice of cake or a slice of pizza, but it worked out and I think the children learned so much about constructing 3D forms. I could see this project also being linked cross-curriculum to math and have the children create a slice of cake and then figure out, mathmatically, what size paper they need to go around the sides of the cake slice. I'll need to explore this more....

Claes Oldenburg-Inspired Giant Pizza Slice

Supplies Needed:

  • Medium weight paper (large sheets or a roll of paper)
  • Scissors
  • Ruler
  • Newspaper or paper scraps to stuff the form
  • Stapler with staples
  • Tempera paint, assorted colors
  • Paint brushes
  • Water bucket, paper towels
  • Paper scraps, optional, for pizza toppings, etc.
  • Glue sticks and Elmer's glue, optional
Directions:

1. Cut two triangles from paper for the top and the bottom of the pizza slice. They should be the same size. Our triangles measured 24" x 24" x 18" but that is approximate.

2. Layer the two triangles on top of one another and staple along the two 24" edges, through both layers. Leave the 18" edge open, creating a pocket.

3. Crumple up newspaper, lightly, and stuff the pizza slightly, to give the pizza slice some dimension. Leave about 4" unstuffed at the end (you'll be making the pizza crust with it).

4. Roll the 18" edge of the pizza slice inward a couple inches to create the pizza crust and secure with a couple of staples. You now have a giant slice of pizza!

5. Use tempera paints to paint the crust, sauce and cheese on your slice of pizza. While it dries, you can use paper scraps to create toppings.

6. When the paint is dry, attach the toppings to your pizza slice with glue OR just paint toppings on with additional paint.

YUM! Let's eat!

Giant Wheel of Cheese

Super-Giant Chocolate Bar

Yummy Cupcake
(This size looks like a regular serving for me!)

Giant Taco! Olé!

Tuesday, March 6, 2012

SHARK! A Dollar Store Birthday Party

My littlest guy turned 5! He's a firecracker, and he decided he wanted a shark party (mostly because he saw a shark cake dripping fake blood when I was browsing online). SIGH.

I was excited to make a shark cake, but the kids and I created a few other things for the party that you might like. I have Pinterest to thank for many of them! Many of these supplies can be found at the dollar store.

The cake:


My family loves to watch the Cake Boss. I took cake decorating classes but the Cake Boss has really made me step up my cake decorating style! So, in true Cake Boss style, I shaped Rice Krispie Treats into the shape of a Shark's head, covered it with a light coat of frosting and then covered that with fondant tinted pink, white and grey. I added teeth and black bits for the nostrils and eyes. Then I put that on top of a 10" round of strawberry cake (little guys' choice) and covered the cake in bluish frosting. Voila! Great White lunging out of the water! (I was asked "Where's the blood?" since mine was gore-free--Hey, I didn't want to freak out the four- and five-year-olds that were going to be in attendance!)


Shark Attack Cake--Just like Little Guy Wanted
(OK, minus the blood)
Decorations:
Shark jaws: Made from dollar store paper plates! I couldn't believe this when I saw it! Easy, inexpensive and fast! And the kids LOVED them! We got many a picture of the kids holding scary shark teeth! I saw this idea on www.dollarstorecrafts.com.

Shark Jaws made from paper plates and view of the Table Runner
(After this photo was taken I set the table with plates and napkins, etc. )

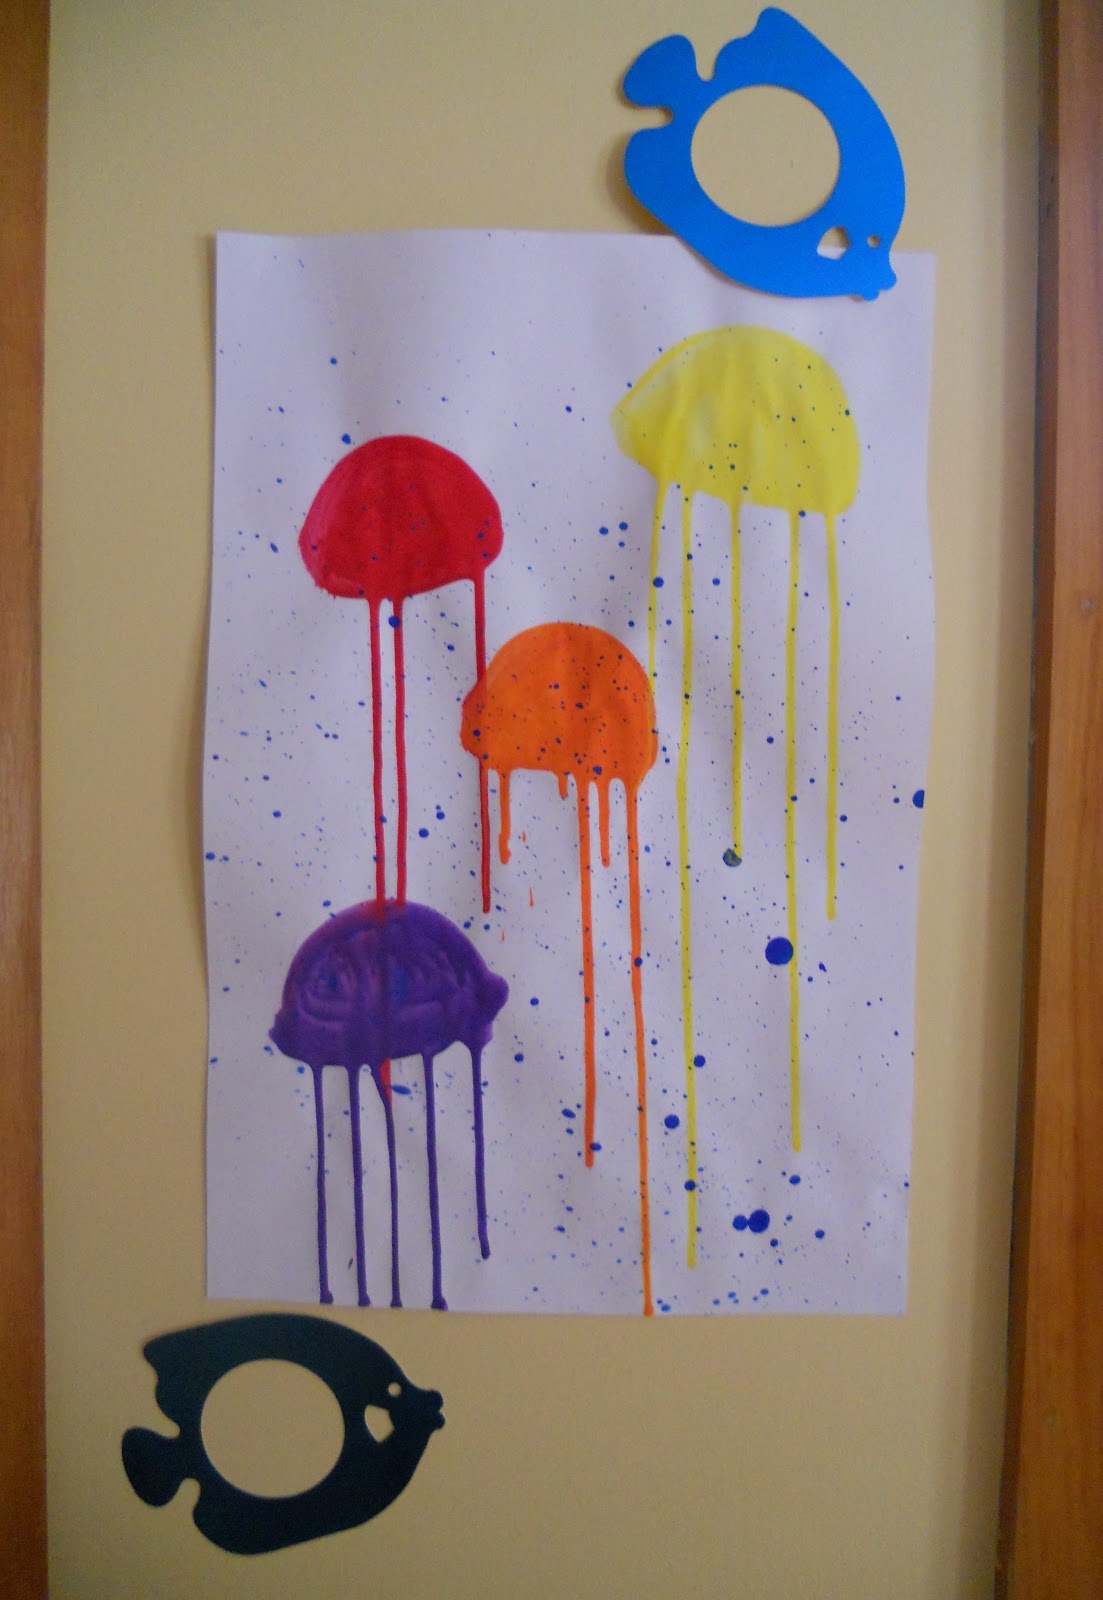
Wall art: I saw the jellyfish pictures on a favorite art blog of mine: "For The Love of Art" and I thought they were so pretty. I made a few of them, hung them on the wall and added some blue metallic fish shapes I bought at the dollar store.

My version of the jellyfish pictures don't do this art activity justice--
go to "For The Love of Art" to see the originals.
Table runner: We used tempera paints in a variety of colors with a big paint brush to make waves along a piece of paper from a roll. We then stamped on a few shark shapes cut from craft foam to give that "sharks are circling" effect.

Goodie Bags: I kept these simple since the children were making some crafts. I stamped a shark fin on the side of each and added blue "waves" from the scraps of the table runner. I then included a Star Wars coloring book (little guy's choice), a set of colored pencils, a couple of lollipops and a bag of Swedish fish (all from the dollar store). I put each child's name on his/her bag and as s/he would finish a craft I'd pop it in the corresponding bag.

Printmaking and Eric Carle-inspired waves!

Crafts:
Shark clips: I saw these on Pinterest originally and had to do them with the kids. They took no time at all and the children loved them (the four-year-olds as well as the ten-year-olds loved them!). I drew them on card stock, had the children color them in and hot glued them to clothespins (card stock and clothespins are from the dollar store).

Easy to make and fun!
T-shirts: OK, I didn't get the t-shirts from the dollar store, but I did get them from the craft store on sale for 4 for $10. I had originally wanted to have the children create shark t-shirts like one I saw in Family Fun Magazine years ago, but ran out of time to do the prep work necessary. So, I let the older kids design their own shark inspired t-shirts using clear contact paper and sprayable fabric paint. I purchased the clear Contact paper at the dollar store and one roll was enough for 8 t-shirts. The older kids went with a "Shark Attack" theme with their shirts. For the little ones, I cut shark head shapes from the contact paper and the little ones got to spray and draw on their shirts with fabric paint.


A shark coming up from the deep to investigate a swimmer...

This isn't going to end well...

This shows the empty shark cage and the shark with feet sticking out of its mouth.
YIPES! I assure you these are by well-adjusted children!

And the "Rest of the Story..."
I was also able to get "Happy Birthday"-themed paper products at the dollar store (cups, plates, napkins) as well as streamers, and balloons. They weren't "Shark"-themed, but were bright and colorful!

All-in-all I think the party went well! And little guy said he had a wonderful time hanging out with his friends!

Monday, February 13, 2012

Last Minute Valentine: "I Love U"

This is a nice project to teach positive and negative space and symmetry and makes a cute last-minute Valentine for the wall or as a bookmark. It is super-inexpensive and pretty darn easy. Make one of these for your Valentine today!


Positive/Negative "I Love U" Valentine

Supplies Needed For The Wall Art:

  • Piece of black construction paper (9" x 12") in black
  • Pieces of red and pink construction paper (the red sections are 3" tall and the pink sections are 2 1/4" tall)
  • Pencil
  • Glue stick
  • Scissors
Supplies Needed For The Bookmark: 
  • Piece of white posterboard (2" x 5") in white
  • Pieces of red and pink construction paper (1" square)
  • Pencil
  • Glue stick
  • Scissors
  • Clear packing tape (2" wide)
  • Hole punch
  • 8" of ribbon
Directions:

1. Decide on the order of your colored paper pieces.

2. For the first section, the heart, draw a half a heart shape onto the first piece of colored paper. Cut it out. Glue the outside of the heart shape onto the backing of your piece (either the posterboard if you are making a bookmark or the black construction paper if you are making a larger piece). Line up the cut edge the square with the center of your backing paper.

3. Glue the corresponding half heart shape along the center line, "flipped out" from the square it came from. Hmmm....sounds confusing, but look at the picture for a guide.

4. Continue down the column, cutting out half an uppercase "I" another half heart and half an uppercase "U." Finish with another heart, if desired.

5. If you are making the wall art, you are done! If you are making a bookmark, put a strip of clear of packing tape over your design to protect it. Punch a hole in the top edge of the bookmark and add a ribbon, if desired.

Sealed with a kiss! ENJOY!

Saturday, February 4, 2012

Easy Valentine's Cards: Stamping with Wine Corks

I love homemade cards! This year, I used a wine cork and acrylic paints to churn out a few simple cards for my hubby and kids. This is a fun way to learn about basic printmaking and the options are endless!
I TOAD-ally Love You!
(OK, so it's actually a frog...)


Easy Wine Cork Valentine's Cards

Supplies Needed:

  • A wine cork
  • Acrylic paints (assorted colors, a pea size amount)
  • Paper plate for palette
  • Cardstock or a blank card
  • A fine point marker (I used a Sharpie)
  • Embellishments such as googly eyes or antenna are optional (the antenna I used are flower stamens from the cake decorating aisle of the craft store)
Directions:

1. Practice different designs on scrap paper before you move on to the cardstock. I found it helped to have a few sayings before doing the stamping. Here are a few to get you started:

  • HIPPO Valentine's Day!
  • I'm WILD For You!
  • You're DINO-mite!
  • HOGS and Kisses!
  • You're My Sweet-Pea!
  • You're My ALL-STAR! 
  • I think you're TOAD-ally Awesome!

2. Dip the cork into a bit of paint (you don't need much) and then stamp it onto the cardstock. 

3. When dry, use a fine point marker to add details and wording to your card. The sky's the limit! Have fun!

Detail of the card for my daughter--my Sweet Pea!

Here are the Valentines for the kids. I thought of things they liked
and then made a card to reflect that interest. These would also make nice bookmarks.

Friday, February 3, 2012

St. Valentine's Day Craft: Pom Pom Critters

One of my sons loves stuffed animals and any funky little critters with googly eyes! One year we made a ton of these to give away to his classmates. They are fast and easy to make (and easy to love)!

The Usual Suspects...
Pom Pom Critters

Supplies Needed:
  • Small piece of felt for base (feet). I use a stiff piece of felt for the base.
  • Large pom pom (for body), ours were about 2" in diameter
  • 2 googly eyes (or one if you are making a cyclops!)
  • Cardstock for mouth (an index card works great)
  • Markers
  • Scissors
  • Embellishments such as hearts, antennas (mine are flower stamens sold in the cake decorating aisle at the craft store), bows made from bits of ribbon, etc.
  • Tacky glue
  • Tape
  • Construction paper for the card, optional
Directions:

1. Cut out a heart shape large enough so that it sticks out from under your pom pom like little feet.

2. Use tacky glue to glue the pom pom to the heart-shaped base.

3. Add eyes and embellishments. Have fun and be silly! My son knew what he wanted to do and I just let him go!

4. Use tape to secure your critter to a rectangle of construction paper. Write a silly message such as "I'm Wild For You" or "I've got my EYE on you Valentine!" (if you are doing the cyclops) and the To/From Information. ENJOY!

Saturday, January 21, 2012

Mini Craft (Popsicle) Stick Snowman

Snowman's Valentine
by Leland B. Jacobs

I have a jolly snowman,
The best I've ever had.
I'm giving him a valentine
that ought to make him glad.
For though he's very handsome
and sound in every part,
I noticed only yesterday
he hasn't any heart.
So quickly with my scissors
and paper red and fine
I made a fancy little heart;
my snowman's valentine!


Left: Back of piece
Middle: Front of snowman, partway through project.
Right: Completed snowman project
This is a nice little craft that uses supplies you may already have on hand. I sent this craft in for my son's 2nd grade class to do at their Holiday Party, but it is a cute craft to do on a snowy day or decorate your snowman with a heart, attach the above poem, and give it out for St. Valentine's Day!

Popsicle Stick Snowman

Supplies Needed:

  • Four craft/popsicle sticks
  • Glue (I like using a glue gun, but tacky glue is probably better for little ones)
  • White tempera or acrylic paint
  • Markers (we used black and orange)
  • Felt scraps, assorted colors. You'll need a 3.5" x 4.5" rectangle for a hat and a 9" x 1" rectangle for a scarf
  • One to two 6" pieces of yarn
  • Sticky-backed felt shapes or paper to make a heart, optional
Directions:

1. Line up three of the popsicle sticks next to each other with their long sides touching. Cut the remaining popsicle stick into 1" sections. Glue two of the small sections onto the back of the larger popsicle sticks for support, using tacky glue or hot glue. This is your snowman's body. Let dry.

2. Flip the popsicles sticks over and paint the front of the snowman white. Let dry.

3. Fold one of the long edges of the 3.5" x 4.5" rectangle to make a hat brim. Using the photo as a guide, attach the hat to the snowman (you'll need to glue it to the front of the snowman and the back). Then, use a piece of yarn to gather the hat and give it some shape. Knot the yarn and trim excess. If you are making the snowman an ornament, make a loop with the second piece of yarn and attach it to the back of the piece.

4. Using the markers, draw features on your snowman such as eyes, carrot nose, mouth and buttons.

5. Cut 1/2" long slits for fringe at either end of the piece of felt you will be using for a scarf. Tie the scarf around the snowman and secure with a dot of glue. 

6. Add a paper heart if you are sticking with the poem above.

You're done! Enjoy your little snowman!

Thursday, August 25, 2011

Artist Trading Cards

Ahhhh...the internet. I need to set limits because there are just WAY too many good sites out there with WAY too many great art ideas and I get lost in a world of links! But, on the bright side, I get so many wonderful ideas and learn so much! One thing I see that intrigued me is something called Artist Trading Cards (or ATCs).
Some of the ATCs made by my boys (the "Make More Art" one is by me).

Artist Trading Cards are awesome! Started in 1997 by an artist in Munich, they are a great way for artists to showcase their style or ideas, but they aren't just for professional artists! Anyone can create ATCs--children, teens, or grown-ups! There are very few rules for ATCs: 1. They must be 2 1/2" x 3 1/2" and, 2. You cannot sell them--they must be given away or traded. This is a wonderful way for children (and grown-ups) to learn new art techniques and express themselves! It is also a wonderful way to spend time together as a family--grab some art supplies and sit down and let your creativity go!

For Me: Personally, I am embracing the ATC idea! I'm an artist but I am also a mother of four and an art teacher trying to grow my business--I don't get to do huge masterpieces right now. I'm OK with it, but sometimes I get an art idea and need to explore that. ATCs are just right for me!

For my children: I am also encouraging my children to do ATCs. My children love to collect and trade things, but I seriously WILL NOT pay lots of money for cheap trading cards whose sole purpose in life is to get children to spend money (oops, getting off the soapbox now...). Anyhow, ATCs allow children to create & explore and gives them something they are excited to trade and are actually connected to. Learning and fun--I'm all in!

Supplies Needed:

ATCs are easy and require no special supplies, unless you want to try different techniques. Here are some supplies to begin with:

  • Posterboard cut to 2 1/2" x 3 1/2" to use as "blanks"
  • Glue sticks
  • Scissors
  • Pencil and eraser
  • Markers, colored pencils, crayons, etc.
  • Stickers
  • Stamping materials
  • Neat papers (I have a scrap paper bin I brought out and I save neat papers from junk mail, etc).
  • Old magazines
  • Paint (tempura or watercolor) & paintbrushes
  • Old photos
  • Needle & embroidery thread
  • The list is truly endless!
Instructions:

1. Cut a whole bunch of blanks from posterboard. You'll need about 8 or so per person to get started. Once you get going--it is hard to stop!

2. Start creating! Think about the different ways you can create:

Drawing
Painting
Collage
Stamping
Ripped paper
Sewing (by hand or machine)

There is no right or wrong way to do these. Relax and have fun. Send me pictures of your ATCs--I'd love to see your creations! ENJOY!

Need more inspiration? Here are a couple of links to check out:
This month's Family Fun Magazine
A great mini tutorial on ATCs from http://www.cedarseed.com/ 

My disclaimer: While I do look at all references before sharing, I cannot look at every page of every reference. Please check out these references before sharing with your children, to verify that the content and images are appropriate for your child's age level and the content is acceptable for your family.


Friday, April 22, 2011

Last Minute Bunny Basket & Filler Ideas

No art class for me this week--the cooperative is closed for Holy Week (Easter is this Sunday). I thought this would be a great time to write about some of my favorite artsy gifts to help out with filling those Easter baskets! Come on--one cannot live on chocolate alone!

My theory on Easter baskets and the like is to buy consumables that can be eaten (Peeps candy), used up (a suncatcher kit) or added to what we have (markers) with little impact. With four children, I have WAY too much stuff! While I'm sure you already have a list of candy for those Easter baskets, here's a list of some other stuff to make your children's Easter baskets shine!
  • Basic art supplies (crayons, markers, watercolor paints, glue sticks, glitter glue)
  • A new sketchbook (spiral bound)
  • Mini art kits (make your own picture frame, a suncatcher kit, paint your own pottery, a scratchboard kit, etc.)
  • Origami paper
  • A disposable camera and scrapbook kit or supplies
  • Beads and cord to make a necklace, bracelets, etc.
  • Dover art books--Dover makes a series of mini-books that have mazes, paper dolls, sticker books and more--these are so fun and there is one for every interest! (Buy these online or at book stores).
  • Klutz makes a line of books that foster creativity and come with the supplies needed to create the projects in the books. They have doodle books, window art, pom pom creations and so many more! These books are more pricey (about $15-$20 each), but for older children, one of these books and a couple of candies might be the Easter gift.
  • Yarn and crochet hooks or knitting needles
  • A bucket of air dry clay or play-doh (or you can make your own)
  • Stickers
  • A mini notebook, ruler, and mechanical pencils (for the future draftsperson!)
  • Pipecleaners and googly eyes to make critters
  • A big pack of construction paper
  • New scissors--either straight edge or with decorate edging
  • Sidewalk chalk for outside doodling
Have fun with the "basket" as well--it doesn't have to be traditional! You can use a pail, an art caddy or plastic tote with handle (see the post about art supplies to have on hand). A canvas totebag is also a great "basket" and the child can decorate it as a project as well. One of my girlfriends said that she saw premade baskets made from an upside down sunhat. You can often find plain colors of these and paired with a set of fabric markers, you have an easy project your child will love!

The bunny basket idea below, is a wonderful preschooler craft (or for anyone who is young at heart!). This is not original, it is just the version I improvised with my four-year-old the other day. Excuse the photos--it was difficult to take nice photos while doing the project with a four-year-old! He's very proud of it though--he shows it to everyone who walks though the door!


Spring Bunny Basket

Supplies Needed:
  • A one gallon milk jug, washed and dried
  • A sharpie or other marking pen
  • Scissors
  • 2 Googly eyes (about 3/4"-1" diameter)
  • Glue dots, tacky glue or a hot glue gun and glue sticks
  • 3 pom poms (about 3/4"-1" diameter), 1 pink and 2 white
  • 3 pipe cleaners (any color)
  • Scrap cardstock, white
  • Pencil and eraser
  • Crayons
  • Stapler
Directions:

1. You'll want to start by making a hole at the top of the bunny basket for all of those Easter treats! We left the handle of the milk jug on so that my preschooler could carry it around for an Easter egg hunt. Use the photo below as a reference. A grown-up should use scissors to carefully cut the milk jug.
The cutting line is marked with Sharpie.

2. We then used glue dots to glue on the googly eyes. I like to let the children glue them on because I love the cute expressions that are created when the kids glue the eyes on askew! So cute!

3. I then cut a set of teeth out for the bunny and had my son glue those on using glue dots.

4. I then cut a small slit (about 1/2" long) on either side of the teeth and we threaded all three pipe cleaners through the slits to create whiskers.
The pipecleaners are just fed all at once through two slits--one on either side of the bunny teeth.

5. Using the glue gun (a parent's job), I attached the pom poms to finish the bunny's face.
Awwww....look at that cute bunny face!

6. I then cut two ears out of cardstock and drew an inner ear shape inside of them. My son got busy coloring them in, and then we attached them to the back of the bunny basket with a stapler (he helped me and thought that was the best part of the entire project!).
Not perfect, but what do you expect with a 4yo breathing down my neck!

Rainbow colored ears!

This basket could be done up much more fancy then we did it. You could add a bow tie for a boy bunny and flowers and bows for a girl bunny. Don't worry if you don't have the exact supplies that we used here--using what you have on hand is a great way to teach children how to reduce, reuse and recycle. Enjoy this simple craft with your child!

And, when it's time to help the Easter bunny fill your child's Easter basket--have fun! Helping your child to "spring" into creativity can be easy!

Have a wonderful and joyous Easter! Welcome Spring!

Wednesday, April 13, 2011

Gargoyles in Clay

Last week, with my art class, I thought it would be fun for the children to create gargoyles from clay (carving seems too messy and frustrating). I brought in a variety of pictures of gargoyles for them to look at. We were all surprised to see that gargoyles didn't have to be scary. Modern gargoyles can even be kind of cute, or look like a real animal or person (not a "horrible, unreal creature of the imagination"), and some even tell a story.
Sea turtle gargoyle. This has a gutter on its back. Note the baby turtle hitching a ride!


Background: 

What makes a gargoyle? Well, gargoyles are carved grotesques with a spout used to divert water away from the side of a building. The water usually exits through the mouth, but sometimes there is a gutter on top of the gargoyle instead. If the figure doesn't divert the water, it is not technically a gargoyle, but more of a "chimera."

Gargoyles have been used for thousands of years and in a variety of cultures. The word gargoyle means different things in different languages. The most common being: "throat" or "gargle" and the Dutch call them waterspuwer which means "water spitter" or "water vomiter." Pretty cool visual, eh?

I brought some pictures of gargoyles for the children to see. I also brought in the book, "American Gargoyles: Spirits in Stone," by Darlene Trew Crist. This book has many wonderful, clear images of a variety of old and new gargoyles along with the stories behind them. With this book, I was able to show the children a bird's eye view of a gargoyles and show them the mortar between the building stones (water erodes this mortar--hence the need for the drainage spouts). There were examples of scary gargoyles and friendly-looking gargoyles as well as an image of the gargoyles at work--one with water spewing from its mouth. Since the children in my art class are very interested in turtles, I showed them a picture of the "Weeping Sea Turtle (p.71)" and we discussed how gargoyles can tell a story.

I also borrowed a couple of other books from the library about gargoyles, but left them at home since they weren't completely appropriate for the children to be viewing.

"Holy Terrors: Gargoyles on Medieval Buildings," by Janetta Rebold Benton is also a stellar resource on gargoyles. This book also contains many clear pictures of a variety of gargoyles along with interesting text and an extensive bibliography, but some of the images contained nudity. Since I couldn't leave this book out for the children to peruse, I just left it at home.

"The Gargoyle Book: 572 Examples From Gothic Architecture," by Lester Burbank Bridaham was also left at home due to some nudity, but is an interesting resource of black and white images of gargoyles, Chimeres, Heads, and Woodwork that may be inspiring to the older student. The text is brief, so this is primarily a visual resource.

When doing the research for this project I read about a modern-day gargoyle that I had to check out: Darth Vader on the Washington National Cathedral. I went to the site, searched, and lo and behold. there he was! The piece was designed by Christopher Rader as part of a contest. The piece (not actually a gargoyle since it doesn't direct water) was sculpted by Jay Hall Carpenter, carved by Patrick J. Plunkett, and placed high upon the northwest tower of the Cathedral. I had to show the kids that one!

Before I handed out the materials for the project, I suggested that the children think not only about what creature they were going to create, but think about what type of building it would be on and if it their gargoyle or grotesque would visually be telling a story.

Supplies Needed:
  • Paper mat to work on
  • Hunk of clay (I used Crayola air dry clay in gray-I used two 5lb. buckets for my 12 art students and my demo)
  • Tools such as a plastic knife, toothpicks, a plastic drinking straw and a roller
  • Meat trays for transporting the finished pieces home
  • Paper towels and water for cleanup
  • Books on gargoyles and reference books on animals, dinosaurs, etc.
Directions:

After discussing gargoyles (their function, the different designs, etc.), give each child a hunk of clay about the size of a softball. The clay should be kneaded a bit before starting to work. Have the child create a sculpture of an animal or person (real or imaginary). If it is to be a true gargoyle it should have a hole through its mouth (some of the children in my art class just made the mouth open and some made more of a tunnel going through the clay. I think it depends on the the child's wishes and their ability in working with the clay).

Thin pieces will break off when dry, so the child should be encouraged to make pieces that are at least 1/8" thick (but 1/4" thick is even better). Don't forget to add texture and detail to the piece such as scales, hair, etc.

Is your gargoyle telling a story? What elements can the artist include to help us to "see" the story? In my example, I included the turtle's eggs, a baby turtle, some seaweed and the water, so that viewers could see the life cycle of a turtle and its habitat.

Have fun with this! Gargoyles don't have to be scary! Although....scary gargoyles are cool too!
The sea turtle gargoyle from above. One side has the eggs and seaweed, the other has a baby turtle. The wavy things on either side of the shell are ocean waves (looks nice and makes the sculpture less breakable).

Monday, March 28, 2011

More References: Optical Illusions

Sometimes things just work out great! I love the fact that my children are absorbing all of the "stuff" I'm doing with my art class. While they refuse to actually sit down and try the projects I'm teaching (I think that might be a control thing on their part), they are inspired to use the materials and are very interested in the research I do for each project. As evidenced by my oldest son's library books last week: both about Optical Illusions (FYI: I taught a class on optical illusions just a couple of weeks ago). Both of my older boys have been fascinated by these books, as am I. I'm putting them in my notes for next year...

"Amazing Optical Illusions," by Illusionworks

"You Won't Believe Your Eyes!" by Catherine O'Neil, National Geographic Society

Both of them were awesome! The are full of traditional optical illusions as well as examples of modern-day illusions (newspaper printing, 3D graphics, illusions in nature) all in full color.  There is even a section in "You Won't Believe Your Eyes!" that discusses art techniques where illusion is used (trompe l'oeil, and Pointillism). Wonderful!

And one of the followers of this blog (Hi Scott!) mentioned another kind of optical illusion I hadn't thought of:  Lenticular printing and 3D techniques
 
Say what?!?! At first, I was puzzled--I was sure I didn't know what this was! But then I checked out the definition above and realized that I has seen this before. OK, remember those little novelty stickers from when you were a kid that had a picture of a person or something on it and if you tipped it to the side the guy winked or something like that? They seemed to be made from plastic and have little ridges on them? I used to love these as a kid and my children just received bookmarks that have this technique on them (think: a swimming, biting shark!!). This type of printing is mainly used in novelties (like in Cracker Jack boxes, bookmarks, on Valentine cards, etc.). These pieces can have a series of images that create a little animated movie (sometimes lasting about 1 second) that almost seems 3D (but without the glasses).

What a great way to blend science and art! Thanks, Scott, for making that connection!

Thursday, March 24, 2011

Technique: Watercolors

Everyone has used watercolors--it is usually the first paint that parents introduce to their children because it is inexpensive and so easy to clean up. Children are often content to mix and experiment on their own and churn out hundreds of watercolor paintings!

But if your little artist is looking for something new to try, check out the following tutorial for eight different ways to use watercolors. All of them are pretty basic, but can be combined to add textures and interest to a plain old painting!

An example of wax resist

Supplies Needed (for each painter):
  • 1 piece of watercolor paper (I used 9"x12" Strathmore cold press watercolor paper from a pad)
  • 1 piece of heavy cardboard or foamcore board slightly larger than your watercolor paper
  • Masking tape
  • Pencil and eraser
  • 1 tray watercolors (I use Prang brand watercolors with my students--the colors are better quality than the dollar store/kid brands, 2 children can share a tray if necessary)
  • Water cup with water
  • Watercolor brush (The one that comes with the Prang set is fine, but don't use one from a cheap set, they are made of nylon and the results will be poor).
  • Ruler
  • Sharpie or other permanent marker
  • A drinking straw
  • Paper towels
  • Plastic wrap
  • Table salt in a cup or shaker
  • Crayons (I like Crayola brand)
  • Colored Pencils (Crayola brand or other good quality)
 Basic Rules:

Read through the instructions BEFORE you start.
Gather all supplies BEFORE you start.
Be respectful & gentle. Good quality art supplies cost money, but they will last a long time if you treat them well.

I then give a quick talk about using the supplies properly. I show the children how to make paint by gently dipping their brushes and putting a small amount of water into the tray. I say, "we aren't making mashed potatoes or scrubbing a pot!" We have to be gentle with the brushes.

I also remind them what a paint tray looks like after a 2-year-old is done painting: all messy and black.  Between color changes, artists need to gently wash their paintbrushes in water (if it gets really dirty--get some fresh water!) and dab them on a paper towel.

OK, let's go!

Directions:

1. Begin by taping your watercolor paper onto the stiff cardboard. This will prevent your paper from curling and buckling. Use long strips to tape around all four edges, about 1/4" border.

2. With the ruler and pencil, divide your watercolor paper into eight sections. I like to leave a little space between the eight boxes because if you are working on one square and your wet paintbrush touches another wet square, the paint will bleed together.

DID YOU KNOW? You can lightly sketch on watercolor paper using a pencil and once the watercolor paint is dry you can erase without harming the painting! Just draw lightly and use a good quality eraser to gently remove the pencil lines once the paint is completely dry.

Eight rectangles separated by a little space so they don't bleed into one another while we work (no need to be too precise here, since this is just for practice).

DRY BRUSH:
In the first square, we'll be practicing dry brush technique. The paper should be dry. Wet your brush and take a bit of the water and put it in the watercolor tray so that it softens up the dried color and makes some paint for you to use. Rinse your brush and dab it off gently. Now you can dip your cleaned and dried brush in the paint tray and brush it on the dry paper. See how the color is concentrated? Notice how the bristles of the brush can sometimes be seen? If you want to use this brushstroke on top of a base layer of paint, you need to wait until the base layer is completely dry.


WET ON WET:
In the second square, we're going to have some fun! In this square you can use plain water on your brush and wet the whole square. While the square is wet, add some wet splotches of color. You can use one color if you'd like, but it is fun to add additional colors and watch them blend on their own. This is wonderful for making oceans and sunsets--they almost look like tie-dyed shirts or the fur of an animal! You can try dripping a drop of plain water onto the wet on wet painting you've created-notice how the plain water pushes aside the colors? Try dabbing a bit up with your paper towel--this removes the color. This way of removing some of the paint with a towel is great for making clouds (or if you make a mistake and you paint something too dark!).

Combining techniques: for this cloud-like painting, I painted the background using the wet on wet technique and dabbed the painting with my paper towel to remove some of the color making a cloud-like shape. Once dry, I used the dry brush technique to paint in rain (you could also use colored pencils for the rain lines).


INK & WATERCOLOR:
This is my favorite! In the third box, use your pencil to sketch a simple drawing. Then go over your pencil lines with a permanent marker. Now it looks like a cartoon or a coloring book page! Use watercolor to fill in the drawing. But watch out! If you touch an area with your paintbrush that is still wet, your sections could bleed into one another and that might not be what you want. When you are filling in the areas of a piece done this way, you can take breaks to let each section dry before you paint the ones next to it.


COLORED PENCIL & WATERCOLOR:
OK, also one of my favorites! In this box, you'll want to do a simple shape with watercolor: I chose to make a leaf shape. Once that is dry, add details and texture with colored pencils. I use this technique all the time in my own work. In my example, I painted two leaves and then finished one so that you could see what the colored pencil does. I also added the background in colored pencil. This technique also takes some patience. You must let the paint dry thoroughly before you do the pencil or it will scrape the paint and damage the paper.

The leaf on the right is what I started with. The leaf on the left shows the addition of pencil lines.

WAX RESIST:
In this square, you can make magic! Using crayons, draw some simple shapes in this square. You should use firm pressure, but don't push so hard you break the crayon! Experiment with different colors of crayon: white, blue, red, etc. Once you've finished your shapes, paint a nice wet, watercolor wash in the square-even over the crayon marks! The paint won't stick to the crayon marks! This is wonderful for stars and bubbles and all sorts of great pictures! Experiment with different colors of crayon as well as different colors and values of paint. What happens with a light color of paint? What about a dark color?


SALT:
Fill the entire square with paint just like you did with the wet on wet square. While it is still wet, sprinkle the paint with table salt. Don't touch! You'll need to leave this overnight until it is completely dry. This makes little sparkles or stars in the paint. It's a great technique to use when painting water or sky. When it's dry, the salt just brushes off.


PLASTIC WRAP:
Fill the entire square with paint just like you did with the wet on wet square. While it is still wet, place a piece of plastic wrap on the square, crumpling it slightly and pressing it gently into the paint. Don't touch! You'll need to leave this overnight until it is completely dry. This makes little sections of color in the paint. The texture of this is interesting and could be used for rocks or in when painting water. Once dry, the plastic wrap peels off and you can throw it away or wash it and reuse it for another painting.


BLOW PAINTING:
This one is fun! Get your paint brush very wet with paint and touch the tip of the brush very gently to the dry paper. There should be a rounded drop of paint on the paper. If not, use more water. Once you get a rounded drop on the paper, gently blow through a drinking straw to move the drop around. It's fun to try to control where the paint will go! In one book I have, the artists use this technique to make trees. They look like craggly apple trees! When you are blowing through the straw, take your time and don't blow too hard. Take a break so you don't get dizzy!


To illustrate these techniques, I first did this project at home then did the project along with the students. It seemed to help the children to understand what we were doing if I said, "next we'll be doing this square." Then I showed them how to do it.

While they were practicing a technique, we would talk about what we could use that technique for (such as, "this would make a good rock wall" or "that would look really nice if you were making a starry night sky").

I had the following book on hand: "The Usborne Book of Art Skills" is a wonderful resource for older students (maybe middle school age) and showcases a variety of techniques. I was able to point out many of the things we were practicing. It was helpful for the children to actually see these techniques in use.

This lesson took the entire hour with my class, so the children and I have decided to have a second watercolor class where we will use these techniques to create underwater creatures in their habitats (maybe like the Loch Ness Monster?). They are all very excited about it--I think I need to run out and get more watercolor paper!
Related Posts Plugin for WordPress, Blogger...