Showing posts with label store. Show all posts

Thursday, July 5, 2012

Super Simple Dream Catcher From a Paper Plate

Third son had a terrible dream last night. It didn't help that he fell out of bed (which I hadn't heard but was described by my first son as "something crashed into the house--it made the whole house shake!" A few minutes later I heard the little guy crying and went in & located him (still on the floor). He was shaking and crying and still dreaming away. Man, that's tough!

$1 for the pony beads at the Dollar Store and $2 for feathers-
the rest of the supplies I had on hand. What a nice and easy craft!
So today, we made a super simple dream catcher to hang above his bed to catch all of his bad dreams. This is a lovely craft to do as part of a summer camp, Native American craft session or part of the library's summer reading program (our local library's theme this summer is "Dream Big!").

Well here's the super simple dream catcher and may all of your dreams be pleasant!

Paper Plate Dream Catcher

Supplies Needed:

  • One paper plate
  • Scissors
  • Hole punch
  • Yarn (four 12" sections and one 48" section)
  • Clear tape
  • Pony beads
  • Feathers (ours were about 3 1/2-4" long)
  • Markers
Directions:

1. Cut a 5" (or so) circle from the center of the paper plate, leaving the outer rim of the plate intact.

2. Use the hole punch to make a series of holes every inch or so around the inner edge of the ring.

3. Use markers to decorate the ring with patterns and images as desired.

4. Weave the 48" piece of yarn through the holes in the inner edge of the ring going across the ring to create a web for the bad dreams to get caught in. This is the fun part--even young children can relax and weave this inner section. The funkier, the better! We secured the beginning and ends of our yarn to the back of the ring with clear tape.

5. Use the hole punch to create a single hole at the top of the ring to hang the dream catcher. Make a loop from one of the 12" long strands of yarn, run it through the hole and knot it to secure. If you like, you can string a couple of pony beads onto the hanging loop to add some color.

6. Use the hole punch to create three holes about an inch apart along the bottom edge of the dream catcher. Feed the remaining 12" strands of yarn through the holes and double knot to secure. Feed pony beads onto the yarn coming from each hole. Knot and then use clear tape to attach a feather to the bottom of each strand. Trim excess yarn with scissors. Repeat to make three strands of beads with feathers coming off the bottom of the dream catcher. I made the center stand slightly longer than the other two.

7. Hang above your bed to catch all of those bad dreams! Nighty-night!


Tuesday, June 26, 2012

Dollar Store Flip Flop Collage Craft

I live in my flip flops during the summer (and have the tan lines on my feet to prove it!). So when I saw this cute project on Artrageous Afternoon, I knew it would be great for my Recycled Art class, but also just plain fun, too! 

You'll "flip" for this summertime craft!

First, we traced my flip flops onto lightweight cardboard (we used poster board). Make sure you make two flip flop soles--one for each foot! We also cut out some 1" x 8" strips of card stock for the straps of the flip flops (you'll need 2 strips per flip flop).

Then, we decorated our flip flop "soles" by using strips of magazine paper to fill up the background and then cut neat summery images from magazines to show our summer plans or what we love to do during the summer. I encouraged the children to cover the entire surface of the sole--I didn't want to see any cardboard showing through.

We used hole punches to punch holes in the straps and the sole of each flip flop and then secured them together with one of those metal fasteners (mine were leftover from another project, but you can get them at craft stores and some office supply stores). We secured the other ends of the straps to the underside of the soles with tape.

Lastly, we hot glued our flip flops to a piece of sandpaper (a pack of 12 is $1 at the dollar store) to make our flip flops on a sandy beach. So fun!!


Tuesday, March 6, 2012

SHARK! A Dollar Store Birthday Party

My littlest guy turned 5! He's a firecracker, and he decided he wanted a shark party (mostly because he saw a shark cake dripping fake blood when I was browsing online). SIGH.

I was excited to make a shark cake, but the kids and I created a few other things for the party that you might like. I have Pinterest to thank for many of them! Many of these supplies can be found at the dollar store.

The cake:


My family loves to watch the Cake Boss. I took cake decorating classes but the Cake Boss has really made me step up my cake decorating style! So, in true Cake Boss style, I shaped Rice Krispie Treats into the shape of a Shark's head, covered it with a light coat of frosting and then covered that with fondant tinted pink, white and grey. I added teeth and black bits for the nostrils and eyes. Then I put that on top of a 10" round of strawberry cake (little guys' choice) and covered the cake in bluish frosting. Voila! Great White lunging out of the water! (I was asked "Where's the blood?" since mine was gore-free--Hey, I didn't want to freak out the four- and five-year-olds that were going to be in attendance!)


Shark Attack Cake--Just like Little Guy Wanted
(OK, minus the blood)
Decorations:
Shark jaws: Made from dollar store paper plates! I couldn't believe this when I saw it! Easy, inexpensive and fast! And the kids LOVED them! We got many a picture of the kids holding scary shark teeth! I saw this idea on www.dollarstorecrafts.com.

Shark Jaws made from paper plates and view of the Table Runner
(After this photo was taken I set the table with plates and napkins, etc. )

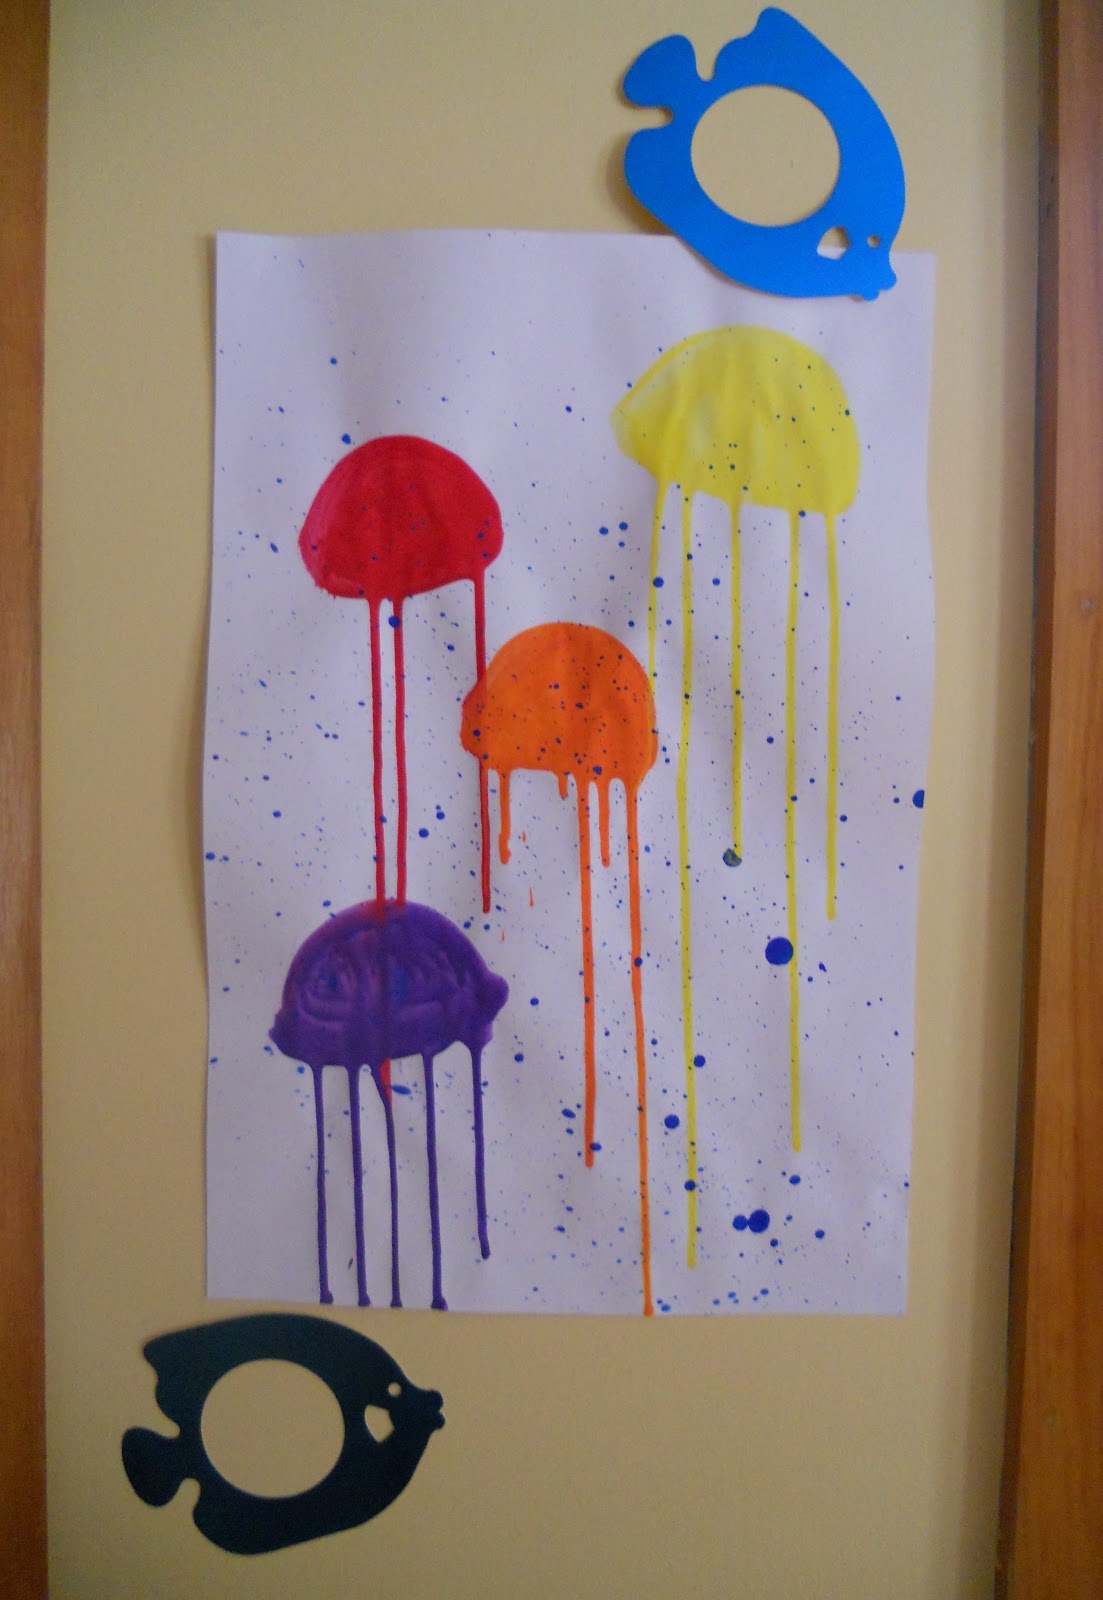
Wall art: I saw the jellyfish pictures on a favorite art blog of mine: "For The Love of Art" and I thought they were so pretty. I made a few of them, hung them on the wall and added some blue metallic fish shapes I bought at the dollar store.

My version of the jellyfish pictures don't do this art activity justice--
go to "For The Love of Art" to see the originals.
Table runner: We used tempera paints in a variety of colors with a big paint brush to make waves along a piece of paper from a roll. We then stamped on a few shark shapes cut from craft foam to give that "sharks are circling" effect.

Goodie Bags: I kept these simple since the children were making some crafts. I stamped a shark fin on the side of each and added blue "waves" from the scraps of the table runner. I then included a Star Wars coloring book (little guy's choice), a set of colored pencils, a couple of lollipops and a bag of Swedish fish (all from the dollar store). I put each child's name on his/her bag and as s/he would finish a craft I'd pop it in the corresponding bag.

Printmaking and Eric Carle-inspired waves!

Crafts:
Shark clips: I saw these on Pinterest originally and had to do them with the kids. They took no time at all and the children loved them (the four-year-olds as well as the ten-year-olds loved them!). I drew them on card stock, had the children color them in and hot glued them to clothespins (card stock and clothespins are from the dollar store).

Easy to make and fun!
T-shirts: OK, I didn't get the t-shirts from the dollar store, but I did get them from the craft store on sale for 4 for $10. I had originally wanted to have the children create shark t-shirts like one I saw in Family Fun Magazine years ago, but ran out of time to do the prep work necessary. So, I let the older kids design their own shark inspired t-shirts using clear contact paper and sprayable fabric paint. I purchased the clear Contact paper at the dollar store and one roll was enough for 8 t-shirts. The older kids went with a "Shark Attack" theme with their shirts. For the little ones, I cut shark head shapes from the contact paper and the little ones got to spray and draw on their shirts with fabric paint.


A shark coming up from the deep to investigate a swimmer...

This isn't going to end well...

This shows the empty shark cage and the shark with feet sticking out of its mouth.
YIPES! I assure you these are by well-adjusted children!

And the "Rest of the Story..."
I was also able to get "Happy Birthday"-themed paper products at the dollar store (cups, plates, napkins) as well as streamers, and balloons. They weren't "Shark"-themed, but were bright and colorful!

All-in-all I think the party went well! And little guy said he had a wonderful time hanging out with his friends!

Wednesday, February 29, 2012

Dollar Store Preschool Art Ideas

I have two little ones under 5 and there are some times when I need to keep their hands occupied, but I don't want to have a mess on my hands (like just before dinner!). In my travels around cyberspace I've collected a couple of age appropriate art ideas that would work perfectly!


Yarn Art on a Sand Paper Board

I made a list and went to the dollar store and bought much of what I needed! These ideas are not mine and they are out there in abundance. Make a couple of these for your little ones for busy time, a car ride or to give as a birthday gift for your favorite preschooler! ENJOY!

Mini Salt Sensory Table

Supplies Needed:

  • Small tray (a dark one works well)
  • Salt (about 1/3 cup)
  • Miscellaneous stuff: paint brushes, cookie cutters, small scoops, little trucks (we like construction/snowplow ones)
Directions:

1. Place 1/3 cup salt in the bottom of the tray. Too much and the child won't be able to "draw" in the salt properly.

2. Play! Actually, this is a great way for children to explore drawing shapes and letters. They can "draw" in the salt or push it around with the construction vehicles for a mini sandbox experience. This is the messiest activity of the bunch, but cleanup isn't too bad...

Cost: $1.50 (not including Misc. "stuff")
This salt activity tray idea is from "Teach Preschool" blog. I LOVE this blog! It is full of wonderful activities and experiences for the younger set. Deborah is so creative, I look forward to seeing what she comes up with!

Salt: messy, but fun!

Mess-Free Fingerpainting

Supplies Needed:
  • 1 gallon-size zip top freezer bag
  • About 1/3 cup tempera paint
  • Piece of foam core or heavy cardboard, optional
  • Duct tape
Directions:
There are a couple ways to do this: you can either put two colors in the bag such as red and yellow and have the child mix them and learn about color mixing (red & yellow make orange) OR you can just put paint in the bag and move on to the fun! Either way, you'll want to put about 1/3 cup paint total in the bag (too much doesn't work well) and then squeeze the air out of the bag and zip it shut. Then use duct tape to further seal the seam closed. I taped ours to a piece of foam core so it is portable.

Cost: $3.00 if you use cardboard you have at home for the backing

Oldest son says "It's like an iPad!" So sad...

Sand Paper Board (With Variations)

Supplies Needed:
  • Coarse Sandpaper Sheets (Yep, I got a pack at the dollar store!)
  • Hot glue gun with glue sticks
  • Heavy cardboard or foam core
  • Duct tape, optional
  • Sharpie or black paint, optional
  • Yarn bits
1. Glue the sandpaper sheet to the cardboard or foam core using hot glue. Cover the edges of the piece with duct tape, if you'd like a more "finished" edge.

2. On some of the boards, draw lines (horizontal, vertical, diagonal, wavy, curved, zigzag, etc.) with a marker or paint. Another idea is drawing shapes such as circle, square, triangle, etc. 

3. Cut bits and pieces of different colors of yarn and have your child press them onto the sandpaper (following the lines you drew, if desired, or making his/her own pictures). The yarn will stick to the sandpaper and can be removed and reused over and over! Felt and cotton balls also will stick to the board.

Exploring shapes and lines.

Related Posts Plugin for WordPress, Blogger...