Showing posts with label ornament. Show all posts

Tuesday, December 18, 2012

Artsonia Ornament Picture How-To

I saw this project on Artsonia and thought my students would love to make this, and guess what? I did too! I made this along side one of my private art students and it was fun and easy and I love the contrast and graphic look of the piece.


Ornaments and Evergreen Picture

Supplies Needed:

  • Scraps of watercolor paper 
  • A circular object to trace--I used a glass (our circles are about 2 1/2" in diameter)
  • Pencil
  • Watercolor paints and brushes
  • White watercolor pencil or crayon
  • Water bucket and paper towels
  • Black mat board
  • Oil Pastels
  • Tacky glue
  • Gold and silver Prismacolor colored pencils
Directions:

1. Use the pencil to trace the circular object onto your watercolor paper about four to five times. Trace lightly. It is better to have a couple more circles than you'll use, just in case.

2. Use the watercolor crayon to add the highlights to each of the ornaments.

3. Wet the entire circle of an ornament. Use the watercolors to create juicy, saturated colors on the ornaments, letting the water blend the colors (wet on wet technique). Use your brush to blend the colors into the highlight a bit to soften the edges. Try to use three colors per ornament--choosing colors that are next to each other on the color wheel (analogous) so that they blend nicely. Repeat with all of the ornaments. Let dry.

4. Use the oil pastels to create the branches of the evergreens. I had my student start with the brown part of the branches. Use a chocolate brown first and rough in the branch. Then go over the branch with a lighter brown (like a yellow ochre) for the highlights. 

5. Use the oil pastels to create the needles of the evergreen. Start with a dark emerald green and rough in some of the needles. Then layer on the medium kelly green color for the bulk of the needles. Finally, use a light moss green for the highlights. Remember to make the needles start at the branch and curve toward the tip of the branch, the way real evergreen needles do.

6. Glue the ornaments onto the background. you may need to place a book on top of them to keep them from curling.

7. Use the gold colored pencil to add the top of the ornament (the finial?) and the hook. Use the silver to create a bit of highlight on the gold.

Merry Christmas!

Thursday, December 6, 2012

Pinterest Party 2012!

My friends are too busy to get together over the holidays. They work, they have children, they have large families with lots of commitments. Me too, but sometimes going without seeing or talking to my friends for two months, or so, is too long! Friends are what help me get through all of that everyday stuff and offer me a bit of comic relief--and I certainly need that when I'm up to my eyeballs in "to do's" and tinsel!
Look at this LOOT!
I mean, look at all of these presents I was able to make...
I could have had a cookie swap, but I didn't want the stale cookies or calories. I could have had a gift swap, but that didn't seem right either. So, I had a Pinterest Party. Here's how it worked:

How It Works:
I invited 7 of my crafty friends. I asked that they choose an easy, gift-worthy craft from Pinterest, make a sample of it and bring the supplies needed to make 7 more. Making a sample beforehand let us know what we'd be making and allows the person to work all of the kinks out beforehand. I asked that they only spend $20-$25 total for all of the supplies necessary to make their craft. Then, the plan was for us to all get together, eat, drink and craft and go home with one of seven different crafty gifts.

I also asked that they bring a snack, drink or dessert from Pinterest to share.

What I Did To Prepare:
Along with making my own craft, I made sure I had a few tables on hand for us to craft on (instead of my one little dining room table). It's great to have some basic supplies like a hot glue gun, scissors, glue sticks, extra ribbon in various sizes and colors (I just grabbed my ribbon bin) and tape. Having a cleaning spray, paper towels and dustpan and broom easily accessible will also help when you need to tidy between projects.

I think next year I will have a gift bag station for wrapping the gifts and a dedicated place for people to put their gifts as they finish them (maybe a large gift bag or grocery bag with handles).

I also set up a group board on Pinterest and invited all of my guests to pin their craft and food item so that, after the party, we'd have access to the directions and recipes, if needed. Our Board is here.

The Projects:
Wow! I was so thrilled at the diversity of the projects! Here's what we made:

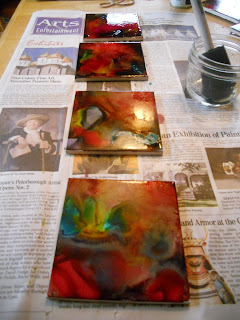
  • Alcohol Ink Coasters (set of 4)
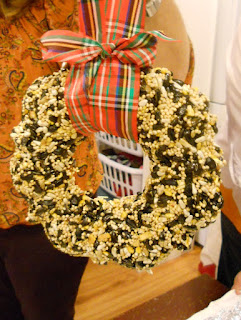
  • Birdseed Wreaths
  • Mason Jar Soy Candles
  • Terrariums in a Glass Ornament
  • Desktop Dry Erase Board
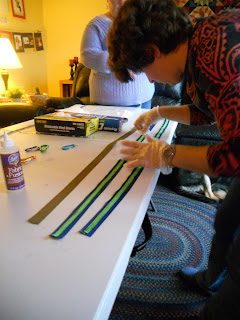
  • No-Sew Lanyards
  • Washer Necklaces

We took turns having the person who brought a specific project lead the rest of us through it in a mini tutorial. We learned so much about so many different types of crafts and we were able to try things that we might otherwise have never done.

Working on the No-Sew Lanyards
The Food:
YUM! Too many good things and WAY too much food! But I enjoyed working my way through the buffet! I had coffee and tea on hand as well as juice spritzers. One of my good friends brought eggnog from a local dairy. These are some of the recipes from Pinterest that were there (Check out the Pin Board for the links/recipes):

  • Pumpkin Whoopie Pies
  • Candy Cane Dip With Apples & Oreos for dipping
  • Asian Slaw With Ginger-Peanut Dressing
  • Buffalo Chicken Enchilada Roll-ups
  • Goat Cheese Stuffed Bacon Wrapped Dates
  • Seven Layer Bars
  • Hummus & Salsa with veggies and chips, etc.

Some of the coasters drying--these really brighten up
after they are sprayed with the sealant.
Some Thoughts:
If you think you'd enjoy a Pinny Party, do it! It was fun and it's great to come away with lots of little gifts for giving. It does take some advance planning since you have to give your guests time to come up with an idea, try it at home, and shop for the supplies to create enough for your guests.

We had allowed three hours for the party (from 1:00-4:00 on a Sunday afternoon). That really wasn't enough time. Have your guests think of how they can prep some of their supplies ahead of time to save time and try to keep each project to about 1/2 hour. Limiting the guest list to 4-6 can help with time, but who wants to limit the guest list too much! Maybe if the party is held a bit earlier in the year (mid-November?) and there are two evenings of crafting (3-4 projects and evening) then that would allow for more time and more fun. But I wouldn't try to hold a party with two sessions in December--much too crazy!

But I LOVE the projects we made and I'm worried I won't be able to part with them! I'm so thrilled I was able to spend time with my friends and have some crafting therapy! I may not be entirely ready to face the holidays, but when things get stressful, I'll try to remember the good time I had with my friends this weekend.

And a present for our feathered friends, too!

Saturday, January 21, 2012

Mini Craft (Popsicle) Stick Snowman

Snowman's Valentine
by Leland B. Jacobs

I have a jolly snowman,
The best I've ever had.
I'm giving him a valentine
that ought to make him glad.
For though he's very handsome
and sound in every part,
I noticed only yesterday
he hasn't any heart.
So quickly with my scissors
and paper red and fine
I made a fancy little heart;
my snowman's valentine!


Left: Back of piece
Middle: Front of snowman, partway through project.
Right: Completed snowman project
This is a nice little craft that uses supplies you may already have on hand. I sent this craft in for my son's 2nd grade class to do at their Holiday Party, but it is a cute craft to do on a snowy day or decorate your snowman with a heart, attach the above poem, and give it out for St. Valentine's Day!

Popsicle Stick Snowman

Supplies Needed:

  • Four craft/popsicle sticks
  • Glue (I like using a glue gun, but tacky glue is probably better for little ones)
  • White tempera or acrylic paint
  • Markers (we used black and orange)
  • Felt scraps, assorted colors. You'll need a 3.5" x 4.5" rectangle for a hat and a 9" x 1" rectangle for a scarf
  • One to two 6" pieces of yarn
  • Sticky-backed felt shapes or paper to make a heart, optional
Directions:

1. Line up three of the popsicle sticks next to each other with their long sides touching. Cut the remaining popsicle stick into 1" sections. Glue two of the small sections onto the back of the larger popsicle sticks for support, using tacky glue or hot glue. This is your snowman's body. Let dry.

2. Flip the popsicles sticks over and paint the front of the snowman white. Let dry.

3. Fold one of the long edges of the 3.5" x 4.5" rectangle to make a hat brim. Using the photo as a guide, attach the hat to the snowman (you'll need to glue it to the front of the snowman and the back). Then, use a piece of yarn to gather the hat and give it some shape. Knot the yarn and trim excess. If you are making the snowman an ornament, make a loop with the second piece of yarn and attach it to the back of the piece.

4. Using the markers, draw features on your snowman such as eyes, carrot nose, mouth and buttons.

5. Cut 1/2" long slits for fringe at either end of the piece of felt you will be using for a scarf. Tie the scarf around the snowman and secure with a dot of glue. 

6. Add a paper heart if you are sticking with the poem above.

You're done! Enjoy your little snowman!

Thursday, December 22, 2011

Gifts From the "Art" Class

Last week I finished a mini course with students in 2nd through 4th grade where they create eight art-inspired gifts for giving. The course was fun to prepare for--I had to choose projects the children would love to make that resulted in gifts they would be proud to give! I think the class was very successful. 

The projects we created were:

Stained Glass Plate: based on rose windows of Gothic cathedrals, this project is pretty much a black snowflake-like shape decoupaged onto a clear glass plate with tissue paper squares added for color. These are striking displayed on a plate rack where light can shine from behind. We used Mod Podge to attach both the "snowflakes" and the tissue paper squares to the back of clear glass plates.
Faux stained glass plate

Watercolor coasters: The children used crayons and watercolors to create four pieces of art (Christmas images and the four seasons were popular). These paintings were then cropped and inserted into a glass coaster set.
One student's set of coasters with a holiday theme.

Mexican Folk Art-Inspired Ornaments: The original post for this can be found here.

Pillow Pals: The children drew an animal, doll or critter onto white cotton using permanent marker and crayon. The image was heat set and stuffed with fiberfil. The result was a unique stuffed animal for a younger sibling.
Coloring in a turtle Pillow Pal. We used black Sharpies to outline and regular Crayola crayons to color in the images. When done, heat set using a warm, dry iron and a pressing cloth.


Framed Silhouette: I took the children's profile pictures in the first class, printed them out, cut them out with scissors and then painted the shapes. The children mounted these on white paper for contrast and then on a larger piece of colored card stock and framed the piece. Mom is sure to love those! I'll have a more detailed post about this in the future.

Mosaic candles: We used the technique from the snowglobe mosaics post to create little mosaics (7x7 squares). The children could do a holiday image such as a tree or snowflake, or the initial of the gift recipient. The resulting mosaic was decoupaged onto a ready-made glass candle using Mod Podge.

Peg game: We used the process from an earlier post for a Valentine's Day peg game, but I changed the image to a tree. Dad will love that game!

Hand woven fleece scarf: We used a technique similar to one that I saw in Family Fun magazine, but substituted different types of yarn for a more artistic look and feel. The resulting scarf is sophisticated, and a great intro to weaving. Plus it used up some of the yarn I had in my stash!

Lots of great projects! I have had wonderful feedback from the parents and students! I think this course increased the students' confidence in being able to create a quality finished art piece as well as showing them that the best gifts really do come from the heart. Have a wonderful New Year!

Thursday, December 15, 2011

Mexican Folk Art Ornaments

Ooooh, I have a special treat for you today! Tooled metal ornaments inspired by Mexican folk art! They are so bright and shiny, the children just loved making them!
Mexican Folk Art Ornament

When I am looking for inspiration for art projects, I look pretty much everywhere: my Art History books, gift catalogs, and magazines to name a few of my sources. My grandmother loves to bring me magazines that she's done with. No matter how old the magazine is, I love to look through them for techniques and inspiration. This craft was originally published in "Crafts" magazine in 1984. I loved the look of these ornaments and thought my art kids would love to make them. I was right! They LOVED making these. I had them make little cards to put them in so they could give them to a loved one as a gift.

The tooling aluminum needed to be ordered online from www.dickblick.com, but it was so worth it! I ordered a roll for just under $6 and combined with a couple of other things, shipping was only $7. I know that seems like a bit much, but I did have a few things in my order and the tooling aluminum is a roll of 15' or so, enough for plenty of ornaments! Plus, it is a medium that is unusual for the children to work in. I highly recommend it! So, let's get started!

Supplies Needed:

  • Tooling aluminum, available from www.dickblick.com
  • Newspaper
  • Dull pencil or blunt stick for tooling the design
  • Sharpie markers or other permanent felt tipped markers in a variety of colors (I had an eight color assortment available, but so many beautiful colors are available!)
  • Hole punch
  • 8" piece of ribbon for hanging
If you would like to make this as part of a card, see the end of this post.

Directions:

1. Choose a design for your ornament, we used the full size ornament patterns that were published in "Crafts" magazine, but I also had a few blank ornament shapes available for children to design their own. I encouraged the children to design bold designs with clear, large shapes. I also told them to fill up the entire ornament shape and add some details to their design (tons of little details may get lost, but I didn't want them to just draw one little shape in the middle of the ornament and say they were done). Just to be sure they created designs that would work, I had them show me their drawings "for approval" before they started tooling.

2. Using scissors, cut a piece of the aluminum roughly the size of your ornament. We used 4 1/2" x 6" rectangles. Tape the paper with your ornament design to the aluminum to hold it in place while you work.

3. Place the aluminum onto a pad of newspaper. This will create a soft surface for the metal. Using a dull pencil and firm pressure, trace over all of the lines of your design.

4. Once your design is done, use scissors to cut out the shape of the ornament. I found that younger children had trouble with this part and sometimes the ornament would get all bent up or the outer shape would become distorted. So if you are working with younger children, you may want to cut the ornaments out yourself.

5. Flip the ornament over and gently color the raised surfaces with permanent markers. The children can create large areas of color and then add details with a darker color on top. Encourage doing one's best work, taking one's time and adding details and pattern.

6. Once done, have the child add his/her name and date to the back.

7. Use a hole punch to create a hole for hanging and add ribbon to hang the ornament.

8. Attach to a card if desired. See my card directions, below. Feliz Navidad (Merry Christmas)!

Some of the ornaments done my my students

----------------------------


To make this project into a card:

Additional Supplies Needed: you'll need construction paper for the card, an envelope, tape to adhere the ornament to the card and the optional information for inside the card (see the info later on in the post).

Cut a piece of construction paper so that it fits inside the envelope you have. Inside the card, glue the greeting and the information about the project. Have the child sign the card.

The greeting I used was:

Feliz Navidad, próspero año y felicidad!

(Merry Christmas, a prosperous year and happiness)

 May the Spirit of the season bring you joy and peace.


I also included this information on the card: 

Tooled Metal Ornaments


Congratulations! You are the proud recipient of a hand-tooled and hand-colored metal ornament. These ornaments are done in the style of Mexican folk art with markers standing in for the traditional paint. The children used tooling aluminum from www.dickblick.com, pressing their designs into the metal with a dull pencil, then added color with permanent Sharpie markers.

Care of your ornament: the tin is bendable, so care should be taken to keep it from being crushed. It should also be hung up away from little ones since the marker could come off if the ornament is chewed on and the edges are a bit sharp for delicate fingers.


Use tape to attach the ornament to the front of the card and draw a "frame" around the ornament with a felt tip marker to fancy up the front of the card. Done!

Note: if you are going to write a name on the front of the envelope, do so before you put the ornament in the envelope or you will ruin the ornament. Also, take care not to fold or bend the ornament--the metal is pretty thin and will crush and/or bend easily. If you want to mail this card, you'll have to put it in a crush- and bend- proof package.
Related Posts Plugin for WordPress, Blogger...