Showing posts with label letters. Show all posts

Wednesday, August 26, 2015

1 Point Perspective Shapes of AWESOMENESS

Ok, so this is a pretty basic 1 point perspective draw-a-long that I did with my 6th grade students. This was left by the art teacher for me to do with the students as their first project of the semester. Since it could be a little dry, I starting calling it "Shapes of AWESOMENESS" and used a super-hero-type voice that really inspired awe in my students :-) or maybe they were worried I had lost my marbles!


One of the students made me this--Thank you!

Anyhoo, this was a great way for them to learn the basics of perspective drawing such as horizon line, vanishing point, height, width, depth, facing size, construction lines, etc. They were able to draw geometric shapes, organic shapes, and letters. I encouraged the students to place their shapes and letters above and below the horizon line.

Once they practiced drawing a variety of shapes and letters on their "Shapes of Awesomeness" test sheet, I gave them another, smaller piece of paper and they could draw their names using what they had learned. They drew with pencil, outlined with Sharpie, then shaded with colored pencils.

My super-smart students then suggested we glue the finished names to their folders (duh, Mrs. P, why didn't you think of that!?!) and that's what we did. The teacher I was subbing for uses basic two-pocket folders for students to hold class paperwork and smaller projects in-the-works and these fit nicely on the cover.

Enjoy!

Thursday, June 13, 2013

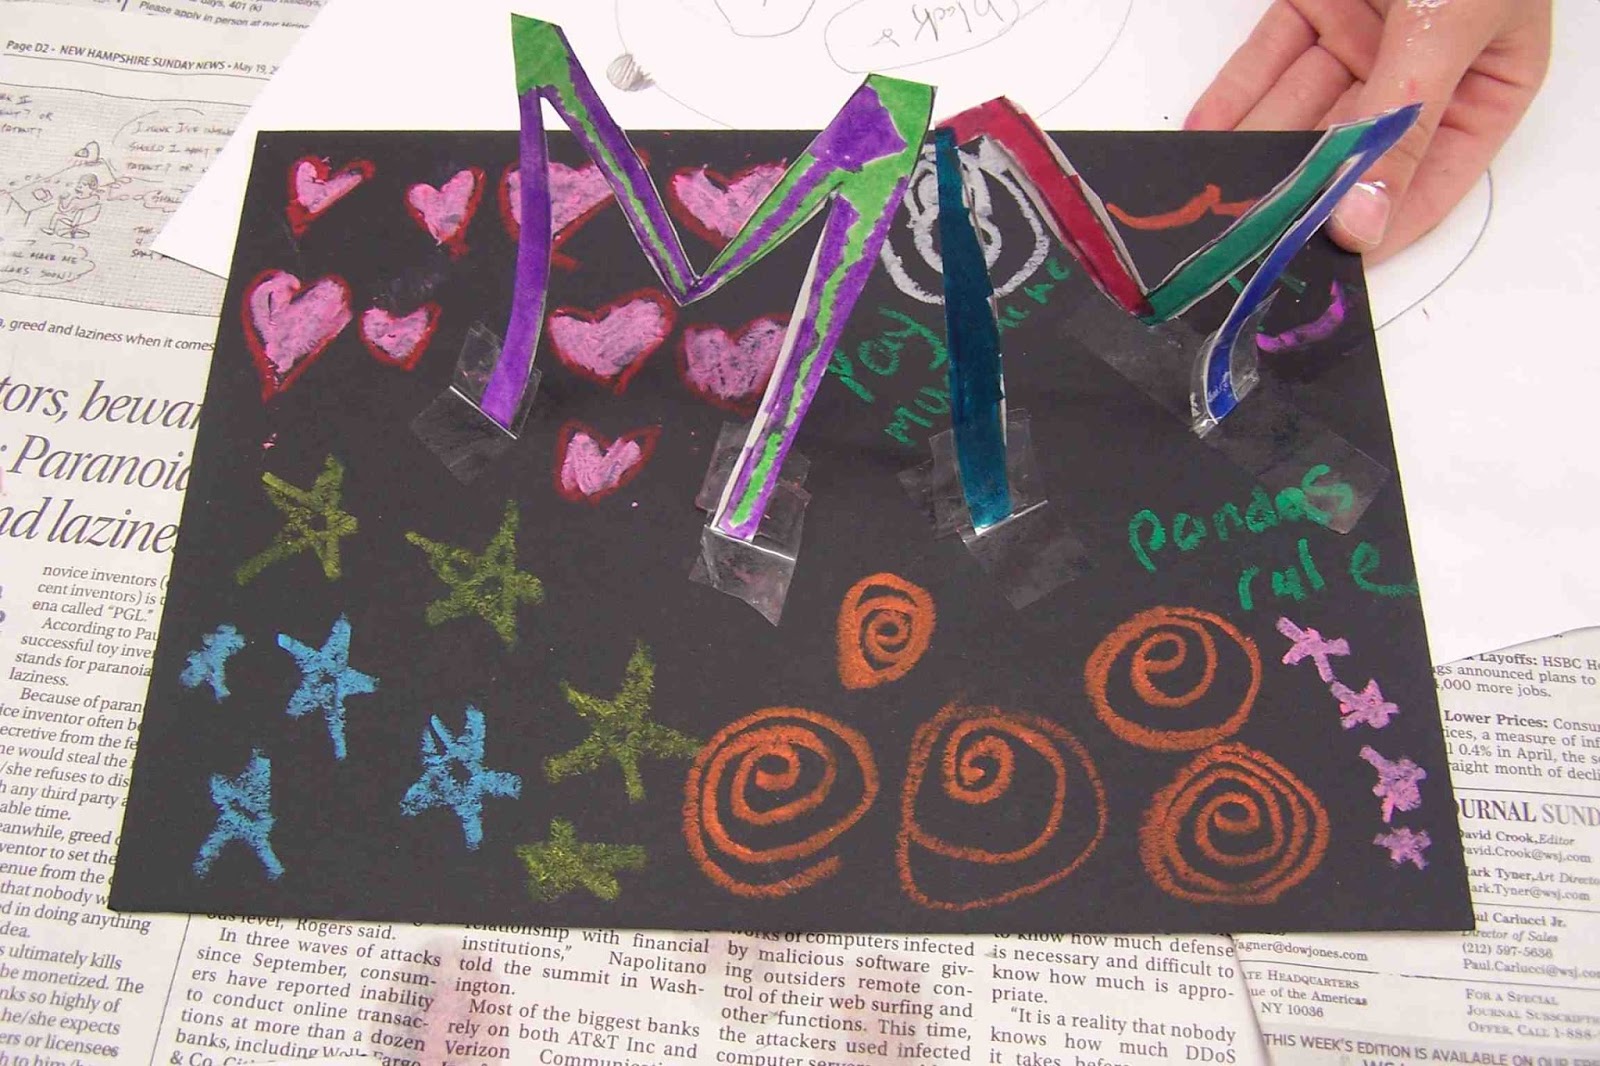
Easy Paper Name Sculpture For DAD

Yep, Father's Day is right around the corner, but don't fret if you haven't made Dear Old Dad a present yet...here's a fun and easy sculpture you can make for him that will look nice on his desk or toolbox (that's how the dads in our family roll). 


This project is based on one I saw on pinterest that had no destination or info--it was pretty much a picture on the internet. I've tried to do it justice, so here's my version. My early finisher students did this one day after painting some other sculptures. I'd say this project takes less than a half an hour to do if you choose an easy word like "dad."I'd love to have my students create multi-leveled sculptures with their entire names (more letters = a more exciting sculpture), but that's for another time!

Paper Name Sculpture For DAD

Supplies Needed:
  • 3" x 5" index cards, white on both sides (one for each letter of the name you choose)
  • Pencil
  • Scissors
  • Markers
  • Clear Tape
  • Mat Board, we used black
  • Oil Pastels
Directions:

1. Draw nice, thick letters onto the index cards making them as big as you can (touching all edges of the index card, if possible). Cut out your letters with scissors.

2. Decorate both sides of each letter with markers. Use at least two colors on each side of every letter. Try using different patterns and colors for each letter--have fun!

3. Use clear tape to attach the letters to the mat board so they stand up. Make your letters touch and lean against one another, if you'd like. The more letters you have, the more elaborate your sculpture will be. You can even make your sculpture go up vertically if you have enough letters. Think of building this sculpture like you would build a house of cards with a deck of playing cards, but you can hold the letters together with clear tape (bonus!).

4. Once all of your letters are taped where you'd like them, use the oil pastels or craypas to write a message on the base such as "I Love You!" or "Dad Rocks!" The decorate the rest of the base with the oil pastels with swirls, lines, and patterns.

Now you have a colorful sculpture for Dad! Enjoy!


Some students made sculptures with their initials instead.

And this student made a sculpture for his dog, Lulu!

Wednesday, September 19, 2012

Art and the ABC's of Ecology

I was asked to spend some time with 4-year-olds and talk about ECOLOGY. I said "YES!" and then ran to my computer to look up what "Ecology" was!

Ecology is: 1. the branch of biology that deals with the relations of organisms to one another, and 2. The study of the interaction of people with their environment.


You'd "B" Crazy Not To Try This Recycling Craft! (GROAN!)

I started off having the children play with blocks. We talked about how we needed to share the blocks. If one person took all of the blocks, there wouldn't be enough for everyone. This is a good way to illustrate the concept of REDUCE. If you use less, everyone can have some. Then I talked a bit about how people and nature can be connected. If we go on a picnic and throw our trash on the ground it will dirty up the environment and outside is where animals live--it is their home! Imagine our homes filled with trash! YUCK!

So we went outside with a shopping bag and looked for trash. They were good at that game and found quite a bit! We also talked about biodegradable vs. non-biodegradable. Leaves will break down over time, but a plastic coffee cup will not.

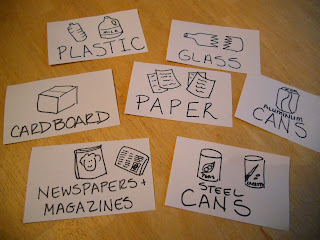
We went back inside and I introduced the next concept: RECYCLE. If we threw everything away or landfills will fill up quickly, and some of the stuff we throw away is still good or can be turned into something else. For example, water bottles can be turned into Polar Fleece fabric. I had a bunch of different recyclables on hand, in a pile, to show them. I had a ton of categories for them to sort the recyclables into (our town has a wonderful recycling center!). I had seven bins with labels such as:
  1. Paper
  2. Plastic
  3. Cardboard (Corrugated)
  4. Steel Cans
  5. Aluminum Cans (Soda cans)
  6. Newspaper/Magazines
  7. Glass (be careful with that!)
Here are my basic labels for the Recycling Bins

Then they sorted the recyclables into the appropriate bins. This went quite fast! I explained that other things can also be recycled: clothing, books and toys, by giving them away to someone who may need them.

On to the art project!

Recycled Letters

Supplies Needed:
  • Poster board (we used black)
  • Scraps of construction paper, magazines, newspapers, labels from cans, etc.
  • Glue stick
  • Scissors (young children can rip the paper if they aren't ready for scissors).
Directions:

1. Cut the first letter of the child's name from poster board. It should be about 10 inches tall and wide enough so that s/he has space to glue paper to the surface.

2. Have the child use the glue stick to attach bits of paper to the surface of the letter.

This project REUSES paper that normally would have been thrown away.

We then went back to the pond onsite and looked for trash and critters. We found water bugs and a frog and we also saw trash that we couldn't reach, floating in the pond, such as a tennis ball. This allowed me to reiterate the information I had talked about earlier about how humans and nature are connected and how our actions affect other living things.

Home Connections

To strengthen the learning this lesson at home, parents can do the following:
  • Discuss with children how they can be kind and not so kind to the environment.
  • Set up a recycling station at home and visit the Recycling Center in their town.
  • Look through outgrown toys, books and clothing and donate the items to those in need.
  • Go on a hike and/or picnic and be good stewards by staying on the paths and carrying out their trash and disposing of it properly.


Wednesday, February 29, 2012

Dollar Store Preschool Art Ideas

I have two little ones under 5 and there are some times when I need to keep their hands occupied, but I don't want to have a mess on my hands (like just before dinner!). In my travels around cyberspace I've collected a couple of age appropriate art ideas that would work perfectly!


Yarn Art on a Sand Paper Board

I made a list and went to the dollar store and bought much of what I needed! These ideas are not mine and they are out there in abundance. Make a couple of these for your little ones for busy time, a car ride or to give as a birthday gift for your favorite preschooler! ENJOY!

Mini Salt Sensory Table

Supplies Needed:

  • Small tray (a dark one works well)
  • Salt (about 1/3 cup)
  • Miscellaneous stuff: paint brushes, cookie cutters, small scoops, little trucks (we like construction/snowplow ones)
Directions:

1. Place 1/3 cup salt in the bottom of the tray. Too much and the child won't be able to "draw" in the salt properly.

2. Play! Actually, this is a great way for children to explore drawing shapes and letters. They can "draw" in the salt or push it around with the construction vehicles for a mini sandbox experience. This is the messiest activity of the bunch, but cleanup isn't too bad...

Cost: $1.50 (not including Misc. "stuff")
This salt activity tray idea is from "Teach Preschool" blog. I LOVE this blog! It is full of wonderful activities and experiences for the younger set. Deborah is so creative, I look forward to seeing what she comes up with!

Salt: messy, but fun!

Mess-Free Fingerpainting

Supplies Needed:
  • 1 gallon-size zip top freezer bag
  • About 1/3 cup tempera paint
  • Piece of foam core or heavy cardboard, optional
  • Duct tape
Directions:
There are a couple ways to do this: you can either put two colors in the bag such as red and yellow and have the child mix them and learn about color mixing (red & yellow make orange) OR you can just put paint in the bag and move on to the fun! Either way, you'll want to put about 1/3 cup paint total in the bag (too much doesn't work well) and then squeeze the air out of the bag and zip it shut. Then use duct tape to further seal the seam closed. I taped ours to a piece of foam core so it is portable.

Cost: $3.00 if you use cardboard you have at home for the backing

Oldest son says "It's like an iPad!" So sad...

Sand Paper Board (With Variations)

Supplies Needed:
  • Coarse Sandpaper Sheets (Yep, I got a pack at the dollar store!)
  • Hot glue gun with glue sticks
  • Heavy cardboard or foam core
  • Duct tape, optional
  • Sharpie or black paint, optional
  • Yarn bits
1. Glue the sandpaper sheet to the cardboard or foam core using hot glue. Cover the edges of the piece with duct tape, if you'd like a more "finished" edge.

2. On some of the boards, draw lines (horizontal, vertical, diagonal, wavy, curved, zigzag, etc.) with a marker or paint. Another idea is drawing shapes such as circle, square, triangle, etc. 

3. Cut bits and pieces of different colors of yarn and have your child press them onto the sandpaper (following the lines you drew, if desired, or making his/her own pictures). The yarn will stick to the sandpaper and can be removed and reused over and over! Felt and cotton balls also will stick to the board.

Exploring shapes and lines.

Related Posts Plugin for WordPress, Blogger...