Friday, April 29, 2016

Fourth Grade Projects From My Long-Term Sub Gig

Here are some of the projects from my long-term sub gig that appear in the collage here so that you had a bit more info on them...ENJOY!! For the background about where I've been/what I've been doing lately, scroll to the end of the post...


Ahhh...Monet's waterlilies--what's not to love?
For details on this project, scroll on down...

Fourth Grade Projects From My Long-Term Sub Gig:


Week 1: Winter Assemblage (1 day) Full post here.
A getting-to-know-you project inspired by Louise Nevelson.
Students worked individually or with a partner to create a folded paper “box.” Students then used strips of paper and various paper folding techniques to create a dimensional relief inspired by winter. Individual student work was mounted together to create a whole-class composition displayed in the artroom.
What a fun project--it ended up being a great whole-grade
project and allowed students to collaborate--something I'm a HUGE fan of! 
Week 2 through 4: Monet Relief Landscapes (2 days) An alternate form of this project can be found here.
Inspired by Monet’s Waterlily paintings
Students used oil pastels with short strokes or color to create the “impression” of the water, vegetation and flowers seen in Monet’s gardens. The "base" for these pictures was a 4" x 6" index card from the dollar store (cheap!).

On week two, students could add dimensional details to their work such as tissue paper water lilies. Pieces were mounted onto mat board and presentation was discussed. I had picked up some mat board scraps that were sized perfectly for this project. Check around your area to see if you can find a framer who'll give you some scraps--mounting students' finished work really makes a difference (and "presenting" is part of the National Common Core Arts Standards!)

These came out so nice! I had wanted to do a display of them for the hallway (complete with a HUGE postcard from Monet), but I was afraid little fingers would pick off the lily pad tissue paper flowers--and many of the students wouldn't part with them and wanted to take them home ASAP!)--that is also why I don't have lots of examples of their work (I can't teach and take photos at the same time!).

While I encouraged students to add tissue paper water lilies,
I didn't force them. I love how graphic this bridge it--
it really stands out!
This is one of my favorites. I love the addition of the fish--
it looks like a koi pond.
Students needed to completely cover the white of the card
and use MANY colors in every section. 
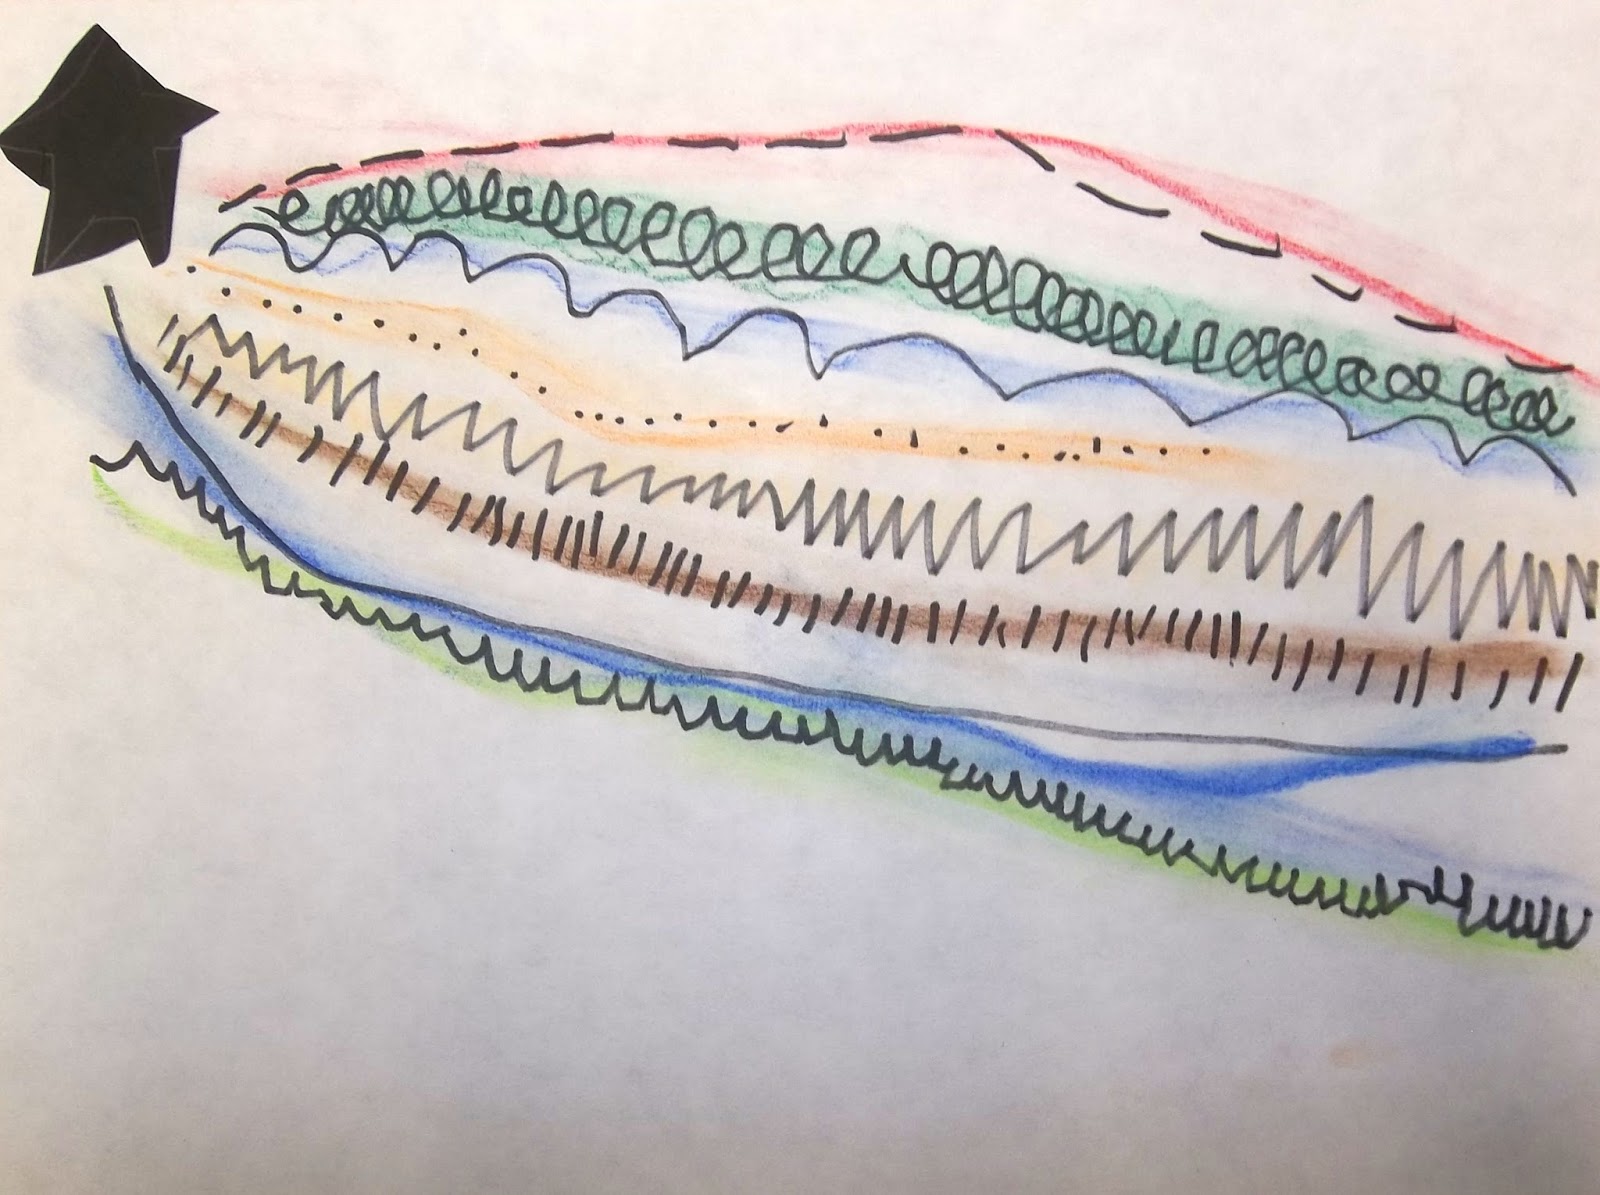
Week 5 and 6: I am a STAR Project From the great Cassie Stephens, y'all
We talked about what makes us special (a.k.a. a "STAR"). Students created a folded 3D paper star and used Sharpie to add designs to each section of their star. They then used markers to add color to each section. 

Once they were done their star, students used metallic markers to write why they are a star (why they are special) onto the background paper. Once the star was adhered to the background, students used chalk pastels to add accent colors to their background. 


I don't have any picts of the stars the students did,
but here's the "test" one I did with my daughter who is in kindergarten.
The fourth graders didn't get quite as much art time with me as the other grade levels did. One week, they were on field trips another week I was at the NAEA conference in Chicago. Bummed about that, but I enjoyed getting to know them and creating art with them!

----------------
Backstory for this post:

So, it's been a busy Spring for me since I finished student teacherin' in December--I subbed a bit in preschool, kindergarten, elementary and high school and then landed a wonderful 6 1/2 weeks long-term sub gig at an elementary school nearby teaching art to grades K-5. What a blast I had--the students and staff at Fairgrounds rock and I was sad to go (it's hard to stop doing something you love when your next big thing isn't settled upon yet). Since then, I haven't blogged much because I've been daily subbing and working on my dang art teacher portfolio (more on that in a future post or ten). Check the sidebar (over on the right side of the blog) for other posts in this series (k-5 at Fairgrounds Elementary School). ENJOY!!

Monday, April 25, 2016

Third Grade Projects From My Long-Term Sub Gig

Here are some of the projects from my long-term sub gig that appear in the collage here so that you had a bit more info on them...ENJOY!! For the background about where I've been/what I've been doing lately, scroll to the end of the post...

"I am flying over the Eiffel Tower. I had a dream to go near. I am so happy."
Check out the post about this project below...
Third Grade Projects From My Long-Term Sub Gig:

Week 1: Snowglobes (1 day)
A getting-to-know-you project.
Students used construction paper and construction paper crayons to create 3D snowglobes with winter scenes in them. You could use oil pastels for more vibrant colors. The blue background paper is double-thickness so it stands up better and doesn't curl. The pieces could also stand up due to a ringed base. Glittery “snow” was added for sparkle! This one is a keeper in my opinion!

Since I did this project in one day with the students (and they took them with them),
it was a whirlwind and I didn't get any photos of student projects :-(
Week 2 and 3: Jasper Johns Numbers (2 days) 
A continuation of a project started prior to my arrival
Students used pencil and Sharpie to create numbers within a folded grid. Once inked, students could use crayons and paint to add color to the negative spaces within their work.

Jasper Johns, Numbers in Color (1958-59)  
Sorry, I don't have pictures of this, 
but the project was similar to this one, but numbers-only.

Week 5 and 6: Faith Ringgold Story Quilt A similar project can be found here.
Inspired by the book, “Tar Beach,” by Faith Ringgold
I feel that this project is sort of my go-to project with all students--I just love it and it so adaptable. I saw the write-up of a version on scholastic and decided to do that the time. Scholastic has a TON of related activities--check out this wonderful link.

For this version of the project, students looked at the book, “Tar Beach” by Faith Ringgold and used drawing and collage to create storytelling quilts about flying away to someplace special. Students then wrote a description of their piece to be displayed with the work. Individual student work was mounted together to create a whole-class composition displayed in the hallway. Note: the glare on the photos below are due to the glitter glue "stars" we added. Everything is betta with glitta!

The finished quilt--beautiful! 
A quote from the book, "I have told him it's very easy,
anyone can fly. All you need is somewhere to go that you can't get to
any other way. The next thing you know, you're flying among the stars."
The little white pieces below each square are the students' write-ups about
what is going on in their work. 
"Hi. I am Liz and I'm in New York where there's cars and good food
and on the 4th of July we put fireworks up in the sky but right now
I'm flying. Do you want to fly with me?"

"I am the fastest superhero and I like basketball and soccer.
I am speedy."
Week 7: Kandinsky group mural Check out the original post here.
Inspired by Kandinsky’s color studies
Students used paint to create a composition of concentric rings based on the color studies by Kandinsky. Individual student work was displayed with other grade levels to create a multi-age group mural for the hallway.

A close-up of the individual 6" squares all glued together
onto the larger roll of paper using Elmer's glue (a dot in each corner).

The finished mural. Beautiful!!

Second Grade Projects From My Long-Term Sub Gig

 Here are some of the projects from my long-term sub gig that appear in the collage here so that you had a bit more info on them...ENJOY!! For the background about where I've been/what I've been doing lately, scroll to the end of the post...


OK, I just think this is the cleverest solution to the "Beautiful OOPS" project
described below--this tiger is just TOO cute!!
Check out the post below to see how it was made...
Second Grade Projects From My Long-Term Sub Gig:

Week 1: Winter Landscapes (1 day) Original Post here.
A getting-to-know-you project.
Students used crayons to draw a winter landscape focusing on foreground, background and atmospheric perspective. They then added watercolor to their work (watercolor resist) to add a colorful sky (sunset, nighttime, etc.).


Inspired by Vincent van Gogh’s Sunflowers
Students used Sharpies to create radial designed “sunflowers” and used oil pastels to add color to their work. Students then cut out their flowers and individual student work was mounted together to create a whole-class composition displayed in the hallway.
Oops, a little glare on the reproduction in the middle...
This display used two bulletin boards. This is display #1.
Display #2. Each second grade class had a vase of flowers.
My mentor teacher did this project with grade 1, this was done with grade 2,
but I think it could be done with a variety of grade levels.

A close up of one of the compositions.
The "table" is dollar store contact paper--easy!!

Week 3 and 4: Beautiful Oops! (2 day) 
This one was from my mentor teacher, Meagan Read, at Riddle Brook Elementary School
Inspired by the book, “Beautiful Oops!” by Barney Saltzberg
Students looked at the book, “Beautiful Oops!” by Barney Saltzberg and then moved through a series of stations where they made six “Oops!” on their papers.

  • Table 1: tear or cut a scrap of warm colored paper and glue to your background paper (up to 2 times).
  • Table 2: tear or cut a scrap of newspaper and glue to your background paper (up to 2 times).
  • Table 3: tear or cut a scrap of cool colored paper and glue to your background paper (up to 2 times).
  • Table 4: Dip the side of a cardboard scrap into paint and stamp onto paper to make a line (up to 6 times)
  • Table 5: Dip a mug into paint and stamp onto paper to make a ring (up to 3 times)
  • Table 6: Write your name on your background paper and then trace a circle tracer onto your background paper and cut it out (make a hole in your paper--1 time).

The next week, we looked at the book again and discussed how we could turn mistakes into masterpieces. Students then used markers and crayons (and imagination and innovation) to transform their mistakes into wonderful art.


The write-up that was part of the display.
A cute little guy!

"The Big Monster:"
This is me, the big monster.
I like to roar--it's fun.
I am roaring now.

"The Rainforest:"
The rain is in the trees and (dropping?) from the tree. 
"The Snowman Winter Clean-up"
The finished display got a TON of attention by staff and students alike.
It was colorful and creative and I often saw people stopping and reading
the captions written by the students about their work.
Note: If you are looking for cookie-cutter, pretty projects, this many not be
the project for you--but it is fun and creative!
Week 5 and 6: Juan Miro’s Fantastical Creatures! Check out my original post here.
Inspired by the work of Juan Miro that Mrs. Pettus saw on her trip to Chicago
Students looked at the work of Juan Miro and noticed the shapes and lines he used to create his images. Students then used dice to randomly select pieces and parts for their own creatures and fantasy compositions. Once the creatures, shapes and lines were drawn with oil pastel, students added a wash of watercolor (water resist) to the background to add mood. This was a wonderful project to follow the Beautiful Oops since students needed to adapt and use their imagination.


Week 7: Week 7: Kandinsky group mural Check out the original post here.
Inspired by Kandinsky’s color studies
Students used paint to create a composition of concentric rings based on the color studies by Kandinsky. Individual student work was displayed with other grade levels to create a multi-age group mural for the hallway.

A close-up of the individual 6" squares all glued together
onto the larger roll of paper using Elmer's glue (a dot in each corner).

The finished mural. Beautiful!!


----------------
Backstory for this post:

So, it's been a busy Spring for me since I finished student teacherin' in December--I subbed a bit in preschool, kindergarten, elementary and high school and then landed a wonderful 6 1/2 weeks long-term sub gig at an elementary school nearby teaching art to grades K-5. What a blast I had--the students and staff at Fairgrounds rock and I was sad to go (it's hard to stop doing something you love when your next big thing isn't settled upon yet). Since then, I haven't blogged much because I've been daily subbing and working on my dang art teacher portfolio (more on that in a future post or ten). Check the sidebar (over on the right side of the blog) for other posts in this series (k-5 at Fairgrounds Elementary School). ENJOY!!

Friday, April 22, 2016

First Grade Projects From My Long-Term Sub Gig

 Here are some of the projects from my long-term sub gig that appear in the collage here so that you had a bit more info on them...ENJOY!! For the background about where I've been/what I've been doing lately, scroll to the end of the post...
Here's lookin' at YOU! Check out the projects below for some
first grade ARTSY inspiration!
Grade 1 Art Projects From Fairgrounds Elementary School:

Week 1: Winter Windows (1 day)
A getting-to-know-you project.
We looked at the book, “Snowflake Bentley” by Jacqueline Briggs Martin. Students folded their paper to make four “window panes” and used crayons to draw four six-sided snowflakes (just like real snowflakes). They then added watercolor to their work (watercolor resist) to add a colorful sky (sunset, nighttime, etc.) and enhance the snowflake designs. The wet work was sprinkled with salt to add texture and interest to the work.

A close-up of one of the "Winter Windows"--
this light yellow crayon was easier to see than a white crayon on white paper.

Week 2: Aboriginal Bark Paintings (1 day)
A continuation of a project started prior to my arrival
Students used crayons to create mini circles within a photocopied Aboriginal design. They then added a black tempera paint wash to their work (watercolor resist) to enhance the designs. Finished pieces were mounted onto construction paper backgrounds.

No image of these--sorry!

Week 3, 4 and 5: Feathers For Lunch Collage (2-3 day) From Fine Lines
Inspired by the work of Mrs. Pettus--that's ME! (I've been doing collage work lately) and the collage artist Lois Elhert and her book, “Feathers For Lunch”
Students looked at the book, “Feathers For Lunch” by Lois Elhert and used different shapes and papers to create a collage composition of a cat and a bird. Details could be added using crayon and a real feather was attached to represent the one that got away—just like in the book!

Our inspiration!!
We talked about using shapes to make our cats and birds.
We used real feathers and oil pastels for fun details.

If a student wasn't in class the first week, they could make just the bird on week two.
This student was fascinated by the hole punches he found on the supply cart.

I love this cat's expression!


The finished display I copied from Fine Lines Blog--
it was perfect, so I just had to do it!

Here's the write-up that I displayed near the bulletin board-
it really helps everyone to see all of the details of this project
(as well as the National Common Core Standards in Art)

Week 6: Line Study With Pastels (1 day)
The attributes of line were discussed (length and direction) and then students took turns drawing different types of lines. Students then cut out a shape of their choice (emphasis on something that moves such as an animal or vehicle, etc.) and attached it to a piece of white paper. They used Sharpies to drew eight different types of lines coming from their shape and going off the edge(s) of their paper. Lastly, they used chalk pastels to trace their lines and smudged them to add the illusion of movement to their work.

Beautiful shooting star!

Some students chose to have a limited color palette, but they still turned out beautifully.

A flying airplane.


And this is a football flying back and forth between players--LOVE it!
We also had flying pigs, a giraffe or two, cars, superheros, a UFO, a couple of rockets,
LOTS of footballs, a unicorn, some cats and much more!
Week 7: Kandinsky group mural See post here
Inspired by Kandinsky’s color studies

Students used paint to create a composition of concentric rings based on the color studies by Kandinsky. Individual student work was displayed with other grade levels to create a multi-age group mural for the hallway.

A close-up of the individual 6" squares all glued together
onto the larger roll of paper using Elmer's glue (a dot in each corner).

The finished mural. Beautiful!!

----------------
Backstory for this post:

So, it's been a busy Spring for me since I finished student teacherin' in December--I subbed a bit in preschool, kindergarten, elementary and high school and then landed a wonderful 6 1/2 weeks long-term sub gig at an elementary school nearby teaching art to grades K-5. What a blast I had--the students and staff at Fairgrounds rock and I was sad to go (it's hard to stop doing something you love when your next big thing isn't settled upon yet). Since then, I haven't blogged much because I've been daily subbing and working on my dang art teacher portfolio (more on that in a future post or ten). Check the sidebar (over on the right side of the blog) for other posts in this series (k-5 at Fairgrounds Elementary School). ENJOY!!

Tuesday, April 19, 2016

Kindergarten Projects From My Long-Term Sub Gig

Hello!

So, it's been a busy Spring for me since I finished student teacherin' in December--I subbed a bit in preschool, kindergarten, elementary and high school and then landed a wonderful 6 1/2 weeks long-term sub gig at an elementary school nearby teaching art to grades K-5. What a blast I had--the students and staff at Fairgrounds rock and I was sad to go (it's hard to stop doing something you love when your next big thing isn't settled upon yet). Since then, I haven't blogged much because I've been daily subbing and working on my dang art teacher portfolio (more on that in a future post or ten). ANYHOW....I thought I'd break out some of the projects that appear in the collage here so that you had a bit more info on them...ENJOY!!

For more info on this awesome project--READ ON!
Kindergarten Art Projects From Fairgrounds Elementary School:

Week 1: Lots of Hearts (1 day)
A getting-to-know-you project.
Inspired by Valentine’s Day, students used chalk pastels to trace the outline of a heart shape (line) and then smudge the edges with cotton balls. Once the heart tracer is removed a glowing heart (shape) remains. Students were asked to repeat the procedure 5-6 times using whatever colors they wished.
 
Sorry, all I have of this project is my teacher example.
The finished pieces were WAY better!

Week 2: Picasso Bouquets (1 day) See post here
Inspired by Pablo Picasso’s drawing: Hands With Bouquet
Students looked at and talked about the drawing “Hands With Bouquet” by  Pablo Picasso. Students then used oil pastels to create a similar bouquet of flowers using circles and ovals and vertical lines. When they were done, I painted the palm of their hand with black paint and they stamped their handprint onto the work to look as though they were holding the bouquet.


Week 3 and 4: Mondrian Mixed Media Collages (2 days) From Art Room 104
Inspired by the work of Piet Mondrian
Students looked at the work of Mondrian and discussed how his work was similar to (and different from) the work of Picasso. Students then used scissors to cut squares and rectangles from paper to create a collage. On day two of the project, students added horizontal and vertical lines to the work using scraps of mat board and black tempera paint.
 
This is the info I put with my displays.
Many people comment about how helpful the info is.

A student example.

The finished display--there's one class in here, I think.


Inspired by the 19th and 20th Century Quilts from the Picturing America Series (Particularly the “Crazy Quilt” Image)
We reviewed the shapes we had been using the past few weeks and the art method they had used recently (collage). Students then used scissors, glue and a variety of papers to create individual quilt squares that had whatever colors and shapes they wanted. On day 2, the teacher used a hole punch to add holes to each quilt square (about 8 per square) and students used yarn to sew their quilt square. Individual student work was mounted together to create a whole-class composition displayed in the individual Kindergarten classrooms.

Each Kindergarten class made their own quilt for their classroom.

An example of a quilt square (they are 6" square).

I needed one more square and decided to create this piece--
the teachers LOVED the quote.
Week 7: Kandinsky group mural See post here
Inspired by Kandinsky’s color studies

Students used paint to create a composition of concentric rings based on the color studies by Kandinsky. Individual student work was displayed with other grade levels to create a multi-age group mural for the hallway.

A close-up of the individual 6" squares all glued together
onto the larger roll of paper using Elmer's glue (a dot in each corner).

The finished mural. Beautiful!!

Related Posts Plugin for WordPress, Blogger...