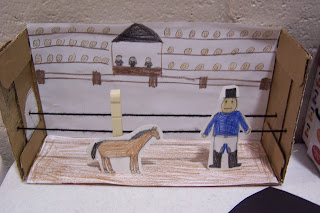
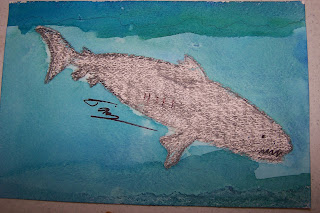
While I had envisioned creating backgrounds and characters to act out a play about St. George and the Dragon, the children created a wide variety of characters and backgrounds such as a rainforest explorer, a soccer team, a horse and rider, and more. This project would also be a wonderful way for children to make an interactive diorama for a project at school or a book they've read (imagine Little House on the Prairie!).
Enjoy this wonderful project and the creative options it inspires!
Background:
Medieval life was hard! But during festivals, children and adults alike were able to enjoy puppet shows. There are woodcuts, paintings and illuminations that show people enjoying puppet shows. These shows were also a great way to illustrate stories for people who could not read.
One popular type of puppet during medieval times was the marionette. We created marionette during my first semester art class. Marionettes have jointed body pieces that are controlled from above with strings. Although there were also puppets that were glove puppets (that fit over a person's hand) and "jiggling" puppets that were controlled from below with a stick.
I brought in a few different types of puppets for the children to see: a finger puppet, a marionette from our first semester class, and a glove puppet. We talked about the elements of a stage: the floor, or stage itself, the background, the actors, etc.
In this project, we use a cardboard box with the top and front removed, for our theater. We then created backgrounds and floors by drawing on pieces of paper and inserting them into the box. The actors (or puppets) are drawn on index cards or cardstock and glued to clothespins. The puppets are then placed onto a piece of yarn that has been strung across the width of the box. The child can then move the puppets along the yarn as s/he acts out the story.
Supplies Needed:
- A cardboard box (we used a box that juice pouches came in)
- Yarn to go across the width of the box 1 or 2 times
- A nail to make the holes for the yarn (a grown-up's job)
- A plastic needle
- Plain white paper for the background (ours were 10 1/2" wide x 5 3/4" tall)
- Plain white paper for the floor (ours were 10 1/2" wide x 3 1/4" deep)
- Pencils
- Crayons or colored pencils
- Sharpie marker (optional)
- Clothespins (the non-spring type)
- Index cards or card stock, white
- Hot glue or tacky glue
- Scissors
- Glue dots or masking tape (optional)
1. Remove the top and front of the cardboard box you will be using for your theater.
2. Measure the back and floor of the inside of your box and cut plain white pieces of paper to fit. These will be the background and floor of your theater.
3. With pencil, draw the details of the background and floor. In my case, I created two backgrounds: one that shows the outside of the castle with a seascape and misty hills shrouded in thunder storms (that is where the mean dragon lives) and an inside view of the castle. This was a great opportunity for me to draw all of the things we've learned about this year in our medieval-themed art class: shields, tapestries, swords, etc. When drawing your background think about drawing things near and far (the foreground, mid-ground and background)--that will add depth to your drawing.
 |
| The two backgrounds I created. I only colored one in. |
When I drew the pieces to line the bottom of my clothespin theater, I drew a dirt path for the outside view and a castle floor with rug for the inside view of the castle.
 |
| The two "floors" of my theater. |
4. If you'd like, go over your pencil lines with black Sharpie marker and then color the images in with crayons or colored pencils.
5. Create the puppets or actors: You will need one clothespin and one index card per puppet. Draw the puppet onto the index card (put the puppet's feet at the bottom of the index card), trace over your pencil lines in Sharpie, if desired, and color in as you did the background. I made my puppet about 5" tall. When done, you can cut around the figure with scissors to remove the excess paper. Using hot glue or tacky glue to attach the puppet to the clothespin as shown in the photo below. This will allow your puppet to move along the yarn.
 |
| Puppet front |
 |
| Puppet back. Note how the clothespin is glued to the puppet. |
6. Assembling the theater: Have a grownup poke holes in the side of the box. They should be the same height as the clothespin slot. Now, using the plastic needle, thread the yarn through the holes and knot each piece outside the box. Slip the background into the box and place it into position (if you want to change the background, you can just prop the background in there, or you can use glue dots or masking tape to permanently attach the background paper to the back of the box). Slip the floor into place (you can attach that with tape or glue dots if desired). Place the puppets onto the string and enjoy the show!
 |
| You can string one, two or more lengths of yarn across the theater. |
Here are a couple of the clothespin theaters the children in my art class created:


