Showing posts with label ink. Show all posts

Friday, September 16, 2016

Break out the sketchbooks!

My team teacher and I decided to have the students use sketchbooks this year and we are really excited about them. We ordered basic two pocket paper folders with tabs (1 for each 7th and 8th grader) because we felt this was a good option. Using folders is inexpensive and flexible--we were able to use the stacks of newsprint, copy paper, lined paper and graph paper that were in the room already and the folders also have a place for handouts to be three-hole punched and inserted.


We started the first day having students hand letter their names and draw at least three things into the design that told us something about them. I showed them illuminated manuscripts and graffiti for inspiration. I had them use 4x6 index cards and ink and colored pencil. They worked on these for a couple of days and then affixed them to their sketchbooks with glue stick.

We also gave them handouts to keep in their sketchbooks. So far, they have the copy of the art contract we have the students bring home for the parents to sign as well as the "What Will I Learn in 7th (or 8th) Grade?" handout inspired by the Art of Education. See their version here.

We also wanted to have them jump right into drawing in these sketchbooks, so I thought this would be a great time to do Danny Gregory's AWESOME sketchbook activity I learned about during the Art of Education's Summer 2016 Online Conference. Basically, students grab a Sharpie (I know! How permanent!!) and move about the room drawing different things for two minutes a drawing. It was awesome and a very good way to get them to loosen up! Here are some of their pages from the day:


Students were asked to star their most successful piece and explain
in the margin why they thought it was the best.
This was a great activity to break in the sketchbooks. This week students are working on a graphic design piece, so they are adding notes to their sketchbooks, but more sketchbook activities will be coming soon! ENJOY!

Wednesday, May 25, 2016

Foam Reduction Shoe Prints With Grade 5

Before I got all caught up graduatin' and getting an art teacherin' job, I posted a WHOLE BUNCH about the long-term art sub gig I had at Fairgrounds Elementary School in Nashua. If you didn't see the posts, I did a series of them by grade level (Kinder and grades 1-4). I also taught grade 5 while I was there and did some fabulous projects with them. I thought that I'd break those projects out into individual posts, though, since they require a bit more detail to explain, etc. Here goes...

Sassy boots! This print was done on white paper.
First printing: red ink, second print: black ink.
The yellow you see is a piece of paper I matted the print on,
the red is the mat board.
The first day I met the fifth graders, I decided to do a simple winter-themed foam printmaking project with them to catch their attention and size 'em up. I had them create snowman images on foam and them print with one color (white) onto their choice of background paper--you can see this post here.
This print was done on white paper.
First printing: blue ink, second print: black ink.
The yellow you see is a piece of paper I matted the print on,
the red is the mat board.
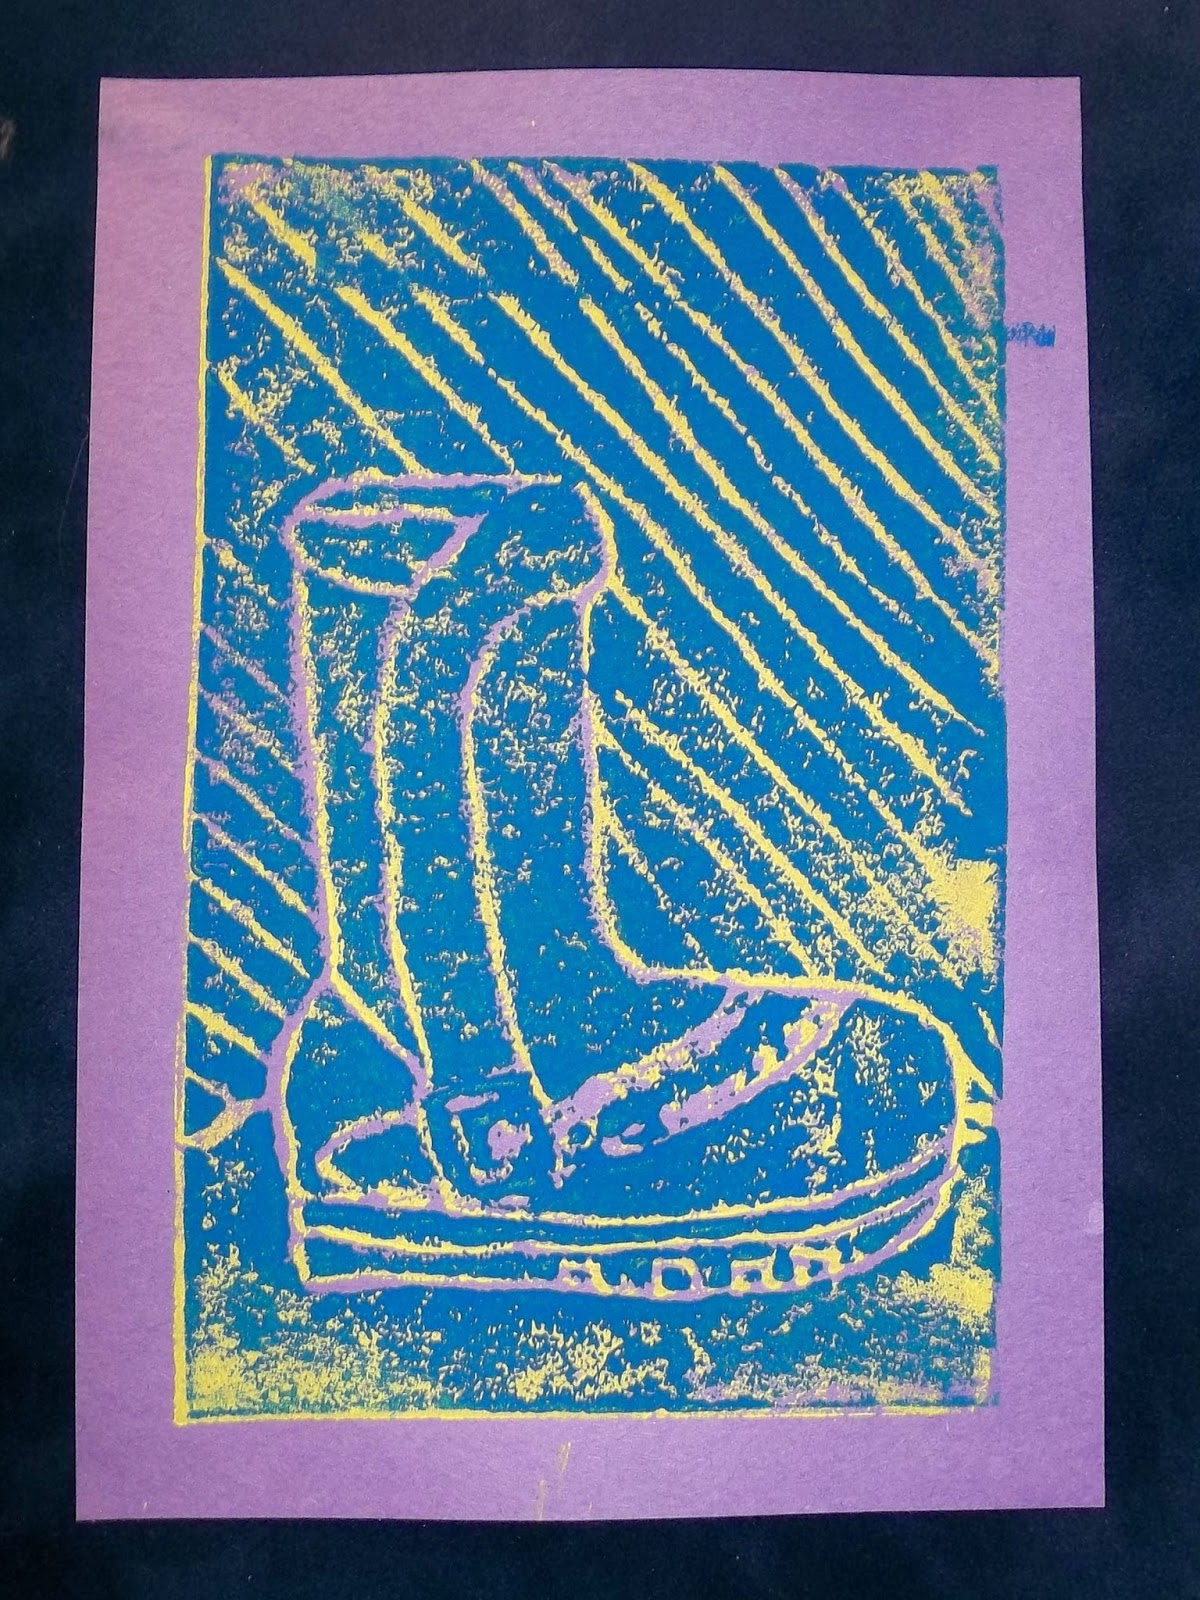
It went so well, that I thought I would continue on with printmaking and do a 2-color printmaking project inspired by the “Killer Heels” exhibit currently at the Currier Museum of Art (actually, I don't think this is currently on exhibit anymore, but it WAS at the time).

This print was done on purple paper.
First printing: yellow ink, second print: blue ink.
The navy blue is the mat board.
Students created their own printing plate by using pencil to “carve” a picture of their shoe into a foam “plate.” Students then used brayers to apply ink to their plates and print 1 print. Week two, students added a ground line and background, chose a contrasting color of ink and reprinted their designs. These prints were mounted on mat board and displayed at the Currier Museum of Art during the New Hampshire Art Educator’s Association Annual Members Reception in March. 

All prints were mounted onto mat board to look fancy.
I think added little paper hinges to groups of three to four
and ribbon ties so that the pieces could be displayed accordion-style
or create triangular displays such as this
(I didn't know how they were going to be used exactly).

WOW! What place of honor--the buffet table,
right where everyone can see these fabulous prints--
although I think people were too busy looking at the awesome food
they were piling on their plates--YUM!

The final week, students worked as a class to create an assessment rubric that contained the important vocabulary words from the Shoe Reduction Print project. They also determined four attributes that should be found in their finished work. Now, having students create their own rubric was something I had only done with high school, but I really wanted the students to be able to see the value in their work and begin to see that assessment isn't something we teachers pull out of thin air. Was walking the students through the rubric creation difficult. Not really. Was it work to keep them focused? Yep. Did it take a lot of time? Nope--we had it done in about 15 minutes. Was it worth it (really)? You bet. They did a great job and I think it lent credibility to me, the art process and what they do in the art room. Creating rubrics with your students is also a great way to review vocabulary and objectives! Win/win! ENJOY!!

Here's the rubric the grade 5 students created.
Normally, I would type up my rubrics to look all fancy,
but I wanted the students to see that this was the one we
created as a class. Pretty good for a first try.
Detail of the top of the rubric--the vocab section.
They needed to think of three vocab words from the lesson
and decide as a class what a good definition would be. 
Detail of the bottom of the rubric--they needed to come up with
four objectives of the assignment. This was fun walking them through
being objective instead of saying "it looks cool!" I put #5 on there. :-)


Sunday, March 6, 2016

One day printmaking project: Winter Prints

I used this as an attention-getting 1-day project with the fifth graders at a school I am temporarily working at--I thought they would appreciate a hands-on project as we got to know each other the first day. 

Yeah, I know, first day printmaking-I'm a little crazy...


We used foam trays from the supermarket as their printmaking plate and they "carved" the plate with a pencil to make a relief. I didn't have them sketch their ideas out first--just grab a pencil and go (I know, super-risky, but it worked)! I had originally intended to have them create just snowmen, but a few branched out and did other winter-themed artwork (snowflakes, hot cups of cocoa, gingerbread houses and more). I'm fine with giving them creative choices and they were able to make a print (white ink on black paper) by the end of the class. Everyone seemed to enjoy themselves and they loved their prints!

P.S. I know that foam plates are not eco-friendly, but I had them already and I wanted to show the students they could create art with supplies they could find in their homes. Next week I'm going to show them how they can use washable markers to hand color a foam plate and make a monoprint like I described in this post.

Friday, January 8, 2016

Still Life Self Portraits With 7th Grade

Self portraits can be daunting, but students can express themselves without painting a traditional portrait. This project is based on one that the art teacher at Amherst Middle School, Rachel Rouillard, does with her 7th grade students. Students learn about self-portraits (traditional and non-traditional) and then bring in three objects from home to arrange into a composition and paint. Rachel has the students use acrylic and paint a mini composition (I think 4" square on canvas board, if I remember correctly). With the group of 7th graders I had at the time, I thought I'd try having them use ink, watercolor and colored pencil--I think that combination offers students more control and they can still explore value and color-mixing using paint.


These photos don't seem to do justice to these pieces.
They are really beautiful in person!

We spent a good amount of time sketching and working on composition for these pieces so that they were dynamic. I did not specify the size for the final pieces and there was a nice variety of little compositions and larger ones. The only trouble I ran into with this project was having the students bring in items from home--that just didn't work well for some. I'm not sure how I would work that in the future (perhaps give them the chance to bring objects in, but if they don't they use objects from the classroom?).

Anyway, I was SUPER-impressed by the work the students did. I think some of them were too! Once these were on display, they generated lots of discussion and comments from the middle school students and teachers in the hallway outside of class. ENJOY!

I like the inclusion of body spray in this one. ;-)

Some students preferred to focus on one object at a time.
I like how this student worked the background as well
adding color around each object and a shadow below.

This student also wanted to have the objects separate because he felt they were easier
to read with some space between them. He did a nice job with the details
and these objects have a great deal of personal significance to him.
And here are more of the students' work from the display...

And even more! Finished pieces were mounted onto mat board.
I feel this elevates the work from ho-hum to a finished piece worthy of display
(and preparing work for presentation is one of the National Core Art Standards).


Thursday, December 31, 2015

6th Grade Radial Symmetry with Foam "Plates"

I love printmaking--especially with easy supplies that are on hand--and this project was perfect for my 6th grade students! We used foam trays from the supermarket as our "plates." The students carved them with dull pencils. 

The project is easy to do and the results are pretty fantastic (lots and "ooh's" and "ahh's" from the students!). Every student was required to create one composition on watercolor paper that had four prints on it. Students who finished quickly and/or who were motivated, could continue on to make a 16-print composition. Either way, they came out beautiful!

The same 3 1/2" printing plate was rotated and repeatedly printed four times
onto the same paper to create a radial print (drawing guide lines lightly in pencil helps to keep things straight).

Objective: Students will create a relief printing plate from foam and use printmaking ink to create a print that has a verity of lines and demonstrates radial symmetry.

Standards of Achievement: Drawing, Painting, Printmaking, Carving

Subject Integration: Math

Vocab: radial, linear, symmetry, line, quadrants, print, printmaking, plate, relief, pressure, ink, brayer, construction lines, repetition, relief, styrofoam, transfer

Duration: 4 class (45 minutes each)

Additional references:
This lesson is based on a lesson from Art With Mrs. Nguyen (formally Ms. Graham). She did this project with 4th grade students, but I felt it was just right for my 6th graders as well. I also showed the students the video on Buddhist sand art Mrs. Nguyen suggests on her site, as well as some images of Spanish tiles and Islamic art.

Definitely a keeper! Enjoy!

The completed bulletin board display.  We had our final debrief in from of this display
and added the vocabulary words you see as part of the debrief.

This student created their design a little differently, but it works.

Neatly done!

Look at that detail--from a foam printing plate--AMAZING!

Lovely!

This design is a little off, but created a nice spiral effect.
The success rate on this project was very high for all students.

Here you can see how the 16 mini prints can be combined into
a larger composition. This student wanted to use four different inks
in their work (I hadn't thought of that!). The students are so creative!

This design is great too. Doing the 16 print compositions definitely require
more fortitude from the students, but are truly stunning when done.

Wednesday, March 6, 2013

Printmaking: Warhol Self Portraits

For my last after school Modern Art class I wanted my students to explore the work of Andy Warhol. Last time we studied Warhol, we did the Handy Andy prints (which are a popular one on my blog and with my students). This time, I wanted to have them try printmaking so they could explore the Pop Art  repetitive printed images of Warhol's. With this project we are using foam trays to make a printmaking plate similar to a linocut or woodcut, but without the sharp tools.


This student loves to create Manga-inspired art.
I love this piece because it shows her interests and
is definitely a POP art piece--Warhol would be impressed!

This was a great first "real" printmaking project and the results are always so bright and fun. Some children really embrace this technique and I had one student complete TWO projects with the class time since she was having some much fun. I also did the project one-on-one with my Kindergardener and he loved it too. Clean-up is great since I used water-soluble printmaking ink (although I would love to try something in the future that is more permanent so that the kids could add color with watercolors afterwards...).

This might be a bit of an expense to buy the roller (brayer) if you are doing this project at home, but once you have the supplies on had you ca make a bunch of great prints for gifts, stationary, etc. Give it a try!

Faux Linocut Warhol Self Portraits

Supplies Needed:
Adjust the dimensions of your supplies based on the size of the foam trays you are using...

  • A few 4" x 5 1/2" pieces of white paper for drawing your design 
  • Pencils and erasers
  • Foam trays or styrofoam plates
  • Masking tape
  • Hot glue gun and glue sticks
  • A scrap piece of cardboard or mat board slightly larger than your foam printing "plate"
  • Water soluble printmaking ink
  • Brayer (I use the Speedball 4" soft rubber brayer)
  • A few 5" x 7" pieces of colored paper (smooth paper with bright colors work well)
  • Glue stick
  • Large piece of construction paper to mount the finished prints on
Directions:

1. Use the pencil to draw a simple self portrait on the white piece of paper. Make it unique--just like you, but don't get too detailed. 

2. Place the drawing onto the foam tray and tape down. Trace the lines of your drawing with a dull pencil. Press down enough to leave an impression in the foam tray, but not hard enough to poke all the way through the foam or shred the paper drawing. This takes some practice...using the pencil at a slight angle helps. Once you've traced the drawing, remove the drawing and go over the lines you made in the foam tray to make them a bit deeper.

3. Mount your finished foam printing plate to the cardboard using hot glue.

4. Squeeze some printmaking ink onto a spare foam plate or foam tray. Use your brayer (roller) to move the ink around, coating the roller with ink. You don't need it gooping with ink--a nice even coating works best. Roll the inked brayer over your foam printing plate. Lay a piece of colored paper o top of the inked printing plate and press gently with your fingertips. I had the children use one hand to hold the paper still while the other rubbed the image. Remove the paper to see the transferred image. 

5. Repeat as may times as you wish. I had the children make at least four copies of the image ad the they mounted them onto a larger piece of construction paper once the prints were dry.

Enjoy!


This guy is super-cute, too! 

Love the freckles!

And this piece is super-sweet! It makes me smile!


Friday, September 28, 2012

Mini Hand Drawing With Pattern & Ribbon

Well, here's another project I saw on Pinterest only to follow the link to nowhere. If you know where this came from, let me know so I can give credit where credit is due! When I originally saw this project I thought it would be great for my 13-year-old private art student. It was, but I also modified it and had my 9-year-old student do it as well. Here are my notes and method:


This is a lovely project that encompasses a variety of art concepts: inking patterns, drawing hands, shading with colored pencils, depth, positive and negative space, and value (in the ribbon and in the patterns). But, in order to make it manageable, I suggest only drawing one hand on an oversize index card. This keeps the size relatively small and you should be able to actually get the piece done at some point. My 13-year-old student used a large piece of paper (maybe 11" x 14"?) and had two hands in the composition and divided up the space with lots of ribbons and she worked on it for over three weeks (each an hour long session) and it was only about 1/3 of the way done. It got to be pretty tedious for her, I think.

With this smaller format, you get all of the fun and it is just enough to keep it interesting. Here's how we did it:

Mini Hand Drawing With Pattern & Ribbon

Supplies Needed:
  • Oversize (6" x 9") white index card, blank (or card stock)
  • Pencil with eraser
  • Sharpies (fine and ultra fine tips)
  • Colored pencils, assorted colors
Directions:

1. Place the hand you don't draw with onto the index card. You can make the hand go off the page a bit, but extend your fingers so that the space around your hand is broken up a bit by your fingers. Trace your hand with pencil.

2. Move your hand off of the paper and use it as a model to fill in some of the details of the hand you traced on your paper. Add wrinkles, rings, bracelets and fingernails. Don't add too many wrinkles though!

3. Draw a ribbon curling around your hand or through fingers and take care to have the ribbon divide up the negative space in your piece. Make it interesting!

4. Erase the lines of your fingers where the ribbon overlaps them. You'll want to take a minute and really make sure that your lines make sense--you don't want to ink something that shouldn't be there!

5. Trace the hand and the details on your hand with the ultra fine point Sharpie. Also trace the ribbon with the Sharpie.

6. Use your pencil to draw different patterns in the different sections of the background. Patterns can be made of lines, dots, squares, triangles, zig zags, and more!

7. Once you have your patterns down, ink them in with the Sharpies.

8. Erase all pencil lines.

9. Use the colored pencils to add color to the ribbons. Once you've built up nice layers of color, use darker colors in areas to create shadows.

My 9-year-old art student created her piece in two one-hour sessions. I'd think that this would take 3-4 regular class sessions if you were doing this project in a classroom setting. 


Related Posts Plugin for WordPress, Blogger...