Showing posts with label composition. Show all posts

Friday, January 29, 2016

Happy Birthday, Paul Cezanne! (On January 19th)

In honor of Cezanne's birthday, I thought I would REPOST a popular lesson from 2013 that is fun and easy and is appropriate for a wide range of students. The painting below is my youngest son's and was featured in the book "500 Kids Art Ideas" by Gavin Andrews published by Quarry Books. While this is a nice fall-inspired still life, you could change it to pears or lemons/limes for a more winter or spring theme. Either way, the results are fabulous and the lesson is chock-full of active learning.

-------------------------------

We are all into fall over here and I thought this week would be a nice time to do a still life with apples with my after school art class. This is the first time we've met this school year, and the group has 1st-4th graders in it. I had an idea of what I wanted to do, it's actually a combination of two lessons I saw out there:
My 1st grader's example with Cezanne's reproduction.
I can't show you the still life--he ate it!
(UPDATE: He's now in 3rd grade, but still eats still eats everything in sight!)

"Still Life With Oil Pastels and Baby Oil" (2 posts) from Fine Lines
http://kids-finelines.blogspot.com/2012/04/still-life-with-oil-pastels-and-baby.html
http://kids-finelines.blogspot.com/2012/04/oil-pastels-and-baby-oil-part-2.html

That was pretty much the lesson I used, but I modified my talk in the beginning to be about Paul Cezanne's work showing them "Still Life With Apples."

I then used the talk I found on That Artist Women: "Open vs. Closed Composition"
http://www.thatartistwoman.org/2011/09/open-vs-closed-composition.html

I really like how she shows real art examples in her post. I showed those to my kiddos as well.

Then I gave them time to experiment with arranging the apples (and one girl's donated pear) into closed and open compositions. There were three students to a table and the table needed to agree on a composition they liked best.

And then we were off! I walked them through drawing, demoed how to use the oil pastels and baby oil, and gave a quick watercolor demo.

These are their creations! Beautiful! They are so proud (me too!).

Enjoy!


Friday, January 8, 2016

Still Life Self Portraits With 7th Grade

Self portraits can be daunting, but students can express themselves without painting a traditional portrait. This project is based on one that the art teacher at Amherst Middle School, Rachel Rouillard, does with her 7th grade students. Students learn about self-portraits (traditional and non-traditional) and then bring in three objects from home to arrange into a composition and paint. Rachel has the students use acrylic and paint a mini composition (I think 4" square on canvas board, if I remember correctly). With the group of 7th graders I had at the time, I thought I'd try having them use ink, watercolor and colored pencil--I think that combination offers students more control and they can still explore value and color-mixing using paint.


These photos don't seem to do justice to these pieces.
They are really beautiful in person!

We spent a good amount of time sketching and working on composition for these pieces so that they were dynamic. I did not specify the size for the final pieces and there was a nice variety of little compositions and larger ones. The only trouble I ran into with this project was having the students bring in items from home--that just didn't work well for some. I'm not sure how I would work that in the future (perhaps give them the chance to bring objects in, but if they don't they use objects from the classroom?).

Anyway, I was SUPER-impressed by the work the students did. I think some of them were too! Once these were on display, they generated lots of discussion and comments from the middle school students and teachers in the hallway outside of class. ENJOY!

I like the inclusion of body spray in this one. ;-)

Some students preferred to focus on one object at a time.
I like how this student worked the background as well
adding color around each object and a shadow below.

This student also wanted to have the objects separate because he felt they were easier
to read with some space between them. He did a nice job with the details
and these objects have a great deal of personal significance to him.
And here are more of the students' work from the display...

And even more! Finished pieces were mounted onto mat board.
I feel this elevates the work from ho-hum to a finished piece worthy of display
(and preparing work for presentation is one of the National Core Art Standards).


Sunday, November 2, 2014

Fall Still-life With Glue and Pastels

Here are some pretty still-life creations my after school art class finished up this week. OK, I can use other, more "artsy" words like "dynamic" or "engaging" to describe these, but MAN, are they pretty, too! I've done this project before, and the students are always amazed at how the pieces come out (me too!). This group had students who are in first grade through fourth--so you can see it's pretty accessible to all with the right amount of scaffolding.


I made the mistake, this time, of using clear glue (gel and plain clear) since that's what other art teachers have said they used for this project with great success. I tried it because, in the past, I had found the regular  Elmer's glue can dry a bit cloudy. Anyway, I WAS NOT happy with the results. The clear glue soaked into the paper and ran off as the students were moving them to the drying space leaving drips and blops all offer the classroom and my car (a.k.a. the mobile art studio). It also soaked through the paper and glued the pieces to tables and the seats of my car...(big unhappy face for Mrs. Pettus) ;-)

So, if you do this project--which a HIGHLY suggest you try--use plain old Elmer's. It's fine for this project. So fun and magical (and "pretty")! Check out my previous post about this technique here.

ENJOY!

Thursday, October 24, 2013

Fall Compositions With Elmer's & Pastels

Fall is my favorite season and I have been LOVING driving my hour-an-a-half drive up to my Grad School twice (sometimes three times) a week...I pop in a book on tape and enjoy the beautiful fall folliage that New Hampshire has to offer! Ahhhh!


The focus of my after school art class for my 1st-4th graders is "Fall Into Art"--fall-themed art activities...last week, we drew apple still lifes inspired by Cezanne, and this week we took advantage of the nice weather and beautiful fall displays outside the school that had been donated by the Amherst Garden Center in Amherst, NH. The Garden Center had flanked the entrance of the school with pumpkins and gourds, hay bales, scarecrows, and beautiful mums! I couldn't ignore all of the visual stimuli out there ready to draw!

We spent some time looking and touching the displays, then we sketched them. We moved inside and selected one the things from our sketches to "draw" on black paper with Elmer's glue. The students were VERY skeptical when I told them we'd be drawing with Elmer's and you should have seen the surprised looks when I did my demo and piped glue along the lines of my drawing!

I had seen this Elmer's glue/pastel combination online before but had never tried it. I think it would be great for winter snowmen as well...

Anyway, we let the Elmer's glue dry (they rode around for a week in the back of my minivan--the mobile art studio.

The next week, I showed the students how to color in the non-Elmer's areas--the negative space--with the chalk pastels, encouraging them to add highlights and shadows to make their pictures really "pop" and look more realistic. I suggested using my "use at least three colors in each section" rule...

The students were VERY pleased with this new "technique" and, at the end of class, we discussed some other compositions they could use this technique on. The fourth-graders were very specific with their questions about materials: where I purchased the materials, what they are called, how much they cost. They want to make sure the next time they go to Michael's Crafts Store they purchase the proper things so they can do this technique again--THAT (to me) is a sign of a successful art lesson--my students wanted to take something they learned in class and go with it.

Enjoy!


Saturday, October 12, 2013

Cezanne's Apples and Composition

We are all into fall over here and I thought this week would be a nice time to do a still life with apples with my after school art class. This is the first time we've met this school year, and the group has 1st-4th graders in it. I had an idea of what I wanted to do, it's actually a combination of two lessons I saw out there:
My 1st grader's example with Cezanne's reproduction.
I can't show you the still life--he ate it!

"Still Life With Oil Pastels and Baby Oil" (2 posts) from Fine Lines
http://kids-finelines.blogspot.com/2012/04/still-life-with-oil-pastels-and-baby.html
http://kids-finelines.blogspot.com/2012/04/oil-pastels-and-baby-oil-part-2.html

That was pretty much the lesson I used, but I modified my talk in the beginning to be about Paul Cezanne's work showing them "Still Life With Apples."

I then used the talk I found on That Artist Women: "Open vs. Closed Composition"
http://www.thatartistwoman.org/2011/09/open-vs-closed-composition.html

I really like how she shows real art examples in her post. I showed those to my kiddos as well.

Then I gave them time to experiment with arranging the apples (and one girl's donated pear) into closed and open compositions. There were three students to a table and the table needed to agree on a composition they liked best.

And then we were off! I walked them through drawing, demoed how to use the oil pastels and baby oil, and gave a quick watercolor demo.

These are their creations! Beautiful! They are so proud (me too!).

Enjoy!


Monday, February 4, 2013

More Miros

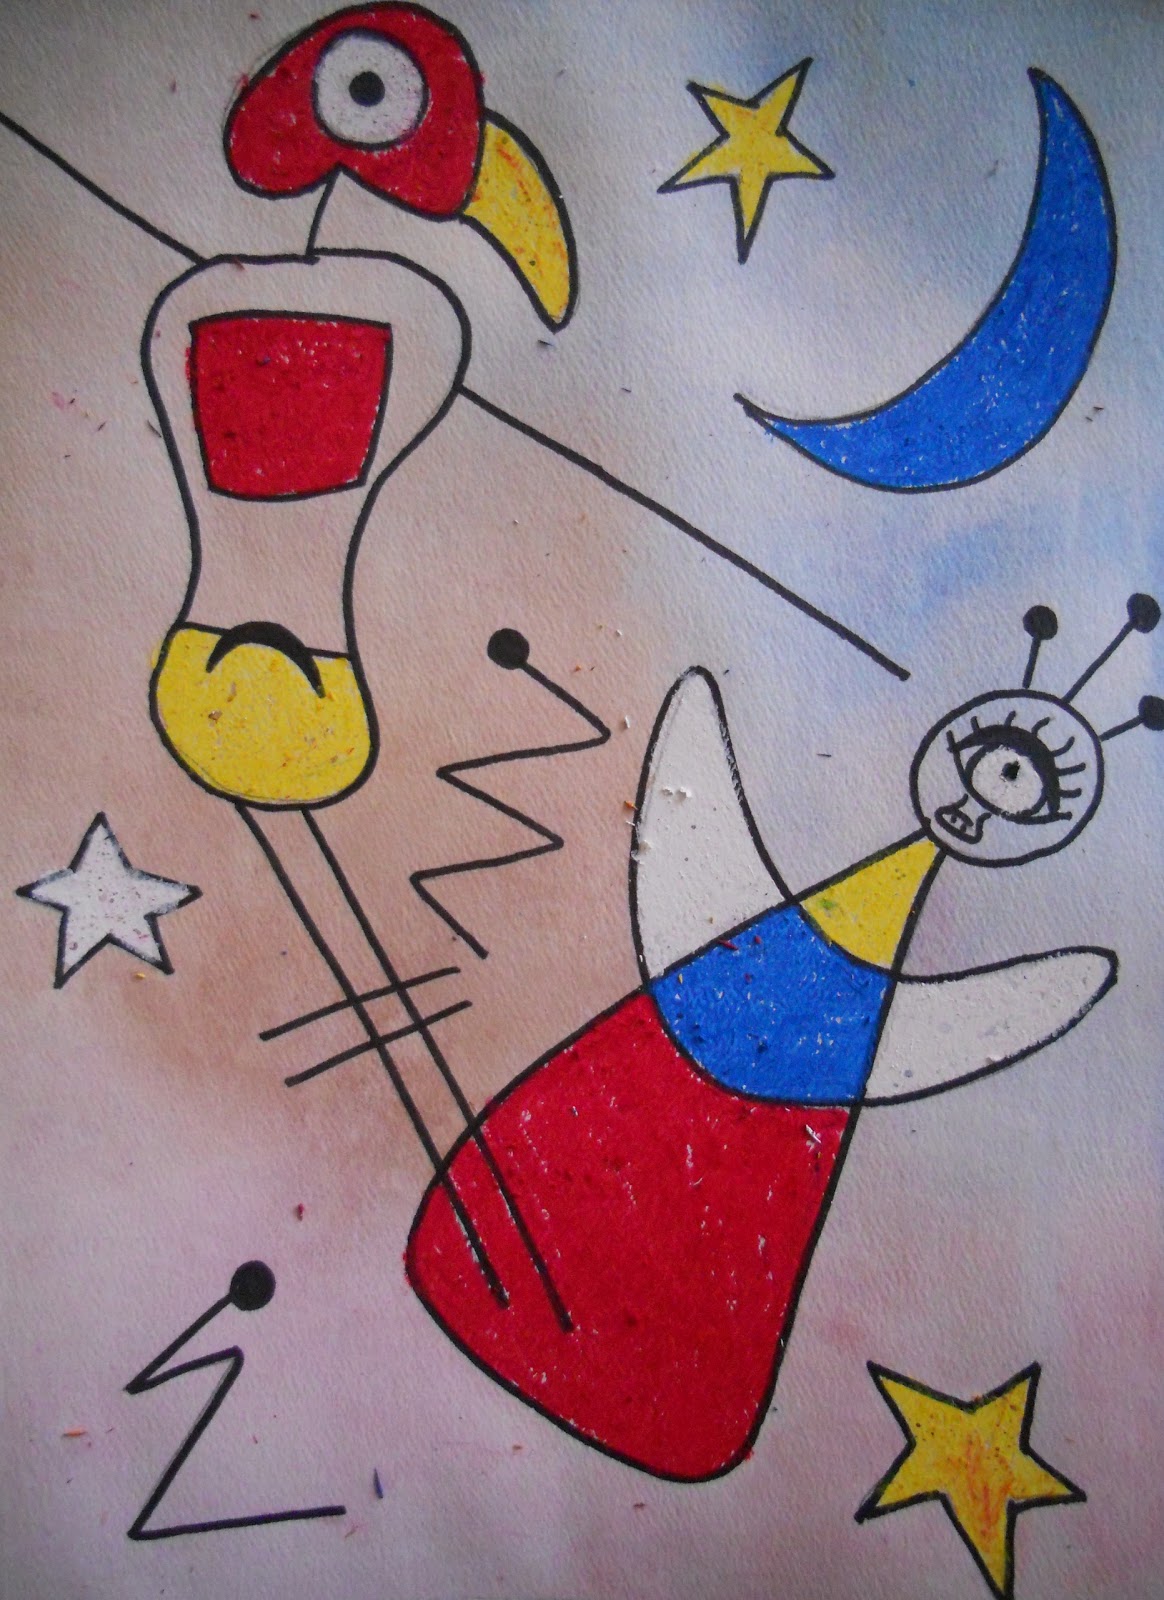
Last Fall I posted a Roll-a-Miro project. I just did this project again with my after school Modern Art class and here are the results--ENJOY!

P.S. If you have been thinking about doing this project but haven't yet, please do! The children really have fun with it!

P.P.S. The link to the Roll-a-Miro chart on Pinterest is here (I haven't been able to find the original source for this):

Creatures From Smoo 57

The Angels of the Ocean

The Angel of the Sky

The Amazing World of Squiggle

The Animal World
The Evil Squidwards

Wednesday, September 19, 2012

Fun With Juan Miro


I just did a fun project with one of my private art students where we looked at the fanciful art of Juan Miro. 

"Midnight Masquerade" Inspired by Miro

His artwork is made up of cartoon-like creatures and has limited colors, but the colors that are used are bright. It can be hard for a child, who is used to drawing from life, to break away and surrender to drawing squiggles and weird shapes, but it's a wonderful exercise in letting loose and having fun with art. In order to free us up so that we didn't draw anything too recognizable, we used a chart and rolled a die to randomly choose the elements that would appear in our pieces. This is the chart I found on Pinterest and it doesn't link back to any site (SIGH). I hate that! If anyone knows where this chart came from, please let me know so I can credit the creator.

When creating the piece, I had my student focus on composition and scale. The figures in our drawings did not have to be the same size, but she chose to make them that way. I think I would suggest, in the future, that the student create two to three figures (their choice) but one had to be larger than the others. I think that would make the piece more visually interesting and we could talk about how the size of the figures affects their relationship to one another and to the space.

As we worked we came up with a story about these creatures and what they were doing. This helped later on when we selected colors for the accents and the background.

We then inked the figures with Sharpies and added spots of color with bright oil pastels. This was a great opportunity to talk about balance and make sure bits of color appeared throughout the piece. We then finished the pieces off with multi-colored watercolor washes. We talked about tone and how the color choices in the background could reflect mood or time of day. For example, a piece that takes place at night might have cool, dark colors whereas a piece that depicts a happy moment may have bright, warm colors. We then made up great desciptive titles for our pieces and wrote them on the edge of the work.

Miro is not for everyone, but it was fun to try something different and fanciful! Enjoy!

"The Wizards Making Magic in the Night"
by my student age 9

Related Posts Plugin for WordPress, Blogger...