Showing posts with label pastels. Show all posts

Friday, April 22, 2016

First Grade Projects From My Long-Term Sub Gig

 Here are some of the projects from my long-term sub gig that appear in the collage here so that you had a bit more info on them...ENJOY!! For the background about where I've been/what I've been doing lately, scroll to the end of the post...
Here's lookin' at YOU! Check out the projects below for some
first grade ARTSY inspiration!
Grade 1 Art Projects From Fairgrounds Elementary School:

Week 1: Winter Windows (1 day)
A getting-to-know-you project.
We looked at the book, “Snowflake Bentley” by Jacqueline Briggs Martin. Students folded their paper to make four “window panes” and used crayons to draw four six-sided snowflakes (just like real snowflakes). They then added watercolor to their work (watercolor resist) to add a colorful sky (sunset, nighttime, etc.) and enhance the snowflake designs. The wet work was sprinkled with salt to add texture and interest to the work.

A close-up of one of the "Winter Windows"--
this light yellow crayon was easier to see than a white crayon on white paper.

Week 2: Aboriginal Bark Paintings (1 day)
A continuation of a project started prior to my arrival
Students used crayons to create mini circles within a photocopied Aboriginal design. They then added a black tempera paint wash to their work (watercolor resist) to enhance the designs. Finished pieces were mounted onto construction paper backgrounds.

No image of these--sorry!

Week 3, 4 and 5: Feathers For Lunch Collage (2-3 day) From Fine Lines
Inspired by the work of Mrs. Pettus--that's ME! (I've been doing collage work lately) and the collage artist Lois Elhert and her book, “Feathers For Lunch”
Students looked at the book, “Feathers For Lunch” by Lois Elhert and used different shapes and papers to create a collage composition of a cat and a bird. Details could be added using crayon and a real feather was attached to represent the one that got away—just like in the book!

Our inspiration!!
We talked about using shapes to make our cats and birds.
We used real feathers and oil pastels for fun details.

If a student wasn't in class the first week, they could make just the bird on week two.
This student was fascinated by the hole punches he found on the supply cart.

I love this cat's expression!


The finished display I copied from Fine Lines Blog--
it was perfect, so I just had to do it!

Here's the write-up that I displayed near the bulletin board-
it really helps everyone to see all of the details of this project
(as well as the National Common Core Standards in Art)

Week 6: Line Study With Pastels (1 day)
The attributes of line were discussed (length and direction) and then students took turns drawing different types of lines. Students then cut out a shape of their choice (emphasis on something that moves such as an animal or vehicle, etc.) and attached it to a piece of white paper. They used Sharpies to drew eight different types of lines coming from their shape and going off the edge(s) of their paper. Lastly, they used chalk pastels to trace their lines and smudged them to add the illusion of movement to their work.
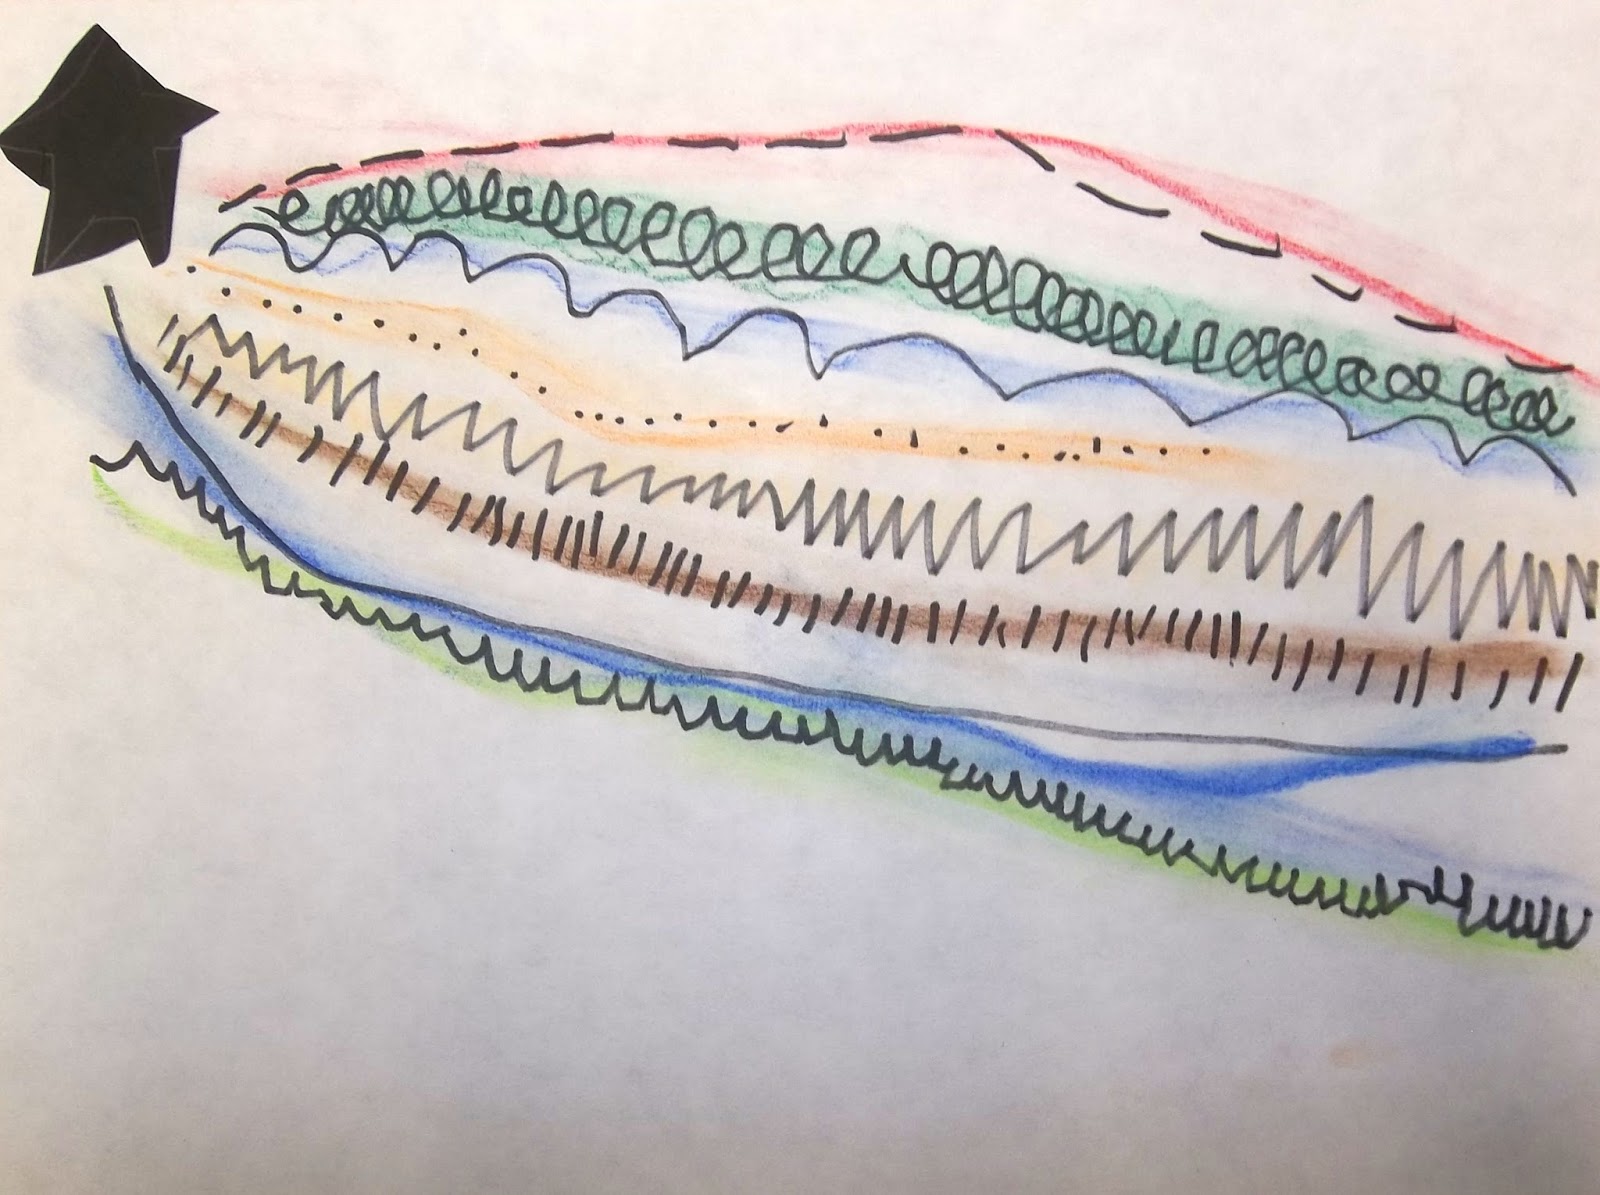
Beautiful shooting star!

Some students chose to have a limited color palette, but they still turned out beautifully.

A flying airplane.


And this is a football flying back and forth between players--LOVE it!
We also had flying pigs, a giraffe or two, cars, superheros, a UFO, a couple of rockets,
LOTS of footballs, a unicorn, some cats and much more!
Week 7: Kandinsky group mural See post here
Inspired by Kandinsky’s color studies

Students used paint to create a composition of concentric rings based on the color studies by Kandinsky. Individual student work was displayed with other grade levels to create a multi-age group mural for the hallway.

A close-up of the individual 6" squares all glued together
onto the larger roll of paper using Elmer's glue (a dot in each corner).

The finished mural. Beautiful!!

----------------
Backstory for this post:

So, it's been a busy Spring for me since I finished student teacherin' in December--I subbed a bit in preschool, kindergarten, elementary and high school and then landed a wonderful 6 1/2 weeks long-term sub gig at an elementary school nearby teaching art to grades K-5. What a blast I had--the students and staff at Fairgrounds rock and I was sad to go (it's hard to stop doing something you love when your next big thing isn't settled upon yet). Since then, I haven't blogged much because I've been daily subbing and working on my dang art teacher portfolio (more on that in a future post or ten). Check the sidebar (over on the right side of the blog) for other posts in this series (k-5 at Fairgrounds Elementary School). ENJOY!!

Sunday, November 2, 2014

Fall Still-life With Glue and Pastels

Here are some pretty still-life creations my after school art class finished up this week. OK, I can use other, more "artsy" words like "dynamic" or "engaging" to describe these, but MAN, are they pretty, too! I've done this project before, and the students are always amazed at how the pieces come out (me too!). This group had students who are in first grade through fourth--so you can see it's pretty accessible to all with the right amount of scaffolding.


I made the mistake, this time, of using clear glue (gel and plain clear) since that's what other art teachers have said they used for this project with great success. I tried it because, in the past, I had found the regular  Elmer's glue can dry a bit cloudy. Anyway, I WAS NOT happy with the results. The clear glue soaked into the paper and ran off as the students were moving them to the drying space leaving drips and blops all offer the classroom and my car (a.k.a. the mobile art studio). It also soaked through the paper and glued the pieces to tables and the seats of my car...(big unhappy face for Mrs. Pettus) ;-)

So, if you do this project--which a HIGHLY suggest you try--use plain old Elmer's. It's fine for this project. So fun and magical (and "pretty")! Check out my previous post about this technique here.

ENJOY!

Thursday, October 24, 2013

Fall Compositions With Elmer's & Pastels

Fall is my favorite season and I have been LOVING driving my hour-an-a-half drive up to my Grad School twice (sometimes three times) a week...I pop in a book on tape and enjoy the beautiful fall folliage that New Hampshire has to offer! Ahhhh!


The focus of my after school art class for my 1st-4th graders is "Fall Into Art"--fall-themed art activities...last week, we drew apple still lifes inspired by Cezanne, and this week we took advantage of the nice weather and beautiful fall displays outside the school that had been donated by the Amherst Garden Center in Amherst, NH. The Garden Center had flanked the entrance of the school with pumpkins and gourds, hay bales, scarecrows, and beautiful mums! I couldn't ignore all of the visual stimuli out there ready to draw!

We spent some time looking and touching the displays, then we sketched them. We moved inside and selected one the things from our sketches to "draw" on black paper with Elmer's glue. The students were VERY skeptical when I told them we'd be drawing with Elmer's and you should have seen the surprised looks when I did my demo and piped glue along the lines of my drawing!

I had seen this Elmer's glue/pastel combination online before but had never tried it. I think it would be great for winter snowmen as well...

Anyway, we let the Elmer's glue dry (they rode around for a week in the back of my minivan--the mobile art studio.

The next week, I showed the students how to color in the non-Elmer's areas--the negative space--with the chalk pastels, encouraging them to add highlights and shadows to make their pictures really "pop" and look more realistic. I suggested using my "use at least three colors in each section" rule...

The students were VERY pleased with this new "technique" and, at the end of class, we discussed some other compositions they could use this technique on. The fourth-graders were very specific with their questions about materials: where I purchased the materials, what they are called, how much they cost. They want to make sure the next time they go to Michael's Crafts Store they purchase the proper things so they can do this technique again--THAT (to me) is a sign of a successful art lesson--my students wanted to take something they learned in class and go with it.

Enjoy!


Tuesday, January 8, 2013

Igloo Landscape With Northern Lights

I'm really excited about this project! I did this project as part of a special winter-themed afternoon with the Kindergardeners at Clark School this week. Previous visits have used cut paper and printmaking and they've learned all sorts of great skills and art techniques. This little lesson uses something every teacher on hand: bulletin board borders to give that wavy look in the sky. I bought mine at the dollar store (a package of 14 for $1).


The art concepts that the children learn with this project are the parts of a landscape (foreground, background, ground, sky), as well as collage, cutting with scissors & working on a multi-step, multi-layered project. The children can rip the paper for the ground and use geometric shapes (squares and rectangles) to create the semicircular igloo. They create their own shape for the moon--that can vary quite a bit and they are all darling. Pastels can be messy, and this project uses that to its advantage! The pastels are perfect for the bright colors and streakiness of the Aurora Borealis, or Northern Lights.

There are also great literature, music, science and cultural links to this project as well: the Northern Lights are part of the rich spiritual culture of the Inuit people (indigenous people of the arctic), as are igloos. The Inuit people live in stick framed houses now, but there are still times when igloos are used as shelter today. Igloos are temporary shelters that can be erected in as little as two hours! WOW!

There are many tales associated with the Northern Lights. I found a great book called The Fiddler of The Northern Lights by Natalie Kinsey-Warnock about the Northern Lights, that is a bit of a different tale. In the book, there is a man from Cape Breton who plays the fiddle and his music makes the Northern Lights dance. I was fortunate to find that my library had two CDs of fiddle music from Cape Breton--so I could share this great music with my students!

I hope you enjoy this lovely little lesson!

Igloo Landscape With Northern Lights

Supplies Needed:
  • 12" x 18" piece of black construction paper
  • 1 bulletin board border from the dollar store (or you can cut a wavy template from poster board)
  • Masking tape and clear cello tape
  • Chalk pastels
  • Tissues
  • Elmer's glue (or other white PVC glue)
  • White construction paper (some ripped into strips, some cut into 1" squares)
  • Semi-circle to trace for igloo shape
  • Pencil
  • Scrap of yellow construction paper (for moon and window)
  • Scissors
Directions:

1. Tape the border to the table: tape it on either end with a piece of clear tape so that it is nice and secure, but your sheet of black paper can slide under it.

2. Slide the black paper under the border. Use the pastels to color on the paper along the top edge of the border. It's OK if you get the pastels on the border and on the black paper at the same time. Just keep the black paper still while you are doing it. Once you've traced along the entire edge of the border piece, take a tissue and gently rub upward (away from the border), along the entire edge of the border. This will give you the lovely, streaky look of the Northern Lights. Don't scrub with the tissue--that won't give you the same effect. Repeat this 2 or 3 more times on the page.

3. When you are done your sky, move over to the collage table. Apply a thin line of glue along the bottom edge of the black paper. Attach strips of white paper along the bottom to make the snowy ground. Ripping the strips of paper gives a nice effect.

4. Trace a semicircle onto the background with the pencil--make sure you are having the igloo rest ON the ground--not float in the air! We used paper plates cut in half as our templates. Apply some glue to the inside of the semicircle area you've traced on the paper. Use the white 1" squares of paper to fill in the semicircle for the igloo.

5. When your igloo is done, cut a 1" square of yellow for the window of the igloo and attach.

6. Cut a moon shape from the yellow construction paper and glue in the sky area.

What a serene landscape! Enjoy the view!


Tuesday, July 3, 2012

Peach-Faced Lovebird in Oil Pastels

About four years ago, my husband was hanging out in his garage with the doors open and in flew this little guy...a peach-faced lovebird! My hubby nabbed him and brought him in to me (no, I didn't believe the bird just FLEW into his shop...). Originally from Africa, this lovebird was far from home showing up in New Hampshire! We put ads in the papers, but never found his owners. "Bird," yep, that's his name, became a part of our family. The children love him and he seems to not mind the noise and activity that four children seem to create.

This isn't my Bird, but he looks just like this!

One of my younger art students loves animals, so I thought drawing Bird would be a great idea! My student had enjoyed working with craypas and baby oil on watercolor paper, so we used that technique. I had downloaded some images of peach-faced lovebirds to have on hand just in case Bird was being tempermental and we set up camp in front of his cage to observe and draw.

Here's my student with our model.
Bird must have loved the attention because he sat there on his perch and looked very handsome! When we looked away too long, he started performing and perching on the side of the cage so he could look upside down at us while we worked. What a great reminder to look at the subject you are drawing more than your paper!

Her drawings came out lovely--here's the final one where she used oil pastels for the bird and then watercolor pencils with a bit of water to soften the edges to create a nice, outdoorsy atmosphere for Bird.
Who would believe a bird could come in such colors!
It's nice to see Bird outdoors instead of behind the bars of the cage.

Related Posts Plugin for WordPress, Blogger...