Showing posts with label assessment. Show all posts

Wednesday, May 25, 2016

Foam Reduction Shoe Prints With Grade 5

Before I got all caught up graduatin' and getting an art teacherin' job, I posted a WHOLE BUNCH about the long-term art sub gig I had at Fairgrounds Elementary School in Nashua. If you didn't see the posts, I did a series of them by grade level (Kinder and grades 1-4). I also taught grade 5 while I was there and did some fabulous projects with them. I thought that I'd break those projects out into individual posts, though, since they require a bit more detail to explain, etc. Here goes...

Sassy boots! This print was done on white paper.
First printing: red ink, second print: black ink.
The yellow you see is a piece of paper I matted the print on,
the red is the mat board.
The first day I met the fifth graders, I decided to do a simple winter-themed foam printmaking project with them to catch their attention and size 'em up. I had them create snowman images on foam and them print with one color (white) onto their choice of background paper--you can see this post here.
This print was done on white paper.
First printing: blue ink, second print: black ink.
The yellow you see is a piece of paper I matted the print on,
the red is the mat board.
It went so well, that I thought I would continue on with printmaking and do a 2-color printmaking project inspired by the “Killer Heels” exhibit currently at the Currier Museum of Art (actually, I don't think this is currently on exhibit anymore, but it WAS at the time).

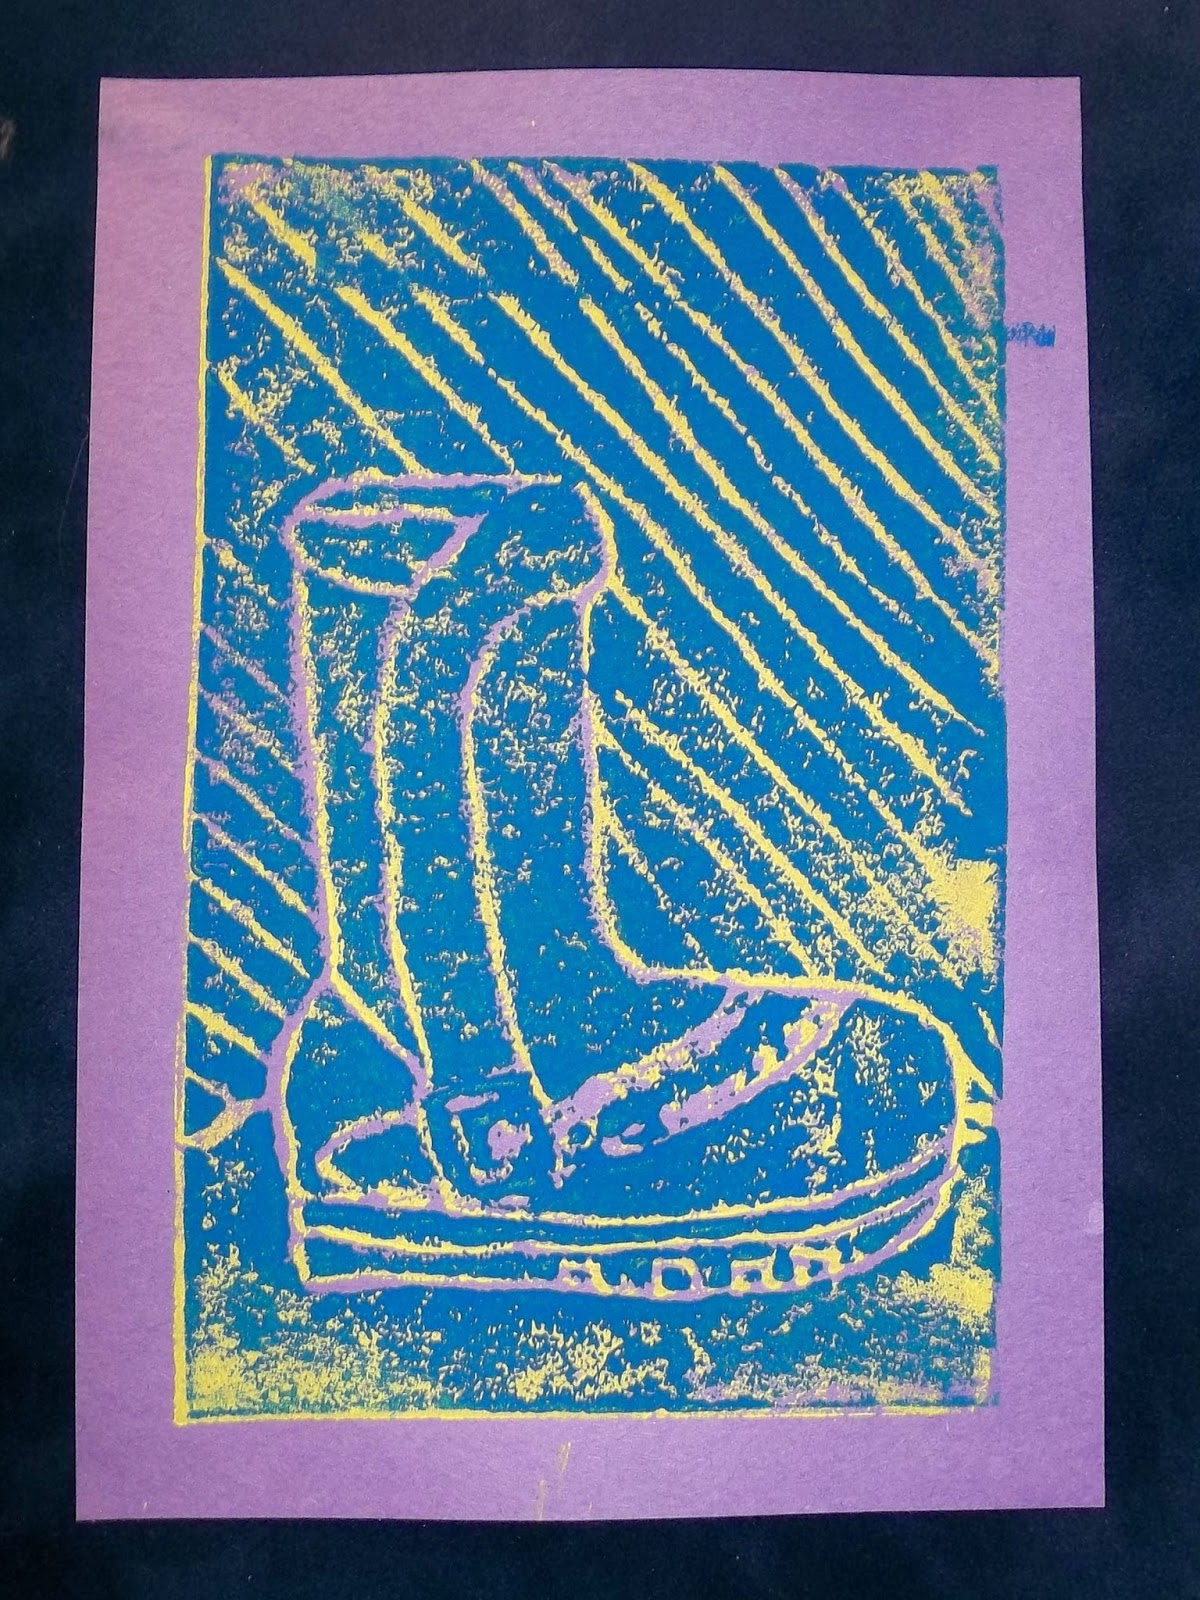
This print was done on purple paper.
First printing: yellow ink, second print: blue ink.
The navy blue is the mat board.
Students created their own printing plate by using pencil to “carve” a picture of their shoe into a foam “plate.” Students then used brayers to apply ink to their plates and print 1 print. Week two, students added a ground line and background, chose a contrasting color of ink and reprinted their designs. These prints were mounted on mat board and displayed at the Currier Museum of Art during the New Hampshire Art Educator’s Association Annual Members Reception in March. 

All prints were mounted onto mat board to look fancy.
I think added little paper hinges to groups of three to four
and ribbon ties so that the pieces could be displayed accordion-style
or create triangular displays such as this
(I didn't know how they were going to be used exactly).

WOW! What place of honor--the buffet table,
right where everyone can see these fabulous prints--
although I think people were too busy looking at the awesome food
they were piling on their plates--YUM!

The final week, students worked as a class to create an assessment rubric that contained the important vocabulary words from the Shoe Reduction Print project. They also determined four attributes that should be found in their finished work. Now, having students create their own rubric was something I had only done with high school, but I really wanted the students to be able to see the value in their work and begin to see that assessment isn't something we teachers pull out of thin air. Was walking the students through the rubric creation difficult. Not really. Was it work to keep them focused? Yep. Did it take a lot of time? Nope--we had it done in about 15 minutes. Was it worth it (really)? You bet. They did a great job and I think it lent credibility to me, the art process and what they do in the art room. Creating rubrics with your students is also a great way to review vocabulary and objectives! Win/win! ENJOY!!

Here's the rubric the grade 5 students created.
Normally, I would type up my rubrics to look all fancy,
but I wanted the students to see that this was the one we
created as a class. Pretty good for a first try.
Detail of the top of the rubric--the vocab section.
They needed to think of three vocab words from the lesson
and decide as a class what a good definition would be. 
Detail of the bottom of the rubric--they needed to come up with
four objectives of the assignment. This was fun walking them through
being objective instead of saying "it looks cool!" I put #5 on there. :-)


Wednesday, January 6, 2016

End of Semester ART Portfolio Self-Assessment

One of my goals at the end of the semester is making sure that the students leave the art room with ALL of their work. This isn't an easy feat with Middle School students, but I wanted to make sure the students realized that the work they had done with me was important and special--special enough to make it home and possibly shared with someone. What we do in the art room is important and needs to be handled as such. Here's what I came up with...

For the sixth grade students, I took a large piece of white drawing paper I had folded in half to create a folder for each student. I attached the following forms to the outside of the folder:

Portfolio Self-assessment Form by Mrs. P @ CreateArtWithMe.blogspot.com

  • A checklist of all the projects they created during the semester as well as a self-assessment for their effort during the semester
  • The Art Portfolio Self-Assessment form that you see above. 
A couple of days before the end of the semester, students were handed an empty folder with these sheets attached to the outside and needed to do the following:
  1. Finish all of their outstanding projects
  2. Gather all of the projects listed on the checklist and put them inside the folder (names on everything!!)
  3. Complete the self-assessment regarding their EFFORT
  4. Complete the PORTFOLIO self-assessment
  5. Pass their completed portfolio and forms in to me to review
This worked wonderfully! Once students passed in their completed portfolios I had everything in one place so that I could complete their grades and once the grading was done, I could pass the whole thing back to the students who had a nice way to carry their work home with them.

Having the students complete the self-assessments was also a win/win. Students were able to communicate with me about how they felt they did during the semester and I had that information as I reviewed their work. The portfolio self-assessment form was short, but allowed the students to look at all their work as a whole and comment on it. I think many of the students were surprised to see everything they had done and how well they had done it! I received comments such as "I didn't know I was an artist!" and "Wow, I can't believe how much stuff I did!" Completing the portfolio self-assessment also led to a richer class discussion on the last day.

This was a great way to wrap up the semester--I definitely plan to do something like this again!

Friday, October 31, 2014

The Making of a Spooky Village and a Poem

Happy Halloween!

Here's a look at the Scary House Prints my students created last week in after school art class. I had each of them donate one print to me and we created a spooky village. I had a kiddo use the formative assessment "poem activity" I spoke about here to create a spooky poem about the halloween village.

"Halloween Houses
Trick-or-Treating
Scary Like a Bat.
Spooky Night!"
ENJOY!!

Thursday, October 30, 2014

Viewing and Writing About Art: A Language Arts Formative Assessment For All!

I'm so excited to share this neat writing/language arts activity I learned about at a recent conference! I really think it has TONS of great uses! 

I'd like to thank Robin Perringer, art teacher at Nashua High School, for sharing this with me. She uses this with her high school students as a formative assessment--she mentioned she uses this in her ceramics class, but says you can use this with any of your students at any age level or with work they've created themselves or work by someone else (famous or not).

NOTE: Do not tell your students they will be writing poetry! :-) My experience has been that a scant few will be excited, but many will either go pale with shock and start stressing right away or exclaim "no!" and refuse to create a "silly" (or whatever creative adjective they can think of) poem! ;-) Once they are done, the students are always so blown away by the awesome writing they've done.

Georgia O'Keefe, Cow's Skull with Calico Roses, 1931

Here's how it works:

1. Have your students look at a piece of artwork. This can be a piece they've finished (or think they've finished), someone else's work in the class, or a famous work of art.

2. Have your students create the following:

  • Line 1: A creative name for the piece
  • Line 2: An action phrase based on what you see
  • Line 3: A simile or metaphor that describes the place/location/character or object
  • Line 4: Another title, but simpler
And there you have it--an awesome "poem" and a sneaky way to check your student's understanding and get them thinking and talking about art!

Here's an example using an image by Georgia O'Keefe...

Smooth Porcelain Petals
Clutching, Hanging, Captured
Cold, like the dessert night.
Bone White.

I'm definitely putting this in my toolbox for future classes! ENJOY!

Friday, April 13, 2012

Kandinsky Media Study

For my after school Modern Art class I wanted to try something a bit different. I usually do a Kandinsky project inspired by Art Projects For Kids using watercolor and crayon resist, but I thought I'd mix it up a bit and try not only experimenting with color, but also with media. I had each child create two 3" squares using the following media:

  • watercolor and crayon resist
  • collage
  • colored pencils
  • collage (using magazine pages)
This piece was created by a 13-year-old student I teach private lessons to.
Feel free to vary the amount of squares depending on the
age and ability of your students. This project looks great with
four, six, eight, nine, twelve squares, or more!

The lesson is perfect as an introductory project when getting to know students or as an assessment project. Originally, Kandinsky created his circle compositions as color studies, so we can too!

I set up four stations in the room, explained how to use the media at each station properly and then let them go. I timed about 10-15 minutes per station (they created 2 squares at each station). About two-thirds of the students were able to create the necessary squares in the allotted time. I think I would break this into two class sessions in the future and have them do watercolor and marker the first week and collage and colored pencil the next. Or, maybe have students just do one square each (for a total of 4 squares).

The finished pieces were glued to black construction paper. Lovely color and media studies! Thanks, Mr. Kandinsky!

Kandinsky Media Study

This project is designed to be worked in four stations. I'll describe each individually...

Station 1: Markers

Supplies Needed:
  • 3" squares of marker paper (marker doesn't bleed)
  • Pencil with eraser
  • Markers (We used Sharpies)
  • Newspaper to protect workspace
Directions:

1. Use pencil to write your name on the back of two squares. 

2. Draw concentric circles on the paper using pencil. The circle can stay within the box or go beyond the box slightly.

3. Color the rings in with various colors of markers. 

Marker Example (Using Sharpies)


Station 2: Colored Pencils

Supplies Needed:
  • 3" squares of drawing paper
  • Pencil with eraser
  • Colored Pencils
Directions:

1. Use pencil to write your name on the back of two squares. 

2. Draw concentric circles on the paper using pencil. The circle can stay within the box or go beyond the box slightly.

3. Color the rings in with various colors of colored pencils. You can use light or heavy pressure to vary the intensity of the colors.

Colored Pencil Example

Station 3: Collage

Supplies Needed:
  • 3" squares of drawing paper
  • Pencil with eraser
  • Ruler
  • Scissors
  • Glue stick
  • Magazines or paper scraps
Directions:

1. Use pencil to write your name on the back of two squares. 

2. Cut a 3" square from a solid-color section of a magazine picture. Adhere to the 3" square of drawing paper.

3. Cut rings of various colors of magazine paper and glue to your squares.

Collage Example
(Using Magazine Paper)


Station 4: Watercolor Resist

Supplies Needed:
  • 4" squares of watercolor paper (note the larger size)
  • Masking tape
  • Piece of cardboard
  • Pencil with eraser
  • Crayons
  • Watercolor paints & brush
  • Water bucket, paper towels
Directions:

1. Use pencil to write your name on the back of two squares. 

2. Tape the two squares to the cardboard or to the table. Tape a 1/4" border all around the squares--this will keep the paper from buckling as it dries.

3. Draw concentric circles on the paper using pencil. The circle can stay within the box or go beyond the box slightly.

4. Using a crayon, trace the pencil lines, pressing hard enough to leave a nice, thick pencil line.

5. Color the rings in with various colors of paint. You may not want to paint the rings in order since painting two sections that touch could cause the paint to bleed.

6. Let dry thoroughly. Trim squares to 3 inches.

Watercolor Example


To finish:

Mount all squares, touching, in a pleasing arrangement, onto black construction paper. Most squares will adhere nicely using a glue stick, but the watercolor paper may need tacky glue to stay glued down properly. Enjoy!


Related Posts Plugin for WordPress, Blogger...