Showing posts with label reduction. Show all posts

Monday, November 14, 2016

Looking at a NH Artist: Don Gorvett

Hello!

I never know where I am going to find inspiration for my art lessons! A couple of weeks ago, I was browsing a craft fair in New Hampshire (by myself--Yay! MOM TIME!!) and I was chatting with lots of the artisans there. To one couple, I had mentioned that my 7th graders were learning about relief printmaking and they mentioned they had seen a feature on NH Chronicle about a woodcut artist named Don Gorvett. Of course, I HAD to check it out! Boy, am I glad I did! Don Gorvett, a woodcut artist with galleries in Portsmouth, NH and Ogunquit, ME, does these amazing seaside-themed reduction prints that my seventh graders were in awe of.

Another great video about Don's work is "Moonlight Drawbridge"


I showed this video AFTER my seventh graders had completed a linocut project, so they had a bit of experience from which to view this video and process Don's work. Of course, their pieces were 4" x 6" and done using flexible printing plates I had in my new classroom. In contrast, Don's work is done on large piece of plywood and he sometimes uses up to 8 colors to our humble 1 color. After I showed this video to the students, there was silence. And some of them had their mouths gaped open. Seventh grade! :-) Yipes! 

Anyway, fast forward to the weekend. My hubby and I went away on a 23-hour anniversary celebration and we drove up to the Portsmouth, NH area to see the sites, shop a bit and have dinner at one of my, ahem, OUR favorite restaurants. My husband suggested we go to Don's gallery, and who do you think was there? Don himself, working away. He graciously took time away from his work to talk to my husband and I about his work and gave me some tidbits about being an art teacher and how I can foster a climate of creativity and wonder in my students. I am so glad we stopped in to visit! I also was able to post a picture of Don and me on "The Instagram"--the account I have for my students' work and artsy happenings at our school! Having an Instagram account is new for me, but I am trying (10 followers-YAY!)!
Hanging with Don Gorvett in his Portsmouth, NH studio/gallery.
So, I would HIGHLY recommend looking at Don's work as well as taking the opportunity to show the work of local (to you) artists. This can be done by showing the students real work or artifacts, a video from the Interweb, or a video you made yourself, or having the person come to your school for an artist visit and demonstration. BTW: Cassie Stevens just began a new series on her blog called "field trip" where she takes her students on a virtual video field trip to meet artists. Her first installment features a musician and visual artist named Bebo. Check that out too!

Enjoy!!

Wednesday, May 25, 2016

Foam Reduction Shoe Prints With Grade 5

Before I got all caught up graduatin' and getting an art teacherin' job, I posted a WHOLE BUNCH about the long-term art sub gig I had at Fairgrounds Elementary School in Nashua. If you didn't see the posts, I did a series of them by grade level (Kinder and grades 1-4). I also taught grade 5 while I was there and did some fabulous projects with them. I thought that I'd break those projects out into individual posts, though, since they require a bit more detail to explain, etc. Here goes...

Sassy boots! This print was done on white paper.
First printing: red ink, second print: black ink.
The yellow you see is a piece of paper I matted the print on,
the red is the mat board.
The first day I met the fifth graders, I decided to do a simple winter-themed foam printmaking project with them to catch their attention and size 'em up. I had them create snowman images on foam and them print with one color (white) onto their choice of background paper--you can see this post here.
This print was done on white paper.
First printing: blue ink, second print: black ink.
The yellow you see is a piece of paper I matted the print on,
the red is the mat board.
It went so well, that I thought I would continue on with printmaking and do a 2-color printmaking project inspired by the “Killer Heels” exhibit currently at the Currier Museum of Art (actually, I don't think this is currently on exhibit anymore, but it WAS at the time).

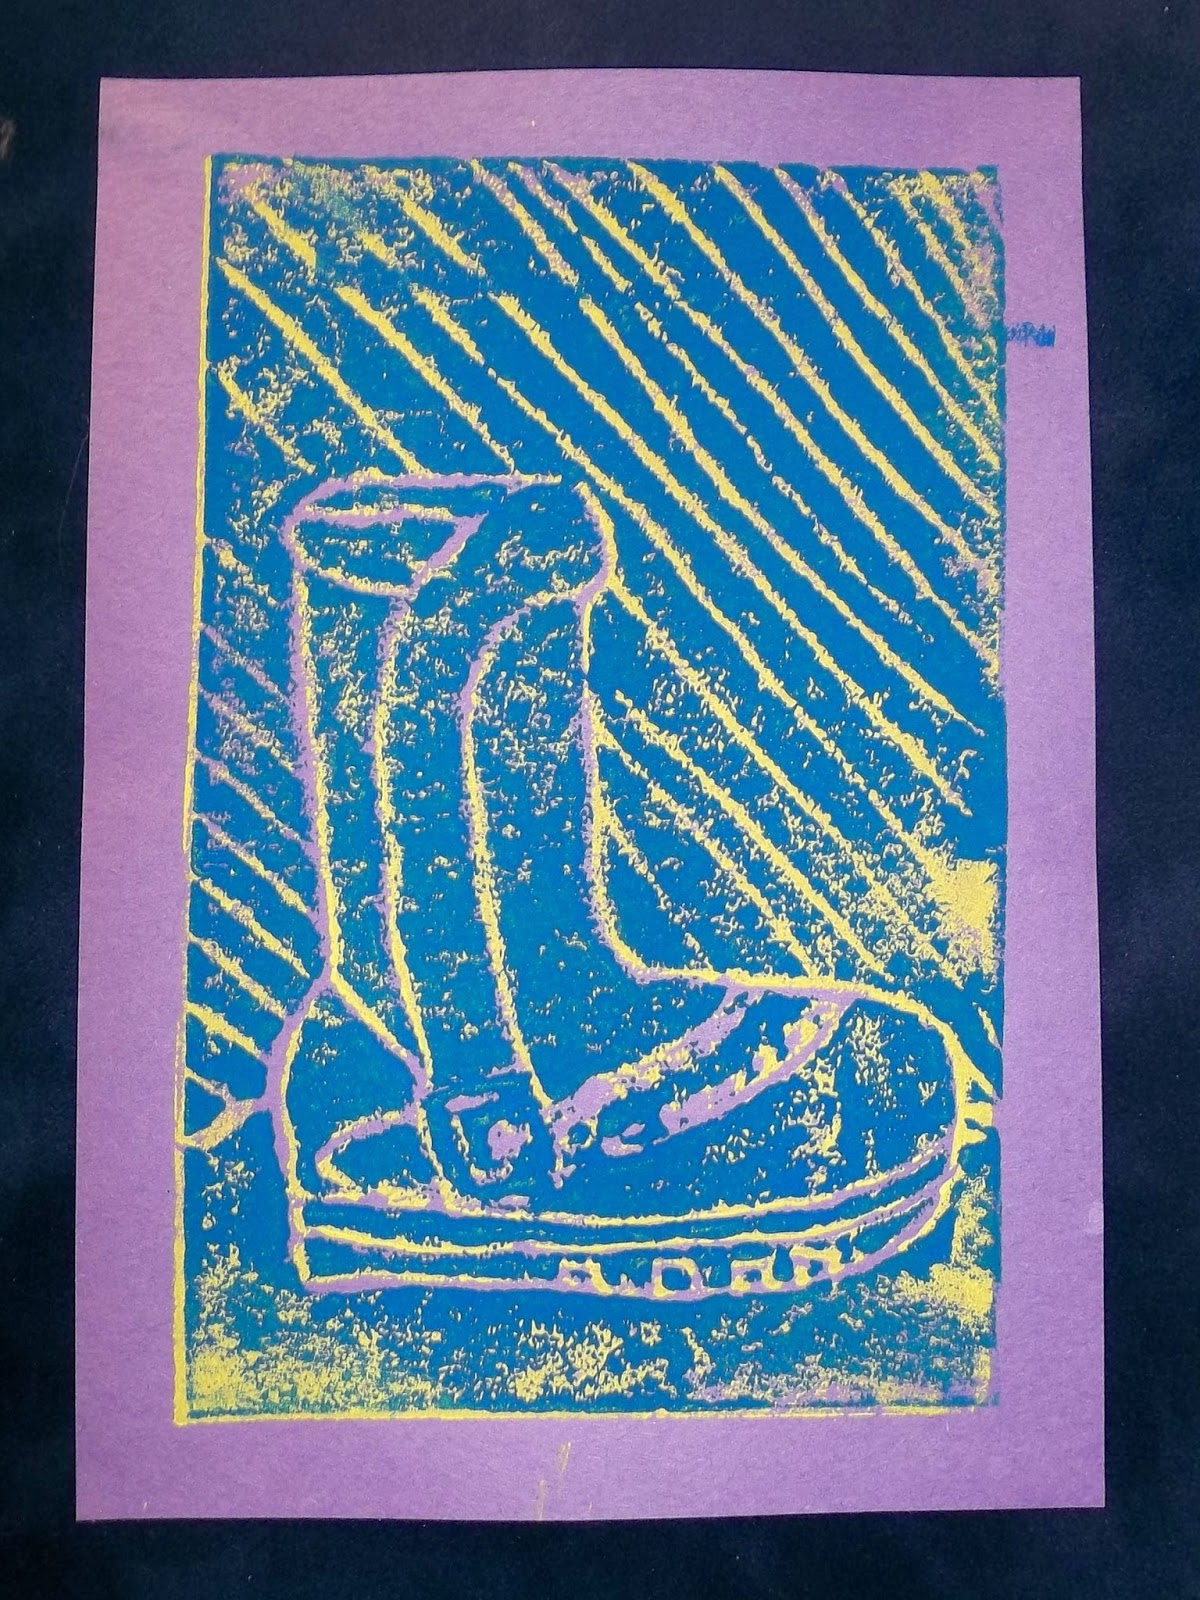
This print was done on purple paper.
First printing: yellow ink, second print: blue ink.
The navy blue is the mat board.
Students created their own printing plate by using pencil to “carve” a picture of their shoe into a foam “plate.” Students then used brayers to apply ink to their plates and print 1 print. Week two, students added a ground line and background, chose a contrasting color of ink and reprinted their designs. These prints were mounted on mat board and displayed at the Currier Museum of Art during the New Hampshire Art Educator’s Association Annual Members Reception in March. 

All prints were mounted onto mat board to look fancy.
I think added little paper hinges to groups of three to four
and ribbon ties so that the pieces could be displayed accordion-style
or create triangular displays such as this
(I didn't know how they were going to be used exactly).

WOW! What place of honor--the buffet table,
right where everyone can see these fabulous prints--
although I think people were too busy looking at the awesome food
they were piling on their plates--YUM!

The final week, students worked as a class to create an assessment rubric that contained the important vocabulary words from the Shoe Reduction Print project. They also determined four attributes that should be found in their finished work. Now, having students create their own rubric was something I had only done with high school, but I really wanted the students to be able to see the value in their work and begin to see that assessment isn't something we teachers pull out of thin air. Was walking the students through the rubric creation difficult. Not really. Was it work to keep them focused? Yep. Did it take a lot of time? Nope--we had it done in about 15 minutes. Was it worth it (really)? You bet. They did a great job and I think it lent credibility to me, the art process and what they do in the art room. Creating rubrics with your students is also a great way to review vocabulary and objectives! Win/win! ENJOY!!

Here's the rubric the grade 5 students created.
Normally, I would type up my rubrics to look all fancy,
but I wanted the students to see that this was the one we
created as a class. Pretty good for a first try.
Detail of the top of the rubric--the vocab section.
They needed to think of three vocab words from the lesson
and decide as a class what a good definition would be. 
Detail of the bottom of the rubric--they needed to come up with
four objectives of the assignment. This was fun walking them through
being objective instead of saying "it looks cool!" I put #5 on there. :-)


Related Posts Plugin for WordPress, Blogger...