Showing posts with label machine. Show all posts

Wednesday, March 12, 2014

Integrating the Arts: Art, Science & The Persistence of Vision

Monday night I had the pleasure of volunteering at Amherst PTA's Math & Science Night at Wilkin's Elementary School in Amherst, NH. The Math & Science night is a free non-commercial event where families can come together and enjoy playing with math and science concepts. There were all sorts of good things there: games, voting & graphing, fishing for fractions, using microscopes, learning about sound waves and more--all in a fun & relaxed setting.


I asked if I could come and set up a table where art and science were used together. Combining science and art is probably one of the most fun things to do (I often tell my husband that if this art teacher thing doesn't work out I am becoming an earth science teacher. To which he replies with raised eyebrows!).

Anyhow, I needed to create a project that would entice children to stop at my table, stay a couple minutes, have a high success rate, and be cheap (hey, I'm paying for this and I didn't know if I was going to have 100 or 300 kids at this event!). So, I chose a basic animation "machine" called the Thaumatrope. Here's my original post here with the "how to."I used plastic drinking straws instead of skewers because they were safer.


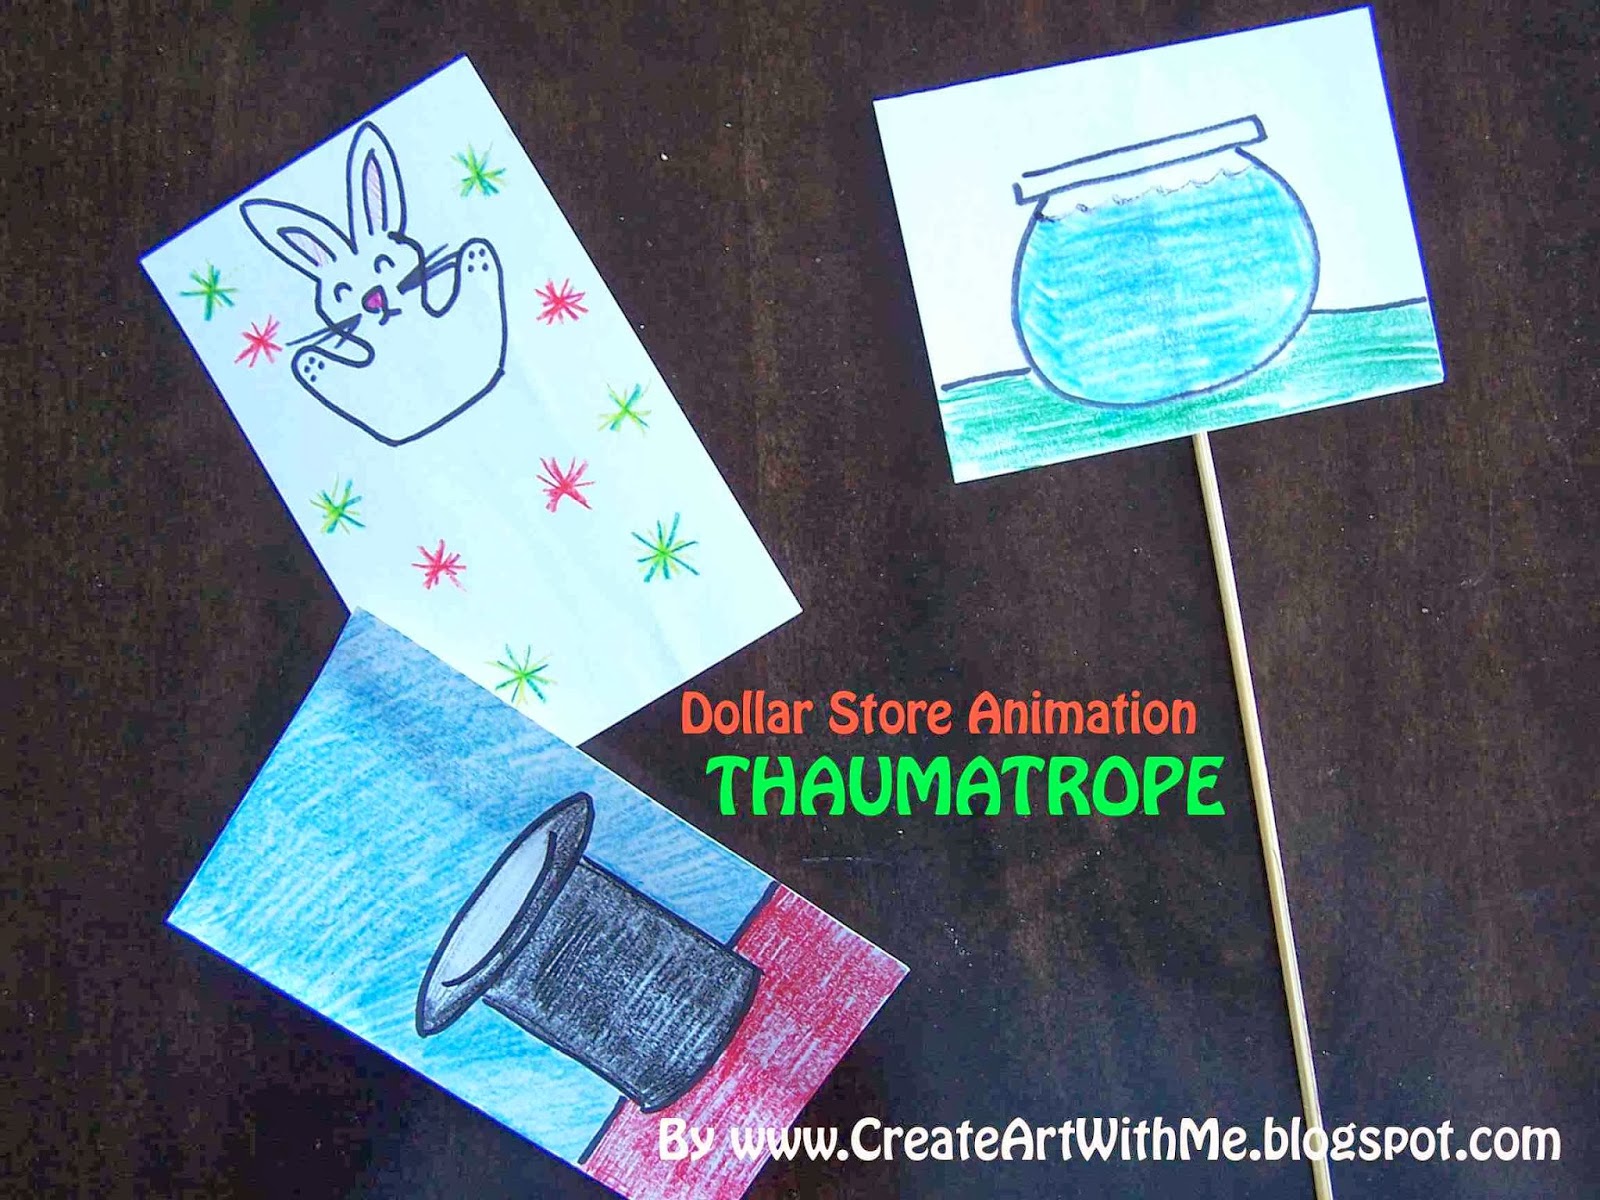
Here are some of the examples of Thaumatropes I brought to the event.
Compare the two images to see the front and the back of each...


Here are some photos from the event...
My display explaining lenticular animation & optical illusions (top portion)
and animation and the persistence of vision (bottom portion).
The work area before the kids arrived. I had all the supplies they needed
in each tray and directions in case I wasn't able to get to the right away.
These Thaumatropes cost about 2 cents each to make (not including the colored pencils).
And just to prove I actually had children visit me, here's a photo of a few
girls working at my table. This was at the end of the night. At one point it was
standing room only at my table! Visitors ended up making 100 Thaumatropes that night!

How it went:

Great! I tried to think of some great hook to get children to stop and do my project—I was worried it would seem like too much work. So I would say—“Hey, do you want to make a magic picture?—It only takes a minute!” and then I’d show them a couple of examples. My favorite was one that I created that has an image of a top hat on one side. I showed this to the children and said “I can make a rabbit come out of this hat—want to see?” And then, when I spun it, the rabbit (image from the other side) appears. It was really fun seeing the look of awe on some of the kids’ faces when they saw the two images come together!

The Lesson:
Because I had about 30 seconds per child to explain the concept, I tried to be pretty descriptive when showing them the examples. I’d say the following:
  • See how there is one picture on this side and one on the other side?
  • When you draw your two pictures, they will come together when you spin your thaumatrope—so think about that when you draw—use pencil first so we can try it out.
  • Don’t worry if it doesn’t work at first—this is tricky! I made mistakes too (I had one of my mistakes on hand to show them)—if you make a mistake, you can erase, or make another one—I have more!
I had all sorts of creative Thaumatropes made: a cheetah leaping into a tree, a sugar glider leaping from a tree, a Star Wars light saber battle, all sorts of sports balls going into goals, hoops, nets, etc., kittens lounging in cat beds or eating food, and so much more! Students of all ages were successful with this craft—K-4th, I’d say. 

I noticed the older they were, the more complicated they tried to make their animations and therefore the more thought needed to go into them (and then they sometimes needed to make some adjustments). But I tried to work with the students so that everyone went away with a successful Thaumatrope.

Monday, January 13, 2014

Dollar Store Animation Class: Thaumatropes

So you'd like to create a series of animation classes for your students, but don't have much $$? No problem! I taught a 3 week series of animation classes for middle school students this fall that was full of information and inspiration, and didn't cost too much.


On the left: a magical bunny who pops out of a magician's hat (both sides seen here).
On the right: The goldfish in the fishbowl (only one side shown).

The course was called: Animation, The Old-Fashoined Way--I wanted to start off showing students that they can create little movies from everyday items. I was able to show them all sorts of animation "machines" from the history of animation. We saw still and moving examples of each "machine" and then created our own.

I told the students that this course is mainly a workshop--lots of experimenting going on here! This was a bit different from my other art classes where they may come away with artwork for the fridge--many of the examples they made in animation class are meant to be held, spun, flipped, etc. and since I'm not telling them exactly what to animate (that wouldn't be fun!), they were going to learn-as-they-went, so they may make mistakes.

Class one, we watched a great video by MIT about the history of animation. This video has examples of many of the old-fashioned animation "machines" we were going to be creating!

http://video.mit.edu/watch/history-of-animation-3391/

First, we started off with the Thaumatrope--the easiest animation machine of all (I think).

What is a Thaumatrope?
The Thaumatrope is a great & quick way to illustrate to students the main magic about animation: persistence of vision. Students create two drawings and glue them back-to-back. As they spin the "machine" in their hands, both drawings will seem to appear at the same time.

History of the Thaumatrope:
The Thaumatrope is a simple toy that was used in the Victorian era (about 1824). Traditional examples use a string to spin the cards, but my example below uses a skewer, because I think that works better.

Examples of a Thaumatrope to check out:
The most common example of the Thaumatrope you'll see on the Internet is the goldfish in a fishbowl. I'm sure you can do better than that! But check these out for inspiration:


Make Your Own Thaumatrope!

Supplies Needed:
  • One 4"x6" white index card
  • Clear tape
  • Pencil with eraser
  • Glue Stick
  • One wooden skewer (I've also used plastic drinking straws)
  • Markers
  • Colored pencils and/or crayons
Directions:

1. Fold the index card in half widthwise (hamburger or taco fold).

2. Lightly sketch 2 images (one on each side of the index card) using the pencil. Make sure that your drawings line up when you flip back and forth between them: I had students fold the index card and then hold the card up to the light in a sunny window so they could see both pencil drawings through the paper. Make adjustments as necessary.

3. Outline the finished pencil lines with marker and color the drawings with colored pencil to make them nice and bold. Animations work best if you do your best coloring.

4. Tape the skewer to the center of the inside of the folded index card. Glue the inside of the index card with glue stick and fold the card closed over the skewer to secure (refer to the photos in this post).

5. Roll the stick of the Thaumatrope back and forth in your hands and enjoy!

----------------------

Other posts in the "Dollar Store Animation Class" Series:

• Thaumatrope (you're here!)

• Phenakistoscope

• Zoetrope
• Flip books
• Stop Motion (Part 1)
• Stop Motion (Part 2)
Related Posts Plugin for WordPress, Blogger...