Showing posts with label dollar store. Show all posts

Monday, January 13, 2014

Dollar Store Animation Class: Thaumatropes

So you'd like to create a series of animation classes for your students, but don't have much $$? No problem! I taught a 3 week series of animation classes for middle school students this fall that was full of information and inspiration, and didn't cost too much.


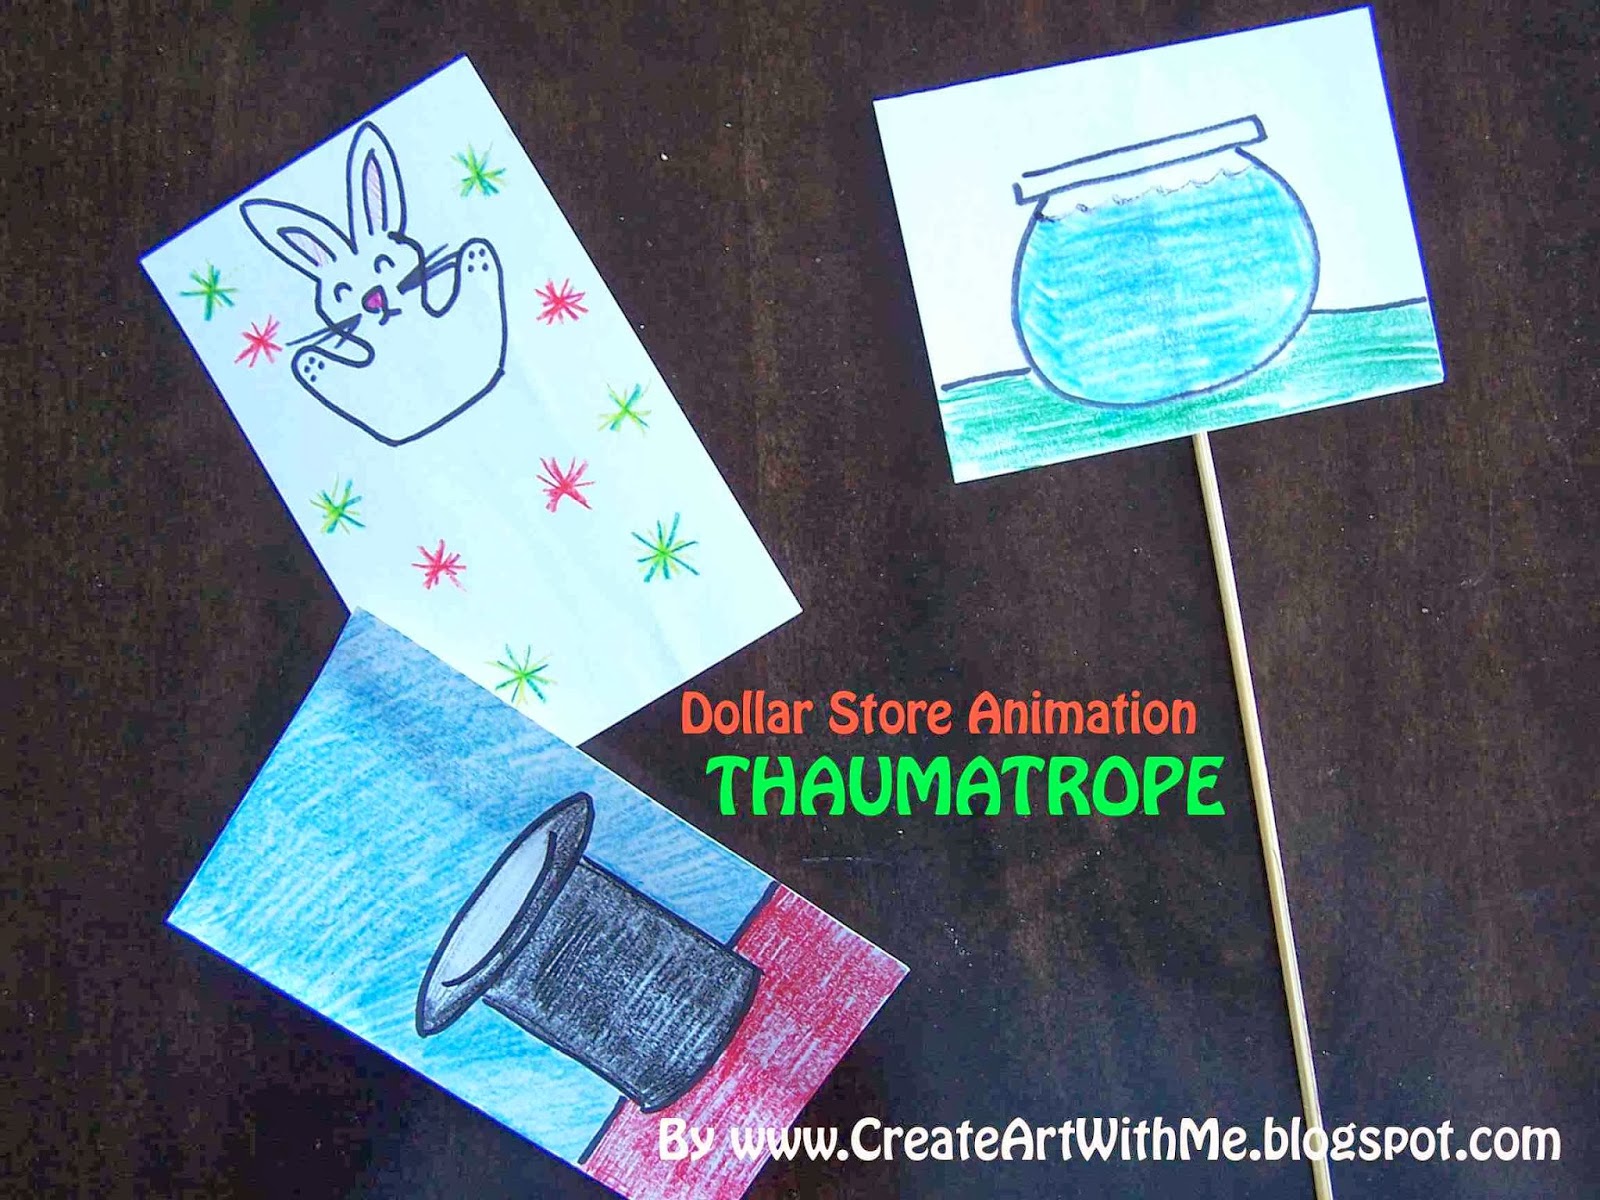
On the left: a magical bunny who pops out of a magician's hat (both sides seen here).
On the right: The goldfish in the fishbowl (only one side shown).

The course was called: Animation, The Old-Fashoined Way--I wanted to start off showing students that they can create little movies from everyday items. I was able to show them all sorts of animation "machines" from the history of animation. We saw still and moving examples of each "machine" and then created our own.

I told the students that this course is mainly a workshop--lots of experimenting going on here! This was a bit different from my other art classes where they may come away with artwork for the fridge--many of the examples they made in animation class are meant to be held, spun, flipped, etc. and since I'm not telling them exactly what to animate (that wouldn't be fun!), they were going to learn-as-they-went, so they may make mistakes.

Class one, we watched a great video by MIT about the history of animation. This video has examples of many of the old-fashioned animation "machines" we were going to be creating!

http://video.mit.edu/watch/history-of-animation-3391/

First, we started off with the Thaumatrope--the easiest animation machine of all (I think).

What is a Thaumatrope?
The Thaumatrope is a great & quick way to illustrate to students the main magic about animation: persistence of vision. Students create two drawings and glue them back-to-back. As they spin the "machine" in their hands, both drawings will seem to appear at the same time.

History of the Thaumatrope:
The Thaumatrope is a simple toy that was used in the Victorian era (about 1824). Traditional examples use a string to spin the cards, but my example below uses a skewer, because I think that works better.

Examples of a Thaumatrope to check out:
The most common example of the Thaumatrope you'll see on the Internet is the goldfish in a fishbowl. I'm sure you can do better than that! But check these out for inspiration:


Make Your Own Thaumatrope!

Supplies Needed:
  • One 4"x6" white index card
  • Clear tape
  • Pencil with eraser
  • Glue Stick
  • One wooden skewer (I've also used plastic drinking straws)
  • Markers
  • Colored pencils and/or crayons
Directions:

1. Fold the index card in half widthwise (hamburger or taco fold).

2. Lightly sketch 2 images (one on each side of the index card) using the pencil. Make sure that your drawings line up when you flip back and forth between them: I had students fold the index card and then hold the card up to the light in a sunny window so they could see both pencil drawings through the paper. Make adjustments as necessary.

3. Outline the finished pencil lines with marker and color the drawings with colored pencil to make them nice and bold. Animations work best if you do your best coloring.

4. Tape the skewer to the center of the inside of the folded index card. Glue the inside of the index card with glue stick and fold the card closed over the skewer to secure (refer to the photos in this post).

5. Roll the stick of the Thaumatrope back and forth in your hands and enjoy!

----------------------

Other posts in the "Dollar Store Animation Class" Series:

• Thaumatrope (you're here!)

• Phenakistoscope

• Zoetrope
• Flip books
• Stop Motion (Part 1)
• Stop Motion (Part 2)

Friday, January 25, 2013

Optical Color Mixing With a Dollar Store Top

I love teaching art, but if I *had* to choose something else to teach, it would be science. Science and nature are just unlimited stimulation for a curious mind! Don't worry, I'm not changing my blog's focus! But the science of color kind of creeps in now and then in art and this time I decided to embrace it and surprise my students with a color theory lesson that was a bit, ahem, over the top (groan!)


When doing research on optical color mixing, I found a couple of neat mechanical devices used by scientists to test optical color mixing and immediately thought: TOPS! Could the simple tops I had on hand from the dollar store be used to make a version of Newton's Color Wheel (or Color Top) and teach the children about color mixing in art? Yep!

Pointillists such as George Seurat are frequently thought of when discussing optical color mixing, but many other artists use it too such as the Impressionists and modern artists such as Chuck Close and modern printing (such as in newspapers and magazines also use optical color mixing).

Here are some sites to get you started on your journey:

"Mixing in the Eye," From Drawing From Life by Fred Hatt
"Newton's Color Wheel," From The Department of Physics at Kenyon College
"Color Mixing Wheel-Sick Science," From Steve Spangler Science

I abolutely LOVE the article by Fred Hatt about color mixing in art! Talk about one-stop shopping in terms of info and images!

So, let's get started!

Optical Color Mixing With a Dollar Store Top

Supplies Needed:
  • Top (ours are from the dollar store and were packed two tops per package--what a deal!)
  • White card stock
  • Pencil
  • Ruler
  • Scissors
  • Hole punch
  • Tape, optionnal
  • Sharpies in Red, orange, yellow, green, blue, purple and black
Directions to prepare the tops:

1. Measure the diameter of the top. Ours were about 2 1/2." Create a series of circles that are the diameter of your top on the white card stock. 

2. Use the pencil and the ruler to divide up the circles into quarters, sixths, rings, etc. using the images below or from the links I've provided. It's good to do a few serious experiments first and then leave a few of the circles blank to create some wild tops using your imagination.

3. Color in the circles with various color combos, experimenting with the colors of the rainbow, or a the primaries, or just black and white. Use nice, bold colored markers and do a nice job coloring the sections in (no streaky coloring).

4. Cut out the colored circles and use the hole punch to make a circle in the center to fit over the "handle" of the top. You can secure the paper piece to your top with a rolled bit of tape, if desired.

5. Spin your top and observe what happens.

Some variations to try:

Use the primaries (Red/Yellow/Blue) to make
Secondary colors (Orange/Green/Purple) from the Color Wheel
Now try this one: divide the circle in sixths, color and spin.
What happens? How is this different than if you mixed
all of these colors of paint together?
(Spoiler alert: Pure White Light is created--
see below in the "How does this work?" section).
This experiment also works with value--try different combos
of white and black and see of you can get different tints and shades.
And now have some fun! Try your own color combinations
and see how they turn out! Which of your creations are your
favorites? Which creations surprised you?
How does this work?

When the wheel spins, your eye cannot keep up with the individual colors on the top, so the colors appear to blend. That is how you can create different shades of gray or secondary colors from the primaries. However, when you use the colors of the rainbow something interesting occurs (spoiler alert!). Instead of mixing together and forming black (that's what would happen if you mixed all those colors of paint together on your palette), a pale gray occurs (it is supposed to be white). Pure white light will be created if all of the colors in a rainbow are visually mixed together in perfect balance. Pure white light is a hard thing to create but your color wheel top with six colors will come very close.

Have fun with your experiments!

Tuesday, January 8, 2013

Igloo Landscape With Northern Lights

I'm really excited about this project! I did this project as part of a special winter-themed afternoon with the Kindergardeners at Clark School this week. Previous visits have used cut paper and printmaking and they've learned all sorts of great skills and art techniques. This little lesson uses something every teacher on hand: bulletin board borders to give that wavy look in the sky. I bought mine at the dollar store (a package of 14 for $1).


The art concepts that the children learn with this project are the parts of a landscape (foreground, background, ground, sky), as well as collage, cutting with scissors & working on a multi-step, multi-layered project. The children can rip the paper for the ground and use geometric shapes (squares and rectangles) to create the semicircular igloo. They create their own shape for the moon--that can vary quite a bit and they are all darling. Pastels can be messy, and this project uses that to its advantage! The pastels are perfect for the bright colors and streakiness of the Aurora Borealis, or Northern Lights.

There are also great literature, music, science and cultural links to this project as well: the Northern Lights are part of the rich spiritual culture of the Inuit people (indigenous people of the arctic), as are igloos. The Inuit people live in stick framed houses now, but there are still times when igloos are used as shelter today. Igloos are temporary shelters that can be erected in as little as two hours! WOW!

There are many tales associated with the Northern Lights. I found a great book called The Fiddler of The Northern Lights by Natalie Kinsey-Warnock about the Northern Lights, that is a bit of a different tale. In the book, there is a man from Cape Breton who plays the fiddle and his music makes the Northern Lights dance. I was fortunate to find that my library had two CDs of fiddle music from Cape Breton--so I could share this great music with my students!

I hope you enjoy this lovely little lesson!

Igloo Landscape With Northern Lights

Supplies Needed:
  • 12" x 18" piece of black construction paper
  • 1 bulletin board border from the dollar store (or you can cut a wavy template from poster board)
  • Masking tape and clear cello tape
  • Chalk pastels
  • Tissues
  • Elmer's glue (or other white PVC glue)
  • White construction paper (some ripped into strips, some cut into 1" squares)
  • Semi-circle to trace for igloo shape
  • Pencil
  • Scrap of yellow construction paper (for moon and window)
  • Scissors
Directions:

1. Tape the border to the table: tape it on either end with a piece of clear tape so that it is nice and secure, but your sheet of black paper can slide under it.

2. Slide the black paper under the border. Use the pastels to color on the paper along the top edge of the border. It's OK if you get the pastels on the border and on the black paper at the same time. Just keep the black paper still while you are doing it. Once you've traced along the entire edge of the border piece, take a tissue and gently rub upward (away from the border), along the entire edge of the border. This will give you the lovely, streaky look of the Northern Lights. Don't scrub with the tissue--that won't give you the same effect. Repeat this 2 or 3 more times on the page.

3. When you are done your sky, move over to the collage table. Apply a thin line of glue along the bottom edge of the black paper. Attach strips of white paper along the bottom to make the snowy ground. Ripping the strips of paper gives a nice effect.

4. Trace a semicircle onto the background with the pencil--make sure you are having the igloo rest ON the ground--not float in the air! We used paper plates cut in half as our templates. Apply some glue to the inside of the semicircle area you've traced on the paper. Use the white 1" squares of paper to fill in the semicircle for the igloo.

5. When your igloo is done, cut a 1" square of yellow for the window of the igloo and attach.

6. Cut a moon shape from the yellow construction paper and glue in the sky area.

What a serene landscape! Enjoy the view!


Related Posts Plugin for WordPress, Blogger...