Showing posts with label point. Show all posts

Saturday, September 22, 2012

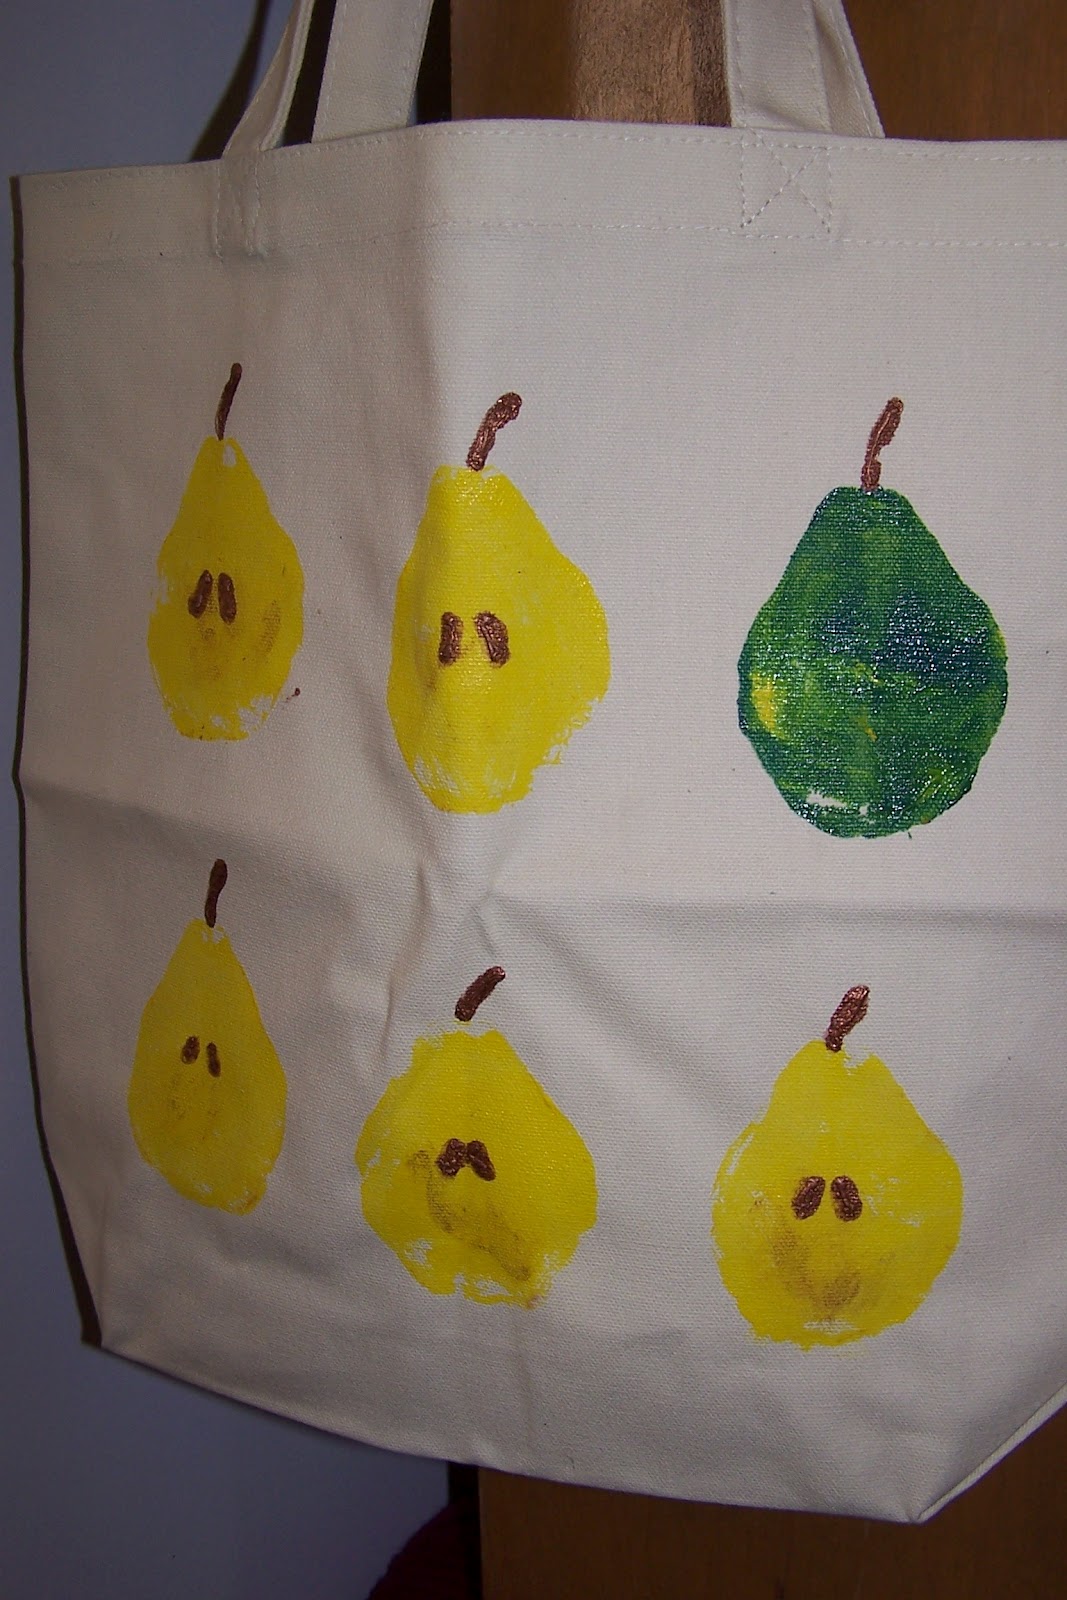
Focal Point Fruit Print Tote

Fall is in the air! And for those of us in New England it's apple picking time! I took the kiddos out and we picked a HUGE bag of Cortlands, Macouns and (my favorite) Honey Crisp apples. YUM! This is also a wonderful time to do an art project that is a lesson in basic printmaking techniques, using fruit to make prints.


One of these things is not like the other...

Variations of this lesson abound, but with this one, you can use apples or pears to make a fall-inspired tote bag to carry all of those library books around! If you don't want to go through the expense of printing on canvas totes, just use tempera paints on heavy-weight paper.

In her book "Teaching Art With Books Kids Love," author Darcie Clark Frohardt has a similar lesson. She uses fruit prints to illustrate the concepts of focal point and dominance to students. She suggests using the book "Saint George and the Dragon" by Margaret Hodges--which has gorgeous illustrations, by the way, to show the concept of focal point and then stamp the fruit onto the surface with one of them being a different color. That different colored fruit becomes the focal point of the piece.

No matter how you choose to do this project, it is fun way to explore printmaking!

Focal Point Fruit Print Tote

Supplies Needed:
  • Canvas tote (or heavyweight paper)
  • Fabric Paints in two colors for the fruit (red and green or green and yellow, etc.)
  • Brown or black fabric paint for seeds and stems (or you could use a Sharpie marker if you are doing this on paper)
  • Fruit such as a pear or apple (or experiment with whatever fruits and veggies you have on hand)
  • Knife (to cut fruit, a grown-up's job)
  • Paper plate palette
  • Newspaper to cover work surfaces
Directions:

1. Cut your fruit in half using a sharp knife (a grown-up's job).

2. Place some fabric paint on a paper plate. Dip the fruit into the fabric paint and try a test print (or two) on paper. Once you've got the technique down, you can stamp the fruit in rows across the tote. To make the focal point, use an alternate color of paint to stamp one of your fruit a different color than the rest.

3. Use brown or black fabric paint with a fine tip to add details like seeds and stems to the fruit. I didn't add seeds to the focal point fruit because I thought that made it look like it wasn't cut open but the rest were.

4. Let dry for at least 24 hours (or whatever the fabric paint manufacturer suggests).

A variation of this would be to use any of the books by Saxton Freymann and Joost Elffers such as "How Are You Peeling: Foods With Moods" and after your initial fruit prints are dry, add faces to them expressing different feelings and moods. FUN!


Friday, March 16, 2012

One Point Perspective Paintings

The focus of this year with my home school art class is art from the 1500's-1700's. One of the things I really wanted to teach them about was perspective, but I felt like a couldn't quite find a project that would work for 2nd-5th graders that wouldn't turn into a circus! So I put it off and put it off, but then I saw Natalie's project on one point perspective at the blog, "SmArt Class," and I thought, "This just might work...."


This student has lots of lovely details in her picture!

Well, I'm happy to say, it did! The first week, I showed the students some examples of paintings with and without perspective in them. Then, I walked the students through a guided drawing exercise using Natalie's step-by-step instructions so I didn't miss anything.

The second week, the children finished their pencil drawings (most of them were still drawing windows on buildings) and added details for interest. Then they used Sharpies to ink their drawings. When done, they used erasers to remove their guide lines. I gave a demo on using watercolors properly. Rules I shared were:

  • proper brush technique
  • no splashing the water
  • dabbing brushes dry on paper towels
  • no scrubbing the brush
  • how to create areas of color by using gradual washes of color, etc...
Most of the students were able to start their painting on week two.

The third week, students continued to add color to their pictures with watercolors. Everyone finished up by the end of this class.

The students were very proud of their pieces--they kept saying things such as, "It really looks like you can go down the road!" I was very happy I tried this project with my students!

Love the bridge and the car in this one!


Even the youngest students in my classes really got into this project!


Wednesday, January 25, 2012

Winter Silhouette Landscapes

WOW! This is one of those projects where I think, "Yeah, this will be a good one to do with the kids," but then I do it and, WOW. I was so happy with the way these came out and the creativity my students showed when making these pieces.

Look at that sky! Beautiful!

My homeschool art class just finished up a two-week session on Chinese New Year and we had a class to go before starting African art. I wanted to do a winter-related project that taught them a skill (such as color-mixing) but also tied in some elements of art such as value, etc.

I found this project for a moon-lit landscape in the book, "Using Color in Your Art," by Sandi Henry. It's published by Williamson Books and I LOVE their art books for children.

I also tied in another favorite book of mine, "The Day the Babies Crawled Away," by Peggy Rathmann. It's a great book that has striking skies offset with detailed silhouettes. The story is about a boy who notices the babies in his neighborhood crawling away from a neighborhood celebration (unbeknownst to their parents). He follows the babies to keep an eye on them and the images are hilarious! Oh yeah, and it illustrates the whole "beautiful background/silhouette landscape-thing I'm trying to teach with this project!

This project teaches a whole bunch of concepts to children, here's the info:

We started by talking about landscapes and what that meant. Then we discussed how there can be different values (lights and darks) of colors. When a painter mixed white with a color, it gets lighter. The values that are made by mixing white with a color are called tints. When a painter mixes black with a color, it gets darker. The values that are made by mixing black with a color are called shades.

In the first part of this project, we are going to make the sky (or background) for our Winter Silhouette Landscapes.

Supplies Needed to make the SKY:

  • 11" x 14" White Heavyweight Paper (I used bristol, but you could use posterboard)
  • Pencil
  • Blue tempera paint
  • White tempera paint
  • Disposable plate for a palette
  • Paint brush or piece of sponge
  • Water, paper towels & newspapers

Directions to make the SKY:

1. Using your finger, locate the center of the white piece of paper. Move your finger up about 2" and then over to the right about 2." This is where your moon will be. Use the pencil to make a little dot to mark the place.

2. Put some white and blue paint on the palette. Paint a 2" circle with white paint onto the dot you marked as the "moon" on your paper.

3. With your brush, get a dab of blue and mix it into the entire blob of white paint on your palette (not in your paper!). Use this brush or the sponge to paint this light blue paint in a ring around the moon on your paper.

4. Keep repeating the process (adding blue paint to make the paint on your palette darker and then painting a ring of color onto your paper) until the entire page is filled with rings of color. It's OK if some of the rings go off your paper. Just keep going and continue filling the page.

5. Let this dry. I brought a fan in to speed up the process since I wanted to send this project home today.

Supplies needed to make the SILHOUETTE-LANDSCAPE:

  • 1 Piece of 9" x 12" black construction paper
  • Bits of yellow construction paper, optional
  • Pencil
  • Scissors
  • Glue stick

Directions to make the SILHOUETTE-LANDSCAPE:

1. I started by talking with the children about what they'd see if we went walking in their yard at night. We discussed not only what we'd see (houses, snowmen), but what we'd smell (trees, smoke from a chimney). Then I asked them what we'd hear (crunching snow, dogs barking, children playing). I also showed them the book by Peggy Rathmann and we discussed a few things we saw in there.

2. Draw a ground line on the black construction paper. Add a house, trees, etc. using the pencil making sure that the elements touch the ground and are large enough and simple enough to be recognized and easy enough to cut out with scissors.

3. Cut out the silhouette with scissors.

4. Glue the silhouette to the background/sky painting using a glue stick. The silhouette becomes the foreground of the picture. The moon makes a nice focal point.

5. Using bits of yellow construction paper and the glue stick, add a window or two to your house.

ENJOY the warm, inviting night-time winter landscapes!

This piece shows one of the babies from the book
getting into trouble by hanging upside from a tree limb!


Related Posts Plugin for WordPress, Blogger...