Showing posts with label video. Show all posts

Thursday, August 11, 2022

New Demo Video: How To Use Hot Glue/How To Use a Hot Glue Gun

Hi friends and enemies!

The past couple of days I've spent trying to build some videos for demo purposes. I'm trying to be able to allow my students more independence and autonomy with art room techniques and materials.


Well if you've been following my posts recently, you may have seen this video coming. I've posted videos on using a glue stick and how to use Elmer's glue and here's my final offering: How To Use Hot Glue/How To Use a Hot Glue Gun.

A necessary skill for a middle schooler and for those who have never used a glue gun before. Yeah, there's people out there that DON'T EVEN OWN A HOT GLUE GUN. GASP! I grew up in the 1980's when crafting with glue guns became a thang. I thought everyone had one of these! 

If you don't have one, they are super handy. My kids and I use them all the time for projects. They are especially good for building 3D and for those times when you are too impatient to wait for Elmer's Glue to dry. 

Here's the link for the video on my Youtube channel.

Enjoy!

Wednesday, August 10, 2022

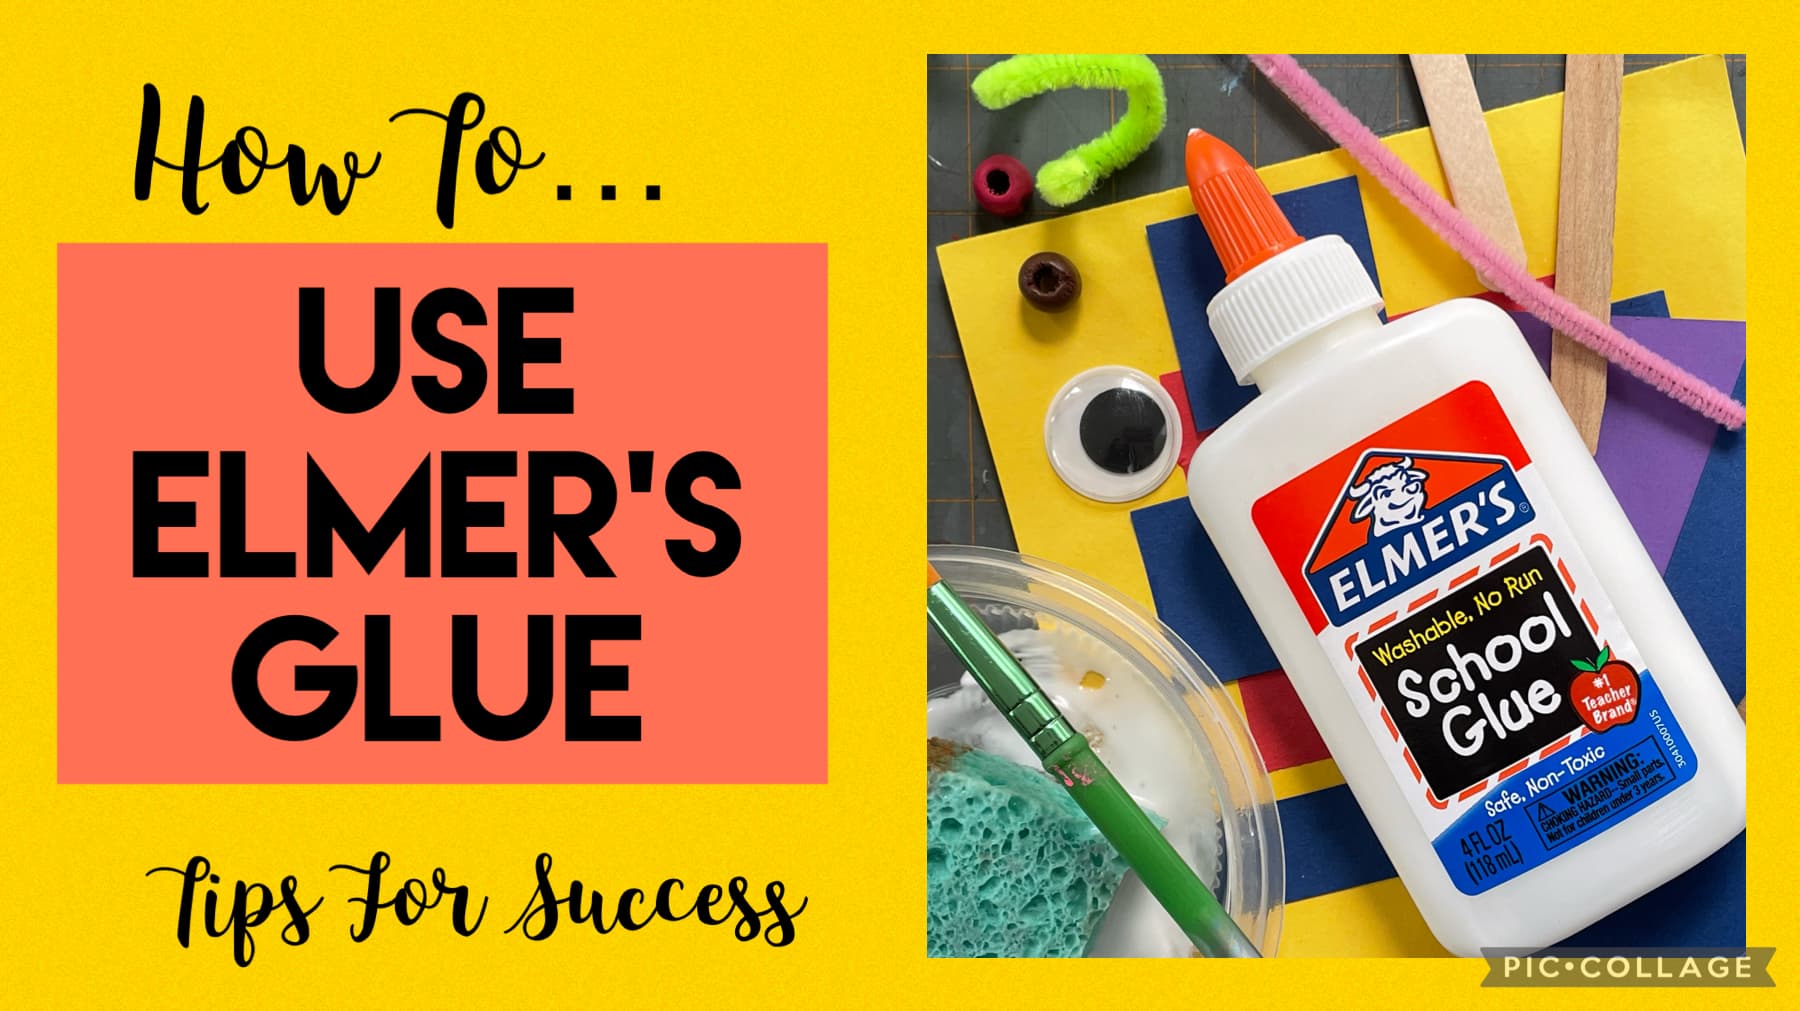
New Demo Video: How To Use Elmer's Glue/How To Use PVA Glue

Hi friends and enemies!

The past couple of days I've spent trying to build some videos for demo purposes. I'm trying to be able to allow my students more independence and autonomy with art room techniques and materials.


Guys. Last year was brutal in terms of kids using glue. Many kids hadn't had art class in person for a couple of years and Elmer's glue is not something everyone has at home. I get it. Liquid glue is messy.

Flashback to my own kids chanting "Glue! Glue!" as they slowly emptied entire bottles onto their projects. True story. 

I had never really used lots of Elmer's with my upper middle schoolers in the past, but now that I am teaching more fifth grade and we are doing projects like collage, Elmer's glue is a big deal. Last year, I had students who didn't know how to open the glue bottles. II'm telling you, they DESTROYED the bottle trying to open them. I even had one class where FOUR STUDENTS completely took the tops off the bottles and just poured the glue onto their projects. Ummmm... Nope!

Ok, I admit, I may have failed to give a complete demo on how to use Elmer's glue, but come on!

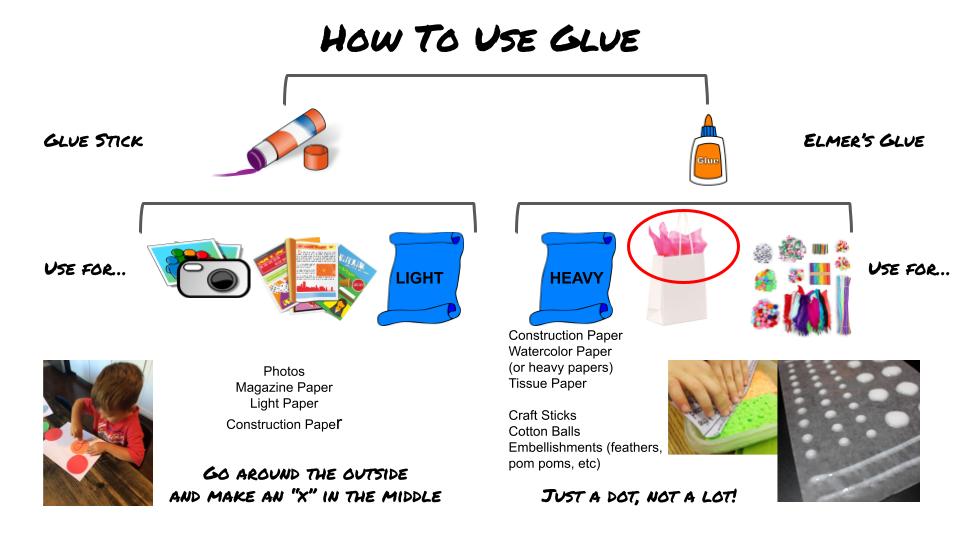
Hence my glue slide I project now during collage projects. It helps.

My GLUE Google slide that is projected during times of duress, I mean, gluing. :-)

And my live gluing demos. And these videos. 

Dude, I'm covering all the bases when it comes to glue!

Last year I used a variety of Elmer's glue techniques with the students (both my fifth grade and adaptive art students) and we use glue the following ways:

  • Straight outta the bottle: dots and lines
  • Glue sponges
  • Applied with paintbrushes
They all have their merits. See the video for how each is used.


Here's the link for the video on my Youtube channel.

Enjoy!

New Demo Video: How To Use a Glue Stick

 Hi friends and enemies!

The past couple of days I've spent trying to build some videos for demo purposes. I'm trying to be able to allow my students more independence and autonomy with art room techniques and materials.

I usually demo how to use a glue stick and even though I teach middle school,  there are still students who struggle with it. I'm not sure I would make a student sit through the entire video without me jumping in to point something out or show in real life, but it's good to know that I have this video as backup.

Side note: mine is not the first video on youtube that shows how to use a glue stick, so someone else thought a video like this was necessary. Mine is meant for an older student, so no baby talk here. 


Here's the link to the video on my Youtube channel.

Enjoy!

My TpT Store: 3-2-1 Oil Pastels--A How To Video & Graphic Organizer

Hey friends and enemies!

I've been creating some resources that students can use to learn the basics of art supplies. So many times I do the same demos over and over and it would be nice to be able to quickly refer students to a demo in case they missed it or need additional info. 


In a previous post, I explained how my friend Jen pointed me down the road to using the 3-2-1 format for my videos. Once I started thinking of organizing my demos this way, I haven't been able to stop!

Oil pastels are near and dear to my heart. I use them in my own scratch art-inspired work and love how easy they are to use and the bright colors!


3-2-1 Oil Pastels Video and Graphic Organizer

With this resource students will learn: 
  • What are oil pastels?
  • Three ways to use this art material
  • Two cool techniques
  • One thing to keep in mind


If you use these resources, leave a comment below! I love to hear that people are enjoying my resources. 

Enjoy!

My TpT Store: 3-2-1 Watercolor Pencils--A How To Video & Graphic Organizer

Hey friends and enemies!

This year, I'm teaching an elective class for Grade 8 called, "Choice Based Studio." Students will be able to choose their own projects to work on. This is an expansion of the final Choice project I usually do with grade 8 classes and I'm SUPER EXCITED to be offering students the opportunity to choose their own ART-ventures for an entire semester!

I've been creating some resources that students can use to learn the basics of art supplies. So many times I do the same demos over and over and it would be nice to be able to quickly refer students to a demo in case they missed it or need additional info. 


Creating demo videos has been in my mind for several years and now seemed the perfect time to move on it. I was worried I've make the videos too long and that the students would get overwhelmed by the info. 

Then along came my friend Jen. She teaches fifth grade at my school and we were sitting on the beach this summer chit-chatting about school and our prep we wanted to get done this summer. I was telling her about my video project and she suggested a 3-2-1 format. She uses this all the time with her students.

I thought about it when I went home and decided to structure my videos in that way. I even created a handout where students could practice the skills in the video and reflect on their learning.

3-2-1 Watercolor Pencils Video and Graphic Organizer

With this resource students will learn: 
  • What are watercolor pencils?
  • Three ways to use this art material
  • Two cool techniques
  • One thing to keep in mind

The link to the video on youtube.


If you use these resources, leave a comment below! I love to hear that people are enjoying my resources. 

Enjoy!


Sunday, August 7, 2022

My TpT Store: How To Use Graphic Pencils

 Hey friends and enemies!

This year, I'm creating some resources that students can use to learn the basics of art supplies. So many times I do the same demos over and over and it would be nice to be able to quickly refer students to a demo in case they missed it or need additional info. 

In this resource, I created a video and handout that teach students about Graphite pencils. With the handout and video they will learn:

  • What are graphite pencils?
  • What is a value scale?
  • How to create a value scale
  • Grid drawing: Using a grid to redraw a photo 
  • Shading Practice: Using a photo for reference


If you use these resources, leave a comment below! I love to hear that people are enjoying my resources. 

Enjoy!

Friday, August 20, 2021

Professional Development: Keeping Track Of It All and NYCATA Art Teacher Art Club

I'm ramping up to go back to school next week (for me--kids show up 8/31) and part of this process is going through all of the paperwork I stuffed in crates and schlogged home with me in June. That means professional development stuff. 


I am not so great about logging pd hours. Our district uses a program called Frontline and I find it sort of challenging to navigate and I get busy and forget where I'm at in the pd process. This means, I end up with a stack of notebooks and materials that need to be entered. So, one day this week, I sat down and wrangled all of the open pd I had outstanding so I could start this school year with a clean slate!

One thing I did was create these stickers to put on my pd stuff (like notes and handouts and articles). This way, I can see where I am in the process. I printed them out on 8 1x2" x 11" Avery sticker paper, cut them apart and put the extras in my pd binder (yeah, I have a binder--I'm old school!!).


Now it's easy for me to see where I am in the process. Did I ever get reimbursed? Do I need to write the reflection? 

Look on the sticker checklist!

One of the professional development resources I found this past year was the New Your City Art Teachers Association (NYCATA) Art Teachers Art Club. I think I saw it on a middle school art teacher Facebook group I belong to. 

A couple of times a month they "meet" via zoom and art lesson ideas are presented and we can art-a-long. I love it. Sometimes I can't make it or I was just too tired from teacherin' all day--and thankfully their videos are on Youtube afterwards. 

Videos I've found helpful:

Foam Monoprinting: I do this with my students but hadn't thought to create a matrix to mount the plate and paper on. I was also intrigued by using opaque watercolors as ink versus the water soluble markers I usually have the students use.

Glue Batik: I've tried this process with glue/flour mixture and it was difficult to use. I was interested to see how this process was. The gel glue was easier to remove and this educator used fabric inks. Very pretty. Maybe art club? Or an 8th grade Choice project?

Google Drawing--Digital Mosaics: This was a surprise to me! I had my students using Google Draw for a couple of projects and hadn't thought of digital mosaics. Once I watched this, my daughter set to work creating all sorts of mosaics for friends and teachers. I was also able to have a couple of students do this remotely with great results.

I also have plans to watch other videos in the series such as: Abstract Data Self Portraits (maybe a good intro project?) and Typographic Portraits (possibly for my Photography courses).


NOTE: All of the digital mosaics in this post were created by my 10-year-old
 on her own using Google Drawing.

I know this might seem a very weird thing to say given the last year an a half, but I'm glad for Zoom--because I was able to attend these workshops by veteran teachers and learn so much. I'm glad our paths have crossed--even if it is digitally!

Enjoy!


Saturday, December 16, 2017

STEAM Project: Mark-Making Machines

Hello!

Are you looking for an engaging project that will provide lots of discussion, movement, creativity and problem-solving with your artists BUT not take for-eh-ver to do? Well, I have a project for you!!

Here are a couple of Grade 8's Mark-Making
Machines with a bit of the display. 

My grade 8 art students began trimester 2 with an exciting art and engineering challenge! I began the activity with a discussion of the most basic art element--the mark. Students discussed and decided upon definitions for "mark" and "machine" and were then challenged to either work individually or in teams to create mark-making machines. Their constraints? The machine needed to use K'Nex building tools (I had a HUGE bucket of them), an art supply from the classroom (paint, markers, pencils, etc.) and use a simple machine (lever, pulley, wheel and axle, wedge, inclined plane or screw).

Students had two class periods to create, test and revise their machines. The process was messy and exciting and really got everyone moving, talking, sharing and working together. A great discussion about "what is art?" ensued as well as a larger discussion of "why?"--as in, "Why are we doing an engineering project in art class?" Students were able to brainstorm skills that they needed in this fun engineering challenge that they would be using this trimester in art class (and throughout their educational career): creativity, resourcefulness, grit, perseverance, working with others, problem solving and more.

By the end of day two, students were required to pass in their machine, an example of the "marks" their machines made (some of the pieces were quite beautiful!) and the video they created of their machine in action (they used iPads to take their videos). I had a hunch that this project would make a great display in our school's lobby so I wanted to make are I had the students give me the "fodder" I would need to showcase these machines!

I was able to create a QR Code for the videos of each of the machines and put them on the finished display, so visitors can scan the QR codes and see the machines in action. Here are a few of the videos for you to see:


This project was a fun way to start of the trimester! ENJOY!!

Sunday, January 11, 2015

More Robot Art: Harvey Moon's Drawing Machines

Well, you know I created a scribbling art bot the and posted about it the other day...well, I was looking around on youtube and saw this AMAZING video about Harvey Moon--an artist is Chicago who uses robots to draw for him. This would be an awesome video to show your students as part of a mark-making unit where they explore mark-making with a variety of traditional and nontraditional tools (flyswatters, anyone?!) and then build and use robots to make marks. Of course, what Moon is doing goes WAY beyond my humble art bot!


Enjoy!


Monday, June 30, 2014

Tommy McHugh - The Empty Chair - Revisited

While I was reading the newest book for my next grad course, "Your  Creative Brain, " by Shelley Carson, Ph. D., I learned about an English artist--Tommy McHugh. He came about being an artist a little later in life--after he suffered a couple of strokes. Before his strokes, he was a builder and it is said that he didn't have any artistic tendencies. After his strokes, however, he became a prolific writer, painter, and sculptor.

I enjoy more abstract pieces, so I really enjoy his work--it has a dreamlike quality that reminds me of the swirling thoughts that go on in our brains--or, at least in my brain. McHugh explained that this creative work helped him process the waves of thoughts and images that started to come into his brain as he was recovering.

McHugh was as passionate about encouraging people to be creative as he was about creating his art. He said, "We all have it--we just don't believe we can do it." He explained in this video that we can direct our paths both in life and in our minds. We can unlock the cells in our brains and do more. He encouraged people to break through whatever is keeping them from trying new paths: self-doubt, money, fear of judgement…and just do it. He explained that once you start accessing those cells in your brain and creating new pathways, more creativity will come.

Imagine if you were given a gift such as this…what would you do with it? You have been. Ready, set,  GO!

Friday, March 7, 2014

Lenticular Animation Tutorial

As I've said in previous posts, I am trying to use technology in my teaching a bit more. I've been working with the Educreations App for the iPad a bit and really love it (along with Screen Chomp). Both Apps just make explaining things so easy. 
Educreations is free in the App Store
So when I decided to make two lenticular animations for a display I am doing, I thought..."wait a minute, this would be great to explain how to make these!" I've posted about Lenticular Animation before, but it was way back when I first started blogging and my project was pretty complicated. I even had a student get super-frustrated with the whole technical aspect of the project as I had designed in. It had to be easier, and I found a way!

I attended an awesome conference session at the Integrated Arts Conference in Plymouth, NH held by Timm Judas and he explained how to make a Lenticular animation and his way was just....easier.

So here's how it works: Students need to create two images that are on the same size paper but VERY different (that way the transformation is the best). Cutting and gluing needs to be pretty precise, so this is best done with students in grade 5 or above, I think (unless you are working in small groups or one-on-one).

In the video I made, I show you how to make simple Lenticular Animations at home. I'm making two pieces for a display I'll be using at the PTA Math and Science fair I'm attending on Monday night. I'm Integrating art with Science and my Lenticular animations are "One Fish, Two Fish" and "Red Fish, Blue Fish."

Lenticular animation is fun and really has a great "WOW!" factor--even grown-ups are wondering how it's done! So watch my Educreations video and try it out--and please send me an email or post below letting me know how your Lenticular design came out--I love to see what people are creating!

ENJOY!
Related Posts Plugin for WordPress, Blogger...