Showing posts with label flower. Show all posts

Friday, June 20, 2014

Nature Walk Scavenger Hunt and Sketches

Are you heading outdoors with a bunch of kiddos to look around? How about a Nature Scavenger Hunt? A couple of years ago, I worked for the Nature Center in town, Peabody Mill Environmental Center, and they sent me off to a Kindergarten to do a class visit. I thought an outdoor exploration of the playground, discussion about plants and their parts, and a sensory nature walk/scavenger hunt would be great! I met with multiple classes that day and we had a blast!

This is a great project and can be adapted for an outing with a bunch of scouts,
a camp experience, an art classroom, general classroom, homeschooling field trip, etc.

Prepping For The Lesson:
This is a nice lesson that requires very little prep--although you may want to buzz around the playground before the kiddos join you, so you have an idea of what is out there that you might want to point out to them.

Also, you'll need to print out the scavenger hunt form--I used one from The Bird Feed NYC--they have a bunch of them there (and some other neat stuff too!). We would all be using the same form and filling it out as a class (each class got their own). I glued the scavenger hunt form to a large piece of construction paper, so I would have room to draw my diagram of a flower and its parts. I also wrote some good scientific words on the poster such as: look, listen, touch, smell, observe, identify, dissect, and collect (apparently I misspelled dissect the first time around!).

I also brought a bunch of star stickers, a sharpie for me, some pencils and sticky notes, too.

Starting Off:
I met the classes in the art room and told them that we'd be heading outside to do some exploring. We talked about using out senses to experience the world around them. However, we would not be using our sense of taste! No licking the trees! I then went over the rules for outside behavior and how we'd be working together to complete the scavenger hunt form.

Moving Outside:
We went out and sat down. We experienced the playground by using our senses and we discussed what we heard, saw, felt, and smelled. We checked off as many things from the scavenger hunt form that we could while sitting there--it was quite a bit!

Then I let the children move around and I pointed out a few things that I thought would interest them, such as a little mushroom I found, etc. We stopped and looked at a dandelion and we discussed the parts of a flower and I drew them on the poster and labeled the parts. They loved this part and they really enjoyed dissecting the dandelions and seeing up close the parts of the flower!

Wrapping It Up:
We took a couple of minutes to see if we could find anything else on the list, then I brought them over to the picnic tables and gave them each a pencil and a sticky note and invited them to draw a picture of something they saw, heard, touched, or smelled today on the walk. I them glued their sketches all around the edges of the poster and gave the finished piece to their teacher to display in the classroom.

In the future, I could make the poster a bit better, I think, but I really liked how this easy lesson came together and I loved the sketches the children drew--it was great to see what they took from their time outside.

Enjoy!


Thursday, May 9, 2013

Mother's Day Flowerpot Ideas

I was asked to create a painted flowerpot idea or two for our PTA to use as a fundraising kid activity at last weekend's 1st Annual PTA World's Fair. The idea for this event was to have a fun-filled day where families could come and browse different vendors, taste foods from around the world, play carnival games, do crafts, jump in a bounce house, etc.


Ladybugs were VERY popular...

I was set up in the Japanese garden area of the gym. One vendor had let the PTA borrow all sorts of trees and flowers and they were arranged all around my work area-beautiful! In keeping with the Japanese theme, I brought some sheets of origami paper and the instructions to fold a few simple pieces such as a helmet, a dog, a butterfly, etc. Since I was busy overseeing the flowerpot painting, the origami  didn't attract as much interest as I had hoped. I have some ideas about that for next year, though...

On to the flowerpots...these ideas aren't mine, they are ideas I've seen here and there multiple times or are things I've received as a mom myself. But they fit the bill for the craft request: something for mom, a painted flowerpot, easy for whatever age group showed up (this was the first year of the event and we had no idea who was going to show), and cheap (the children "paid" four tickets, roughly $2.00 to do the craft and it is supposed to be a fundraiser for the PTA). Each pot included an herb or flower plant that was donated by a local organic farm.

The supplies needed are:

  • 4" flower pots with your choice of herb or flower
  • Acrylic craft paints (we used red, orange, yellow, green, white and brown)
  • Foam brushes if the children wanted to paint the rim of the pots
  • Sharpies for details, optional
  • Fingers for fingerprints! That's what makes them so easy--no brushes to clean up!

So, here are the (poorly taken) photos of my examples, complete with my cheapo fake plant from IKEA sticking out of it. SIGH. But you get the idea...


This example is great for little ones since they are the only ones
who could fit their handprints on the little pots! I had a couple people do this version...
When the children were done, they could choose one of these
poems on a skewer to stick in their finished pot.
These bring tears to my eyes--so sweet!

The children ran with these ideas and we ended up selling about 30 of them. There are going to be many happy mothers in southern NH this Mother's Day!


Wednesday, April 10, 2013

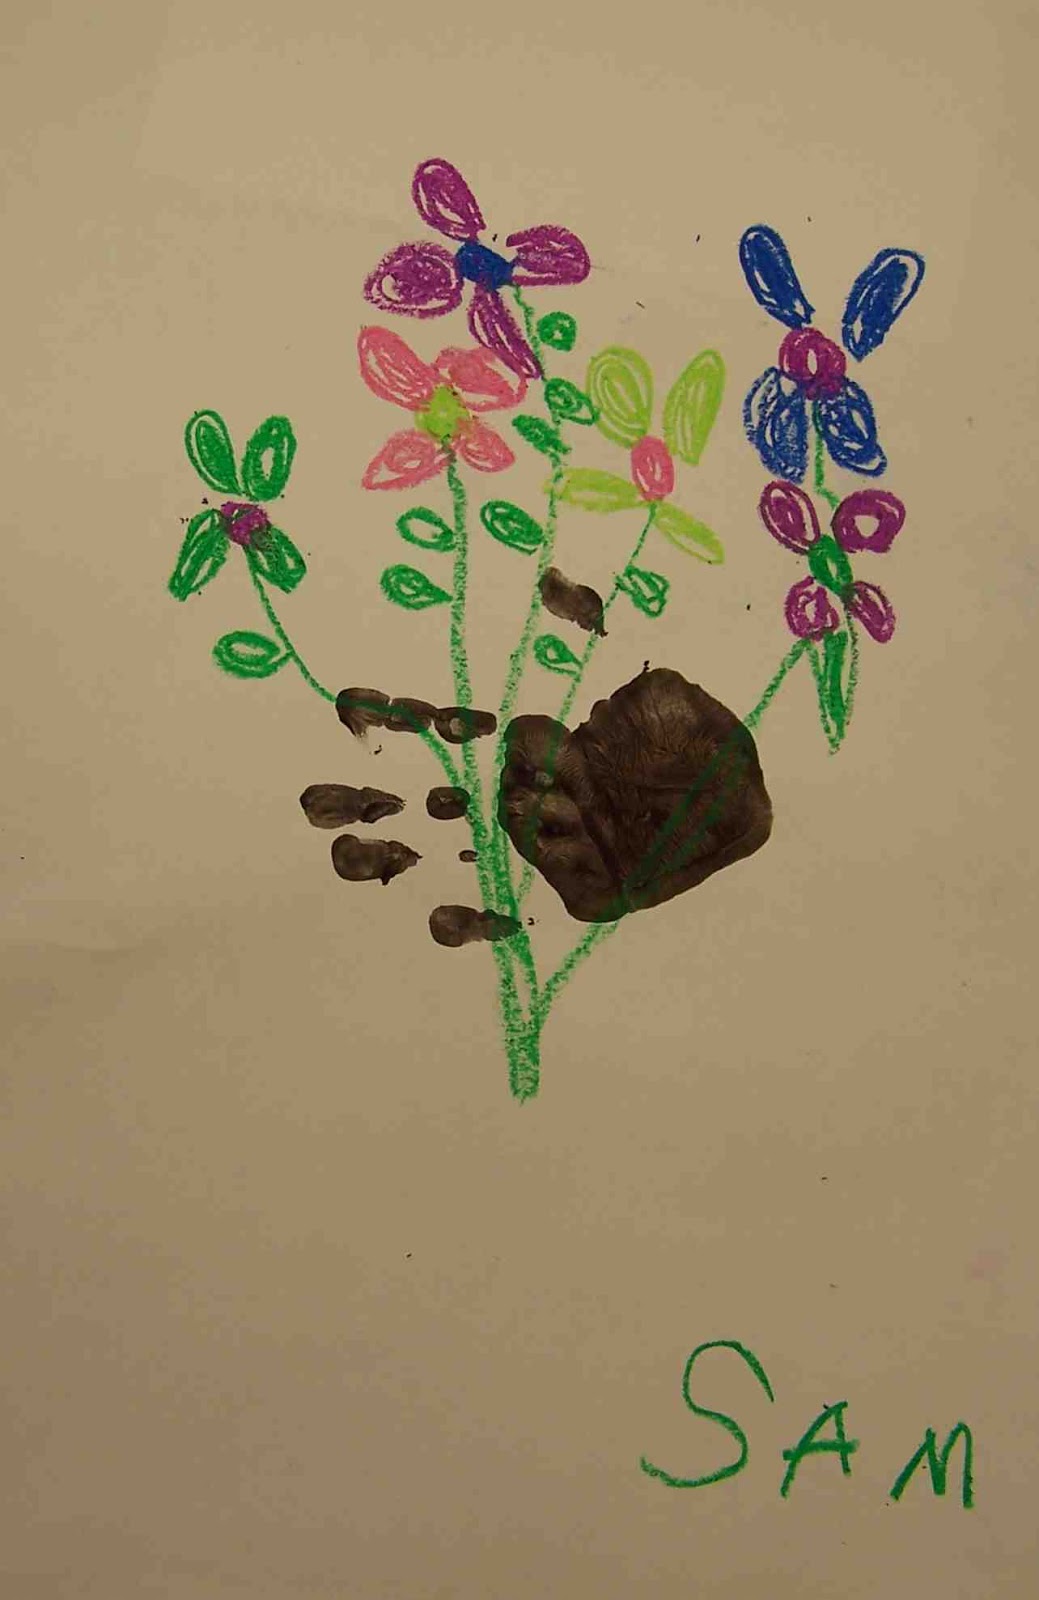
Kinder Picasso "Hand With Bouquet"

I've been visiting the Kinders at a local school (Clark Elementary in Amherst, NH) once a month doing an art enrichment program. I usually tie in a book or music or fine art (and sometimes all three) to make the experience a rich and multi-layered one. I have absolutely LOVED working with the children--Kinders are so cool. They are up for anything and so smart!


We've done some fall- and winter-themed art, but Spring is here! So I thought we'd create a piece that celebrates warm weather, flowers and color! I'm not a huge Picasso fan, but when I saw the piece "Hand With Bouquet" I immediately thought the children would love it. I experimented a bit with using cut paper and paper muffin liners to make a daffodil bouquet (which came out fine), but then I saw this version on the blog "Splish, Splash, Splatter." Rebecca uses the child's hand print as the hand holding the bouquet--WOW! Now, I'm a mom and anything that has a handprint in it instantly gets a place in my heart (and on the wall). It was a no-brainer--this was gonna happen!

But, I have to say, I was a bit worried about handprints and Kinders and only having a half hour per session...but it went great! We have a small sink in the art room, so I brought in two plastic bins, filled them with water, and had the children wash their hands in those. This allowed all 18 kids (or so) to wash their hands in about 5-7 minutes. I had a grown-up helper at the bins keeping an eye on things-I'm sure that helped!

I am so thrilled with the results and so were the kiddos! This lesson was fun and inexpensive and has a great "WOW" factor. It would be lovely for Mother's Day, too. I particularly enjoyed painting my own hand and then giving each student a high five before they printed their hand on the paper (that allowed me to check that they had covered their entire hand in paint and make sure they placed their hand properly on the page). I think the children thought I was silly-but it was so fun!

Here's how we did these colorful pieces:

Kinder Picasso "Hand With Bouquet"

Supplies Needed:

  • One 12" x 18" piece of white construction paper
  • Paintbrush
  • Paper plate for palette
  • Black tempera
  • Oil pastels/cray pas (assorted colors, but you'll definitely need green)
Directions:

1. Paint your palm, thumb and fingers with the paintbrush and black tempera paint. Make sure you get a nice coat on your hand and go all the way to the tips of your fingers. Press your hand onto the white paper, leaving a handprint. The handprint should be perpendicular to the page. Now you can wash your hand.

2. Look at the picture of Picasso's "Hand With Bouquet." How does he make the flowers? What shapes does he use? Turn your paper so the thumb is up. Check out the examples to see what I mean. This gives a more realistic idea of the hand "holding" the flowers.
Our inspiration:
"Hand With Bouquet" by Pablo Picasso
I instructed the children to use the craypas to draw a large circle for the center of their flower and then color it in. Then add petals going around the center. Use whatever colors you want, but make 4-5 flowers on the area of the paper above the hand.

3. Then add the stems. They should go from each flower, to the hand, and out the other side. Add a couple of leaves to make your bouquet look realistic.

4. Don't forget to sign your work like Picasso, using a craypas.

Welcome spring!


Wednesday, December 19, 2012

Poinsettia Mosaic Collage

The other day I set out the supplies for my son to make this great poinsettia craft. He's in Kindergarten, so I wanted to give him some tracing, cutting and other fine motor control practice--oh, and he made this nice little piece for the art wall in our dining room. A win/win, I'd say!


I first saw a version of this project this fall, I think, on the blog Panther's Palette written by Pam Speaker. Her version was colorful and I was instantly drawn to it--as was my son who was looking over my shoulder and said, "I want to make THAT!" As he was adding the tissue paper poofs to his original piece, I thought how we could change the colors of the project to make it look like a daffodil for spring. The more I thought about it, I thought it could also make a great daisy or black-eyed susan for the summer, and poinsettia for winter. I'd love to make four of these depicting the four seasons! I'll put it on the neverending to-do list! For now, here's the winter version:

Poinsettia Mosaic Collage

Supplies Needed:

  • 1 9x12" piece of off-white construction paper
  • Red, green, white and yellow construction paper scraps
  • Scrap of card stock, optional
  • Yellow tissue paper, cut into 1" squares
  • Pencil
  • Scissors
  • Glue stick
  • Elmer's glue
  • Little cup for glue
Directions:

1. Glue a strip of green paper onto the page for a stem. Add a circle of yellow in the center of the page for the center of the flower.

2. Create a petal shape on card stock. Trace the petal shape onto the red paper and cut out 6 petals or so. I showed my son how to fold the paper a couple of times, then trace the shape and cut through the entire stack to create multiple petals in one shot. Glue the petals on around the flower's center.

3. Cut some 1/2" strips from red, green and white paper. Staple the strips together at one end. Use the scissors to cut through all of the strips at the same time to make a bunch of little 1/2" squares. Glue these down in a pattern around the outside edge of the piece.

4. Pour a bit of Elmer's glue in a small bowl or tray. Take one of the tissue paper squares and wrap it over the eraser end of the pencil. Dip the tissue paper in the glue and then touch ot to the paper in the center of the flower. Release the tissue paper and it should create a 3D "poof" with the tissue. Repeat as desired. I thought my son would use the tissue paper just in the center of the flower, but he put them on the petals too. Whatever you like...

You can also look up the story, The Legend of the Poinsettia online if you wanted to add a literature/moral/spiritual aspect to this project. Enjoy!
Related Posts Plugin for WordPress, Blogger...